LeadConnector Integrations

Facebook

In Business Suite, you can export a file that contains the information that people submit through your Instant Form. You can also download this data from Ads Manager, request it through the API or access it through an integrated CRM system. We recommend that you download your leads data directly from Business Suite if you don’t have a CRM system integrated with Facebook.

To download leads data from Business Suite:

  1. Go to Business Suite.
  2. Click More Tools from the menu.
  3. Click Instant Forms.
  4. Click Download next to the form with the leads you want to export.
  5. Choose how you want to download your leads:
    • Click Download New Leads if you only want to export the leads that you’ve received since the last time you downloaded.
    • Click Download by Date Range if you want to download all the leads you’ve received during a certain time period. After you select this option, choose the preferred date range and click Download.
  6. A window appears with your form information. Click CSV to download the leads data in your preferred file type.

Note: You have 90 days from the time a lead submits their form to download their information. Leads expire after 90 days. We recommend that you export your leads data regularly.

When you download your file, if you don't see an Ad ID or Ad Set ID field, it may be because:

  • The lead was generated via organic reach.
  • The lead was submitted via an ad preview.
  • You don’t have advertiser privileges on the ad account that created the lead ad campaign.

To troubleshoot your file download:

If you can’t download your leads file:

  • Check with your Business Manager admin to see if they’ve customized access permissions in Leads Access Manager.
  • If they haven’t customized permissions, reach out to your Facebook Page admin to give you the correct access. Before customization, only Facebook Page admins can download leads.
  • If they’ve customized permissions, make sure they’ve given you the correct access. After customization, only people assigned access permission can download leads.

To Import The Leads Into the CRM:


(New UI)

  • Navigate to Contacts and click the Import Contacts Bulk Action
  • Select your CSV file and click Next
  • Map the fields from your Facebook Lead Form to your CRM fields and click the Next button
  • On the Details tab, click the Advanced dropdown, add a tag for these leads (optional), and toggle on "Add To Workflow/Campaign" and select the Workflow or Campaign that you'd like to add the leads from the CSV to

(Old UI)

  • Navigate to Contacts and click the Import Contacts Bulk Action
  • Select your CSV file and click Next
  • Map the fields from your Facebook Lead Form to your CRM fields and click the Next button
  • Review the sample data and click Continue
  • Select your Duplication Strategy
  • Select or create a tag to be applied to everyone in the CSV
  • In filters, type tag, then select the tag you created in the previous step
  • Select all the contacts
  • Click the "Add To Campaign/Workflow" Bulk Action
  • Click Proceed then select the Campaign/Workflow from the dropdown, give the action a name, then click the "Add to Campaign/Workflow" button

How to fix the issue with FB pages not showing up in the Page Selector dropdown?

You will start by going to your Facebook account. Followed by that, you will head over to the top right avatar icon with your profile picture in it and then head to Settings and Privacy:


Inside Settings and Privacy, click on Settings.


You can follow that up by going to Business Integrations on the left:

Once there, please click on view and edit in front of the LeadConnector app:


Please make sure that all the toggles are turned on; scroll down all the way and toggle everything on:

Please Note:

Only the User that integrated the FB page will be able to see that page in the dropdown of pages. They need to be the admin of that FB page to see it in the dropdown of pages and will no longer see other accounts' FB Pages in the list.


When a list of pages shows up with checkboxes in front of them, mark all those pages that are relevant to your Agency's sub-accounts: 


Once done, please click on Save.

Please Note:

If there are pages already marked over here, Please DO NOT unmark them, as this will break off their integration with your agency's sub accounts even if you are not currently trying to integrate them in this sub account.

What is the Facebook Lead Ads Integration?

The Facebook Lead Ads integration with a CRM (Customer Relationship Management) system allows businesses to capture and automatically import leads generated through Facebook Ads into their CRM system. This integration enables businesses to streamline their lead capture process, avoid manual data entry errors, and follow up with leads more efficiently. By integrating Facebook Lead Ads with a CRM, businesses can track and manage their leads through a single platform, which can improve Lead quality, increase conversions, and ultimately help grow their business

Who is this integration helpful for?

The Facebook Lead Ads integration with a CRM can be beneficial for any business or organization that is using Facebook Ads to generate leads and wants to streamline their lead capture process. It can benefit small businesses or startups that may not have a large sales or marketing team to collect and manage leads manually. By automating the lead capture process, businesses can save time and resources while improving their lead data's accuracy and quality. Additionally, the integration can benefit businesses already using a CRM by seamlessly integrating their Facebook lead data into their existing workflows and follow-up processes.

What are the benefits of this integration?

The benefits of integrating Facebook Lead Ads with the CRM include:

Automated lead capture: With this integration, businesses can automatically capture leads generated through Facebook Ads and import them into their CRM system, eliminating the need for manual data entry. 

Improved Lead Quality: By tracking and managing leads through CRM, businesses can better understand their audience, personalize their marketing efforts, and improve the overall quality of their leads. 

Enhanced lead management: The CRM system allows businesses to track and manage their leads in one place, providing a 360-degree view of their interactions with prospects and customers. This can help companies to streamline their sales and marketing efforts and improve customer retention.

Efficient follow-up: With lead data automatically captured and imported into the CRM system, businesses can quickly follow up with leads and prioritize their sales efforts based on lead quality and behavior.

Increased conversions: Businesses can increase their conversions and ROI from Facebook Ads by automating lead capture and improving lead management.


Pre-requisites for Facebook Lead Ads

  • LeadConnector will need access to the Facebook Business Manager and Business Page where you are running the Facebook Lead Ad from

  • The user trying to integrate the Facebook Page into the CRM will need to be an admin of the Facebook Business page and have Lead Access Permission to access Lead data (A requirement set by Facebook). 
  • If you have moved your page to the New Pages Experience, You can allow trusted people to manage some of your Facebook business pages. You can give some people access to certain parts of your Facebook page without giving them full access.

  • Open business manager > Left navigation > Users > People. If you have added the person, who will be integrating the FB page to the CRM, there already: they will appear at the center of the page.will
    Click on the name and see more details, like the role. The role needs to have Admin or Employee access.

    If you have not added them, Please follow the steps to add people/users first.

    How to add users to your business? 


    Remember that this business manager role differs from Page Role; the Page Role must still be the Admin.

    Please Note:

    The new Pages experience isn't available for all Pages yet. Some Pages you manage might still use the classic Pages experience. Learn more about classic Pages.
  • When creating the custom fields for the Lead Ad in the CRM, please make sure to use the supported custom fields listed below:

Supported custom fields when using Facebook Lead Ads:

  • TEXT
  • LARGE_TEXT
  • NUMERICAL
  • PHONE
  • MONETARY
  • SINGLE_OPTIONS
  • DATE
  • DROPDOWN 
  • RADIO OPTIONS
  • CHECKBOX 
  • Troubleshooting

    Why are my Lead Ads not making it into my Sub-Account?

    1. Are you an admin of the Facebook page - How to add an admin to my Business Manager
    2. Can you confirm that your Facebook ads manager selects the correct FB Lead Ad form and matches the one in your Sub-Account? - https://web.facebook.com/business/tools/ads-manager

    3. Now in your Sub-Account, check in settingsintegrations Facebook form fields mapping if there is a blue tick mark next to the form you have selected in ads manager.

    4. If you are, in fact, the FB Admin, can you try this to confirm if Lead Connector is accessible and can allow access to your page?

    Link mentioned in the gif - https://www.facebook.com/settings?tab=business_tools&ref=settings


    6. Once you have completed the steps in the video above, please use the Facebook leads ads testing tool to see if leads are now being added to your Sub-Account.

    Choose the correct page and Form in the Lead Ad Testing Tool and hit Create Lead. Keep clicking on Track Status until you get a result. If you get a failure status, then proceed to the next step.

    Please Note:

    When testing are you able to locate the App ID 390181264778064 

    If the app ID does not show up or if the test fails, then LeadConnector does not have access. If that is the case please continue to the steps below.


    Go to Business.Facebook.com, head to Business Settings >Integrations> Leads Access. Go to CRMs; if you do not find LeadConnector in the list, that is why the Lead Ads Test tool gave you the error "CRM Access has been revoked from Lead Access Manager."

    Then go back to your CRM account> Settings> Integrations> Disconnect your Facebook Connection by clicking Connected. Reconnect your Connection by clicking Connect a Page and then choosing your page from the dropdown.


    Once your page is reconnected, head back to Business.Facebook.com , head to Business Settings >Integrations> Leads Access. Go to CRMs. Click on Assign CRMs. Choose LeadConnector from the list and grant it access.

    You can then run the Lead ADs Test Tool again; this time, Delete the already existing test lead in the tool and click Create Lead.

    Upon a Success status in the lead ads testing tool, you will be able to see the test lead inside the Contacts tab in the CRM.


    How do I integrate Facebook Leads using a 3rd party service like Pabbly Connect or Zapier?

    You can use a 3rd parties integration tool like Zapier or Pabbly Connect; look for the leadConnector app.


    Common Errors

    Page Quality Issue : 

    Suppose our user is facing this issue. Our customer needs to raise a support ticket with Facebook Support.
    Steps to resolve:
    • Users need to switch to the Facebook page on Facebook, Go to this link and raise a support ticket with Facebook if there is an issue.
    • FB Support Doc:

    Permission Issue: 

    The easiest way to find the issues is by trying to fetch the latest FB/Insta message and the latest lead.
    This is how Zapier does it, and it helps us easily find the missed permission. FB API will present an error if permission is missing or for other reasons. Troubleshooting steps are as follows:

    Instagram Connection/messages Check:

    Check Instagram page is connected to the FB page
    • Switch your logged-in user to the desired Fb page and go to this link.


    • Check if messaging is enabled.


    • If the page is connected, your IG page is still not visible as an option in your CRM. Please do a hard reset and then attempt to connect.

    Messenger/ Instagram not syncing all messages:

    Sometimes the reason for this issue is our LeadConnector app is not set as the primary receiver if they have multiple CRM integration.
    Steps to resolve:


    Leads, not syncing Issue:

    We need to check the business side for the places below.
    • User Added to business(EMPLOYEE OR ADMIN)


    • FB Page Admin:


    • Ad Account Check:
      • Page Owner should Match with Ad Account Owner


    • Integration Lead Access Check:


      • If you are still not receiving the leads. Click on Restore Default Access it and check it again.

    How to connect Instagram Account to the FB page or verify it is connected:

    An Instagram account can be connected to a single FB page.
    Steps to connect the Instagram page or verify it is connected to the correct FB page 


    Log in to Facebook and click Pages in the left menu.


    1. Select your Facebook page(Switch to the FB page), then click Settings


      Select Linked Accounts in the left column.
      Select Instagram, then connect your account.
      If it is already connected, we can verify this.


      If it is not connected. It will show like below

Facebook Conversions API aims to connect your marketing data directly with Funnels and Workflows in LeadConnector and Facebook Meta that help optimize ad targeting, decrease cost per result, and measure outcomes. With Facebook Conversion API, you can collect the people who are more likely relevant audiences for running your ads for retargeting. It is a setup for your business to upload server events for your web traffic. 

Covered in this Article:

What is the difference between Funnel Events and Lead Events in Facebook Conversion API?

How to set up FB CAPI (Conversions API) Lead Event?

Step 1: Create an FB Pixel:

Step 2: Create two FB Conversions API Workflows.

Workflow -1 to Create/Update Opportunity

Workflow -2 to send Conversion data to FB Conversion API


What is the difference between Funnel Events and Lead Events in Facebook Conversion API?

In LeadConnector, we support two types of Facebook Conversion API. 

Funnel Events - The events are sent from a web server to record the events when the user visits the page, adds products to a cart, purchase, subscribe, submit an application, and more. To learn more about how to set up Funnel Event Pixel using FB CAPI, please read this article.

Lead Events - The LeadConnector CRM sends the events with how the Lead moves across the pipeline stages. For example, a Business creates a pipeline name Lead Generation. The leads are moving across the pipeline stages, from new leads to booked or abandoned ones. With Lead events, LeadConnector CRM sends the data to Facebook Conversion API - with CRM being the data source. 

Conversion Leads - 

Facebook conversion leads integration helps your Facebook lead ads Instant Forms optimize for the quality of leads instead of the volume of leads. When users submit the Instant form, their contact information is captured and synced in the CRM. This contact information can then be used to follow up with the leads to nurture them and move them further down the sales funnel. As each Lead moves through the sales funnel, the Conversion leads integration allows the advertiser to share the lead status with Meta, which allows Meta to optimize the lead ad for increased lead-to-sales Conversion. will enable

Guidelines to ensure your business is a good fit for the Conversion Leads integration:

  • Use Facebook/Instagram Lead Ads (Instant Forms) [Facebook form field mapping inside LeadConnector is used]
  • Ensure the 15-16 digit Meta Lead ID is mapped to your CRM
  • Generate at least 250 leads per month
  • Can upload data regularly at least once per day
  • The lead stage you want to optimize for occurs within 28 days of leads being generated
  • The lead stage you want to optimize for has a 1% - 40% conversion rate.


How to set up FB CAPI (Conversions API) Lead Event?

Step 1: Create an FB Pixel:

  1. Please start creating a pixel by going to your Facebook Business Manager (also called the Meta Business Suite) > Head over to the left and then the Events Manager tab.
  2. Ensure you are connected to the correct Ad Account with all the required Access to that FB Page.


  3. Head over to the left sidebar and then click on Connect Data Sources
  4. Choose CRM in the options that show up, and then hit Connect.


  5. Please Note
    If you are looking to send a Funnel Event using Facebook CAPI from LeadConnector for funnel events, select the web option here for recording the events.
  6. It will show you a popup with Best Practices and a button to click Next. The Best Practices are Facebook suggestions on how to utilize this capability best. Click on Next to proceed.
  7. Click on Create New Pixel or Use an existing pixel from the list for collecting the data. Click Continue when the pixel details are added.


  8.  It will take you to your FB Events Manager> Data Sources> Settings.


    Hit Continue in front of Choose Your CRM


  9. Search for LeadConnector in the search bar, and choose LeadConnector from the dropdown:


  10. Select Use a third-party partner to connect in a few steps (no coding required), then choose LeadConnector. Then click on Go to Partner to proceed.

    It will ask you to grant LeadConnector permission to connect with your Facebook Conversions API, and then your CRM should be connected.

Please Note

Prerequisite for Facebook CAPI - Lead Events
1. In CRM, please go to Settings > Integration > Check the Facebook account is connected with admin permissions. Please ensure that your FB Business Page, which you are an admin of and have all access to, is integrated and the correct FB lead Form is mapped in your CRM account.

 
2. In Facebook From Field Mapping, the form should be mapped correctly and the status should be enabled. Facebook form mapping has moved under location settings > integrations > Facebook Form Field Mapping. Here is a list of the supported custom fields which include multiple and single option custom fields as well.

Step 2: Create two FB Conversions API Workflows.

Please Note

You need to create Two Workflows for this process to work effectively.

The first workflow focuses on generating leads and adding them to the correct pipeline with an Create/Update Opportunity Action. Once a lead is captured, it is important to ensure that it is properly tagged and categorized in the correct Pipeline and Stage so that it can be effectively managed and tracked as it moves through your sales funnel.

The second workflow focuses on triggering events for Facebook conversion leads. The goal of this workflow is to get fired off by a lead being moved to a specific pipeline stage and then a Facebook Conversions API workflow action pushing them to FB CAPI.

By combining these two workflows, you can create a comprehensive lead generation and management system that is optimized for Facebook conversion leads. This can help you generate more qualified leads, convert more customers, and grow your business over time.
  1. To send a CRM event from your CRM, you need to create a workflow that does that. For now, you can navigate away from the FB Events Manager> Data Sources> Settings (but keep it open in a tab in your browser)and head over to your CRM account.


    Workflow -1 to Create/Update Opportunity


    Once the FB page is integrated correctly in sub-account settings, go to your Automations> Workflows >Create a new Workflow.


    Add a new Workflow Trigger in your Workflow and have it get fired off by Facebook Lead Form Submitted (if that is the first stage of your conversions flow)


    You can add filters to choose which specific Facebook Lead Ad form to get the Workflow to be triggered by submissions to that form only:


    And then add the action for Create or Update Opportunity.
    Specify the Pipeline and Pipeline Stage for this action.


    The Opportunity Name can be defaulted to the Lead's Full Name by using the custom value dropper:


    Toggle on Allow Duplicate Opportunities for this particular Workflow.

    IMPORTANT

  2. Note - In Workflow Settings, please Allow Multiple contacts.

  3. Make sure to save your actions and then save and Publish the Workflow.


    Workflow -2 to send Conversion data to FB Conversion API

    Create another workflow. Add the Pipeline Stage Change trigger and a Facebook Conversion API action.

    Choose Lead Event as the Event Type

    Make sure to save your actions and then save and Publish the Workflow.


  4. Navigate to your Facebook Events Manager> Data Sources> Settings> Scroll down and click on Generate Access Token.

    Copy the generated Access Token.
  5. Paste it in the Access Token field of your Workflow's FB Conversion API Action.


  6. Navigate to your Facebook Events Manager> Data Sources> Settings> Scroll down and copy your Pixel ID.
  7.  Paste the Pixel ID in the Pixel ID field in your Workflow's FB Conversion API Action. 
     
  8. Fill in the Stage Name; it should accurately represent your Pipeline and Pipeline Stage name for better reporting. Select it using the tag icon at the end to add the custom value of the opportunity pipeline and stages. Save the Action, save and Publish the Workflow


    Save the Action, Save and Publish the Workflow.

    IMPORTANT

  9. Note - In Workflow Settings, please enable Allow Multiple.

  10. You can test your Workflow using the Lead Ads Test Tool. Choose the correct Page and Lead Ad Form, then Create a Lead.

    For more details on how to use the Lead Ads Testing Tool, please click here.

The Event should be picked up by your Events Manager, who is actively waiting for Events sent by your Workflow. It takes up to a day to successfully pick up an event sent by your Workflow.


Once the Event is sent from the Lead Ads Test Tool, please go to Opportunity Pipeline and move the dummy Facebook lead to another stage configured in the Workflow. Once this is completed, check the workflow status as executed and the conversion API event in Event Manager.

11. Return to the “Settings” tab in Events Manager to track the progress of the Conversion Leads integration. 

The Facebook Conversions API (or CAPI) is designed to help businesses deliver personalised advertising experiences to customers and audiences, all while maintaining data privacy. This tool lets you send web events directly to Facebook from their respective servers. If you use a Facebook Pixel to track events for your ads, you will want to add the Pixel code to your funnel and funnel steps.

Covered in this article:

How do I set up a Facebook CAPI (Conversions API) funnel event?

Step 1: Create an FB Pixel.

Step 2: Apply Pixel Code to your funnel or website.

Step 3: Create a Facebook Conversions API Workflow.


How do I set up a Facebook CAPI (Conversions API) funnel event?

Step 1: Create an FB Pixel.

  1. Please start creating a pixel by going to your Facebook Business Manager (also known as Meta Business Suite). Head over to the left and then the Events Manager tab.
  2. Ensure you are connected to the correct Ad Account with all the required Access to that Facebook Page.


  3. Head over to the left sidebar and then click on Connect Data Sources
    .

  4. Choose Web in the options that show up, and then hit Connect.


  5. If you already have pixels, it will ask you to choose between them or create a new pixel. Click on Create New Pixel or use an existing pixel from the list to collect the data. Click Continue when the pixel details are added.


  6. It will then ask you to provide the URL of the CRM's website/ funnel, where you will add your pixel code.


Please add the domain of the funnel/website where you will later add the pixel code, and then click on Check.

If your domain is eligible for this process, then you will see a green checkmark in the domain field., you

Once you see the green checkmark, click on the Next button that appears instead of the Check button.


7. It will then show you a pop-up asking you to choose how to connect your website. 

Choose the first option, Conversions API, and Meta Pixel.


8. It will then ask how you want to set up the conversions API to connect website activity. Choose Set up Manually.


9. It will take you to the Overview tab for the manual implementation process. Read through the instructions, and then click on Continue.


10. You will then be taken to the Select Events tab. You will see a dropdown to choose which industry you are setting up this pixel for. Choose the one that is most relevant to your client.


Then it would be best to choose the events you want to send to Facebook. Select all the events you wish to send to Facebook, and click on Continue.


11. You will be taken to the Select Parameters tab, where a few event detail parameters will already be checked. Checkmark Event ID, as the Best Practices tooltip recommends it to the right.

12. Then, under Customer Information Parameters, you will see that Client User Agent will already be marked for you. You must check the client's IP address, first name, client ID, email, business ID, and last name.


Please Note

You need to atleast select these same checkboxes for every single event that you added to this Pixel.


13. It will then ask you to review the Setup and check all the Parameters you have chosen for each Event one last time. Once you are sure everything is set up as you need it to be, click on Continue


14. In the next step, click on Continue Pixel Setup.


15. You will be shown a popup to Connect website activity using Pixel; choose Install Code Manually.


16. Click on Copy Code to copy the pixel code.

Step 2: Apply Pixel Code to your funnel or website.


17. Keep this browser tab open and navigate to your CRM account. Navigate to the sub-account that you are setting up this Pixel for. 

18. Head on to Sites in the left sidebar and then to Funnels or Websites (depending on where you built the site, which is associated with the domain you used in your Pixel Setup)

19. Click on Edit Page under your desired page and then, preferably, Edit in a new tab to go to a different account to access the Funnel Builder.


20. Once inside the builder, head to Settings > Tracking Code


21. Paste the code from step 16 in the Header Code, then click "Yes, Save."


22. Do remember to save the funnel once you are done.


Step 3: Create a Facebook Conversions API Workflow.

23. Exit the Funnel Builder.


24. Navigate to Automation>Workflows>Create Workflow


25. Click on Start from Scratch and then Create new 


26. Click on Add New Workflow Trigger


Please Note:

You will need to use the Facebook Lead Form Submitted trigger step to trigger this workflow.

Prerequisite for Facebook CAPI (Funnel Events).

1. In CRM, please go to Settings > Integration > Check that the Facebook account is connected with admin permissions. Please ensure that your Facebook Business Page, which you are an admin of and have all access to, is integrated and the correct Facebook lead Form is mapped in your CRM account.


2. In Facebook From Field Mapping, the form should be mapped correctly and the status should be enabled. Facebook form mapping has moved under location settings > integrations > Facebook Form Field Mapping. Here is a list of the supported custom fields, which include multiple and single-option custom fields as well.
Once you have chosen the workflow trigger,

If you want it to get fired off by Facebook Form submissions for a specific form, Add filters, selectIn Form, and choose the Facebook Lead Form. You will not need to add any filters to this trigger unless you want it to get fired off by only specific submissions.


Do not forget to save it down below by clicking on Save Trigger.


27. Then click on Add your first Action. Search for and select the Facebook Conversion API Action:


28. Configure the Facebook Conversion API action. You can name this Action ActionName if you'd like. In the Event Type dropdown, choose Funnel Event.


29. Head over to the Events Manager tab where you were creating a Pixel. Search for the name of the Pixel you were working on. 

30. Click on Complete Setup.
31. In the Using Conversion API tab, click on Get Started

32. Click on Generate Access Token and copy the Access Token generated.


33. Paste the Access token in the Access Token field in the Facebook Conversion API Action.


34. Navigate back to your Events Manager. Scroll down to the bottom and click on Finish under Finish Implementation.

35. Head to Settings and then Copy the Pixel IDThen Navigate back to your Workflow.  


36. Paste the Pixel ID in the Pixel ID field in the Facebook Conversion API Action.

Please Note:

For Lead value, please use assumed values like 1000 or 2000 so that you can identify value each lead contributes to your pipeline.

Once complete, Save the Action and then Save and Publish the Workflow.

TikTok Integrations

Please Note:

Currently multi-select options for TikTok Lead Ads are not supported as of now. This will be supported in the next few releases.

TikTok integration will not work in countries where TikTok is banned by the government(VPN will help here).  

We are supporting only lead generation in-feed ads.


TikTok has become one of the fastest-growing social media platforms. Its popularity has increased exponentially over the last couple of years.

The company has recently announced its intention to launch a new advertising program called TikTok Leads. This new feature allows advertisers to target their ads directly at TikTok users who have already expressed interest in their brand or service.

In this article, we will cover how to integrate TikTok Ads into the CRM.

For information on how to set up TikTok Lead Ads please refer to their User Guide


Covered in this Article

How it works

How to integrate TikTok Leads Ads

Step 1: Enable the TikTok feature first within 'Labs' 

Step 2: Click on the 'integrations' tab & login

Step 3: Map Fields and or create Custom Fields

Supported Custom Fields when using TikTok Lead Ads

Step 4: Set up your TikTok Lead Ads Workflow


Troubleshooting

I see an error message No pages for this account, what should I do?

My TikTok 'Access Token' is expired what should I do? 

I changed a question on my Lead Ad Form during a live campaign, what should I do? 

Can the same TikTok account ID be connected to multiple sub accounts in HL (same agency or across different agencies) without issues?

What are all the permissions on TikTok that the person who connects the integration will need to maintain so that the integration token does not expire?

What would cause the integration token to expire and how can we minimize it on our side to assure a stable integration?


How it works

    Once the page is connected and subscribed you will start getting leads from your TikTok ads.


How to integrate TikTok Leads Ads

To enable TikTok Ads as an integration please head into the "labs" section located in your sub-account settings


Step 1: Enable the TikTok feature first within 'Labs

Sub-account 'Settings' > Click on 'Labs' > 'Enable' TikTok integration


Step 2: Click on the 'integrations' tab & login

Now that the TikTok Integration is live in your sub-account. Please proceed to log into your TikTok Business Account 


 Check all permissions (enabled by default) > Click 'confirm'.


If you have multiple advertiser accounts please select the advertiser account you wish to connect. 

Once the account is selected the tab will automatically close and your TikTok business account will be integrated.


Please note: 

If you have only one advertiser account, this account will be selected by default.

You can change the advertiser account at any point in time by clicking the change advertiser account button.


Step 3: Map Fields and or create Custom Fields

Once your Tiktok business account is connected please navigate to the TikTok form mapping tab to see all the pages/forms you have created in the TikTok business


Click on the 'Map Fields' button to map your form fields with the CRM fields. Click on Update to save your changes and subscribe to the page

.Please Note:

Currently multi-select options for TikTok Lead Ads are not supported as of now. This will be supported in the next few releases.


Supported Custom Fields when using TikTok Lead Ads:

- TEXT
- LARGE_TEXT
- NUMERICAL
- PHONE
- MONETARY
- SINGLE_OPTIONS
- DATE


Step 4: Set up your TikTok Lead Ads Workflow


Once your Tiktok business account is connected please navigate to the TikTok form and submit the form to see if leads are being added to the CRM. Be sure to set up a workflow.

The workflow should have the Workflow trigger step Contact Created and it must have an if/else condition added to it which searches for Contact Details> Source> is> TikTok

Please Note

Make sure to write TikTok exactly like this as the Source attribution is case sensitive.

Troubleshooting

I see an error message No pages for this account, what should I do?

If you come across this error while integrating your business account please make sure you have created an instant form in your Tikttok business account, please follow these steps.


My TikTok 'Access Token' is expired what should I do? 

If you see your access token is expired please disconnect your account from the CRM integration page. Once you re-integrated the CRM will generate a new access token. if you continue to have this issue please notify the support.


I changed a question on my Lead Ad Form during a live campaign, what should I do? 

Let's say you just updated your lead ad form within TikTok to capture a new desired response. You will need to head back into your sub-account settings and make sure you create a custom field for the new desired response. Once this is complete head back into the 'TikTok Form Fields Mapping tab' hit the edit button and select the new custom field you had just created.

If you want to stop all inbound leads just toggle the status off:

Can the same TikTok account ID be connected to multiple sub accounts in HL (same agency or across different agencies) without issues?

Yes as long as both accounts have the TikTok Form fields mapped.


What are all the permissions on TikTok that the person who connects the integration will need to maintain so that the integration token does not expire?

Only LeadConnector needs to be granted permissions and that is taken care of when the integration is connected. User permissions and access are not an issue.

What would cause the integration token to expire and how can we minimize it on our side to assure a stable integration?

Tiktok grants the CRM a permanent access token so the integration should remain intact unless broken off by the user manually. We will be displaying an Integration expired message under the TikTok integration option in settings> Integration

Two Way Sync Integrations

Email Two Way Sync is a feature that allows the synchronization of emails between the CRM and an email client, in both directions. Any email sent, received, or updated in one platform is automatically synced with the other, ensuring that all relevant data is available in both places. This is currently supported for Gmail and Outlook. 

Covered in this Article:

What is Email Two way sync?

Outlook:

Gmail:


Steps to connect

Gmail Two-Way Sync:

Google Rate Limits

How does the Gmail 2-way sync work between the CRM and your email account?

Outlook Two-Way Sync:

How does the Outlook 2-way sync work between the CRM and your email account?


Other functionalities for both Outlook and Gmail Two-Way Sync

Update Email: 

Disconnect Email: 

BCC Address


Does Two-way sync only work with individual emails or bulk emails and workflows?


FAQs (Gmail only)

What happens to emails received from existing contacts?

Will removing a synced account delete existing emails?

Do new emails get synced after an account is removed?

Will all my existing contacts in Gmail be synced with the CRM?

What happens when a new email is received from a contact?

What happens to sent emails from the CRM or Gmail?

How are cc/bcc recipients handled in the sync?

What if a contact emails someone else but includes the CRM user?

How is the conversation thread managed when multiple recipients are involved?

What if the same contact exists in multiple locations for the same synced email address?

What is Auto Bcc Sync, and how does it work?

How is the secure connection handled if Gmail login credentials change?

What happens when an email is forwarded from Gmail?

What if there are duplicate emails with multiple contacts?


What is Email Two way sync?

Users can connect their personal Gmail or Outlook email accounts and sync outgoing & incoming emails between the CRM and their personal Gmail or Outlook accounts. Users can use their email accounts to send, receive & track emails.The sync will be established between both platforms in different circumstances.

Outlook:

When an email thread is initiated from the CRM (first outbound message). All the subsequent emails in the thread will sync between both platforms. This feature is a user-level setting and does not impact other users in the sub-account.


Gmail:

There are two cases of how the sync can be established.

1. You can email a contact from the CRM to initiate the sync between both platforms.
2. Gmail Sync also works if a contact already saved in the CRM sends an email to the User (who has Gmail Two Way sync integrated) on their Gmail Email address. The email would sync into the conversations tab. The contact also needs to be assigned to the user beforehand.

Please note

If the user is added to multiple sub accounts, and has integrated the same Gmail account for Gmail Two way sync in all those accounts, the email from the contact will go to the conversations tab of all those sub accounts, but we will only retain the instance of that contact in that sub account to which the user replies to. Sync will be broken for all other instances.The additional filter of user being assigned to the existing contact also makes sure that the conversation will not go to sub accounts that the contact does not belong to.

Steps to connect

Please go to the sub-accounts Settings page. Go to the Profile tab and then the General tab and scroll down to the section Email (2-way sync) 

Please Note:

You will only see the Profile tab if you are added to the sub account for which you are viewing at that time. 

Gmail Two-Way Sync:

Over there, if you want to use Gmail Two Way Sync, please select Gmail two sync and hit Connect.


It will then prompt you to choose one of the available Gmail Accounts in that browser or ask you to connect a Gmail account; select the one you need; connecting a new account will require you to enter that account's credentials in the popup.


Connecting it will then ask you about which permissions you are allowing LeadConnector to have on your Gmail account; make sure to allow all and then hit enable continue:


Once you hit, Continue, you will see your desired Gmail account connected in the Email Two Way sync tab:

Google Rate Limits


How does the Gmail 2-way sync work between the CRM and your email account?

There are two cases of how the sync can be established.

1. You can email a contact from the CRM to initiate the sync between both platforms.
2. Gmail Sync also works if a contact already saved in the CRM sends an email to the User (who has Gmail Two Way sync integrated) on their Gmail Email address. The email would sync into the conversations tab. The contact also needs to be assigned to the user beforehand.

Please note

If the user is added to multiple sub accounts, and has integrated the same Gmail account for Gmail Two way sync in all those accounts, the email from the contact will go to the conversations tab of all those sub accounts, but we will only retain the instance of that contact in that sub account to which the user replies to. Sync will be broken for all other instances.The additional filter of user being assigned to the existing contact also makes sure that the conversation will not go to sub accounts that the contact does not belong to.


The sent email will show up in the sent inbox of the integrated Gmail account:

Please Note:

Gmail supports only ~500 emails per day and emails beyond that will be unsuccessful.


All subsequent messages in the email thread will be in sync. Outbound emails from your email will reflect in the CRM and vice versa. 


Please Note:

The supported attachment size limit for Gmail Two way sync is 25 MB.

Outlook Two-Way Sync:

If you want to use Outlook Two Way sync, Select Outlook under Email (2-way sync) as your email provider & click on Connect.


Complete the authorization by entering your Outlook email ID credentials.


Approve for permissions requested for LeadConnector:


On the profile page, scroll down to the section Email (2-way sync) to view your email in the connection status.


How does the Outlook 2-way sync work between the CRM and your email account?

You would need to send an email to a contact from the CRM to initiate the sync between both platforms.

Please note

The first outbound email needs to be initiated from the CRM to establish the sync


All subsequent messages in the email thread (initiated from the CRM) will be in sync. Outbound
emails from your email will reflect in the CRM and vice versa. reflect


An email thread initiated from your email will not sync with the CRM. Only email threads that were formed from the CRM will be in sync. created

If an outbound email was sent (while the sync was in active state) and later the sync was disconnected from the CRM, the subsequent messages in the thread will stop syncing. This will also stop syncing new outbound emails sent from the CRM.


Please note

Attachments of up to 3 MB size work across this sync, any attachments larger than this size will cause the message to not sync over.
Supported file types: JPG,JPEG,PNG,MP4,MPEG,ZIP,RAR,PDF,DOC,DOCX,TXT

Other functionalities for both Outlook and Gmail Two-Way Sync

Update Email: 

This helps users change their connected email ID to another without disconnecting the previous connection.

New outbound emails from the CRM will start syncing with the newly added email address. Upcoming messages in the previously connected email ID (same thread) will stop syncing between the CRM & personal email. 

Disconnect Email: 

This helps users to disconnect their connection and stop the sync with the CRM. Post disconnect, emails or messages will not sync between both platforms.

BCC Address

You can include the BCC Address in the CC or B field when sending an email from Gmail/Outlook. Doing so will automatically add the contact and conversation to your CRM, streamlining communication and ensuring all relevant data is centralized. Going forward, any emails received from this contact at the Gmail/Outlook inbox level will automatically sync with CRM.


Does Two-way sync only work with individual emails or bulk emails and workflows?

How the sender domain mapping works for different types of emails:

Individual Email: On connecting a personal email account (Gmail), the Gmail email ID will be considered the sender domain for the emails the user sends for individual emails. Individual emails are sent directly from Gmail when 2-way sync is activated for the user. Be aware that Google sets a limit of 500 emails daily, which applies to this functionality.

Bulk Email: This will continue to be sent from the sub-account level email provider. 2-way sync won't affect this.


Workflow & Automation: In terms of automated emails, they are dispatched from sub-account level providers. This arrangement seamlessly integrates your automated CRM workflows and the email dispatch system.

Please Note:

With this setup, users can leverage the 2-way sync for their one-on-one emails while also successfully sending bulk emails. The Gmail-imposed limit of 500 emails per day applies only to individual emails, so users can send bulk emails via LeadConnector/SMTP without worrying about reaching this limit. This is a thoughtful design feature, allowing users to conduct mass email campaigns without being constrained by Gmail's daily email cap.

FAQs (Gmail only)

What happens to emails received from existing contacts?

All inbound emails from existing contacts will be reflected in your CRM and Gmail/Outlook inbox. This bidirectional synchronization ensures a complete record of all your communication on both platforms.

Will removing a synced account delete existing emails?

No, removing a synced account will not delete any existing emails. Your previously synced emails will remain intact, and the synchronization will only affect new emails sent or received after the account is removed.

Do new emails get synced after an account is removed?

New emails sent or received after removing the account will not be synced between the CRM and Gmail/Outlook. The synchronization between the two platforms will continue for existing emails, and new emails will not be included in the sync.

Will all my existing contacts in Gmail be synced with the CRM?

Yes, the Two-Way Sync identifies and syncs existing contacts from Gmail to the CRM. Incoming emails from these contacts are automatically populated under the respective contact, but past emails (before the integration is connected) cannot be synced over.

What happens when a new email is received from a contact?

New incoming emails from existing contacts will be reflected as new emails in the CRM and Gmail. If the email belongs to an existing conversation thread, it will be displayed as a new email within the same thread.

What happens to sent emails from the CRM or Gmail?

Outgoing emails sent from the CRM will be auto-logged in the Sent folder of the synced mail. Conversely, emails from the synced mail provider will automatically appear under the corresponding CRM contact's conversations.

How are cc/bcc recipients handled in the sync?

If a user is cc'ed or bcc'ed, or included in multiple recipients in Gmail, this information is reflected under the respective contact in the CRM, ensuring comprehensive visibility of all communications. No new contacts are created for the CC and BCC email address.

What if a contact emails someone else but includes the CRM user?

In this case, the email will be reflected under the CRM, associating it with the respective contact, maintaining the complete conversation history.

How is the conversation thread managed when multiple recipients are involved?

In case of multiple recipients (to) in an email, the first contact becomes the conversation tab in the CRM. All subsequent emails will appear in this thread.

What if the same contact exists in multiple locations for the same synced email address?

Email originating from the CRM will be reflected only in the respective location. Subsequent replies and communication should also be specific to that location. However, emails from a contact to the CRM user should be reflected in all locations.

What is Bcc Address, and how does it work?

You can include the BCC Address in the Cc or Bcc field when sending an email from Gmail/Outlook. This automatically adds the conversation and contact in the CRM, streamlining communication and data management.Going forward, any emails received from this contact at the Gmail/Outlook inbox level will automatically sync with CRM.

How is the secure connection handled if Gmail login credentials change?

In case of changed login credentials, the CRM will require you to reauthenticate and resync the email to maintain a secure connection.

What happens when an email is forwarded from Gmail?

Any forwarded email to an existing contact will be treated as a sent email and synced under that contact in the CRM.

What if there are duplicate emails with multiple contacts?

Duplicate emails sent to multiple contacts will be associated with the first created contact in the CRM.

Linkedin Lead Ads Integration

Seamlessly fetch all your leads from LinkedIn directly into your CRM with our easy integration. 


TABLE OF CONTENTS


How it works?

Initiate LinkedIn Integration:

  • Navigate to the sub-account labs to enable LinkedIn integration.
  • Go to the integrations page located under the settings tab.
  • Find the LinkedIn integration.
  • Click on Connect to initiate the process.

Authorize Account & Permissions:

  • Log in to your LinkedIn account.
  • Ensure you grant all necessary permissions for the integration to be successful.

Select Ad Accounts:

  • Choose an ad account or multiple ad accounts to connect to your sub-account.
  • Note: There's no limit to the number of ad accounts you can connect to your sub-account.

Ad Account Requirements:

  • Ensure the ad account you're integrating has a linked LinkedIn page. Without this, the integration won't be successful.

Configure Synchronization:

  • For each ad account you're integrating, determine its sync time.
  • Options include:
    • All leads: Sync all leads from the past 90 days and all new leads.
    • New leads: Only sync new leads.
  • Click on Connect to proceed.

Form Field Mapping:

  • Click on Configure form field mapping or go to the LinkedIn form field mapping tab at the top.
  • Use the Map Fields button to align your LinkedIn form fields with CRM fields.
  • Click Confirm to save and complete the integration.
  • If you want to disable inbound leads from any of the forms, toggle the status off.

Frequently Asked Questions (FAQs):

  • How do I add/update ad accounts in the future?

Navigate to Manage Ad Accounts under Integrations > LinkedIn. From here, you can add/remove or modify the sync time for existing ad accounts. Click Update to save changes.

  • I can't see all forms under the LinkedIn field form mapping. What should I do?

    For efficiency, only mapped forms are displayed upon revisiting the 'LinkedIn form field mapping' page. To view all, including unmapped forms, click Refresh on the page's top right.
  • Can I alter the sync time for an ad account after integration?

Absolutely! Visit Manage Ad Accounts to adjust the sync time for any connected ad account. Changing from 'New leads' to 'All leads' will fetch the last 90 days of leads into the CRM for that account, provided the form fields are correctly mapped.

  • How can I disconnect the integration?

            Go to the integrations page, select Disconnect, and then confirm by clicking Disconnect in the pop-up.

Yes, an ad account can be connected to multiple sub-accounts. All leads from that ad account will populate in every linked sub-account.

In this guide, we will walk you through how to set up workflow automation for your LinkedIn lead ads integration.

Pre-requisite

Please connect your Linkedin account with the CRM. To know more about how to connect Linkedin with the CRM, click here

Add Workflow Trigger

  • Go to "Automation" on the left menu and click on "Create Workflow."

  • Click on "Add a new trigger" and select the "LinkedIn lead form submitted" trigger.

  • Use filters to select a page/ad account (if you've added multiple ad accounts to the subaccount). If you can't see any ad accounts in the dropdown, ensure your LinkedIn account is integrated with the sub-account.
  • Use filters to select a specific form. Ensure that field mapping is completed for the chosen form; otherwise, the leads won't be fetched into the CRM.
  • After setting the triggers, define the set of actions for the automation and save.
  • Once the automation setup is complete, publish the workflow to activate it.

Private Integrations

Table of contents


What are Private Integrations?

Private Integrations allows you to build powerful custom integrations between your account and any other third party app. 

If you are looking to integrate your account with a third party app, you have two options:

1. Find and install relevant app from the App Marketplace

2. Build your own private integration by yourself or with the help of a developer using APIs.

Private Integrations helps you achieve #2 securely.

The key advantages of using Private Integrations are:

  • Simple: Generate Private Integration tokens from your account settings and manage them with ease.
  • Secure: You get to restrict the scopes/permissions that a developer can access on your account


What's the difference between Private Integrations and API Keys?

Private Integrations, to put it simply, is more powerful yet secure alternative to API Keys.

Private Integrations
API Keys
More Secure: You get to restrict the scopes/permissions that a developer can access on your account Less Secure: A developer gets unrestricted access to all your account data 
State-of-artPrivate Integrations allows you to access API v2.0 which is state of the art.Out-dated: API Keys work on API v1.0 which has reached end-of-life and is no longer maintained.
More Features: API v2.0 has more powerful APIs and supports webhooks(ability for third party apps to get notified when specific events occur on your account).Less Features: API v1.0 has limited APIs and does not support webhooks. 


How do I use Private Integrations?

Who can create Private Integrations?

By default, all account admins can create and manage Private Integrations. 

However, you can restrict this permission at a user level. To do this, Navigate to Settings > My Staff > Edit the specific account user > Roles & Permissions, and enable/disable Private Integrations for the user.


Where can I find Private Integrations?

To manage Private Integrations, go to Settings and scroll down to the 'Other Settings' section in the left navigation menu. 

If you don't find the setting, please make sure that you have enabled the feature on Labs.


How do I create a new Private Integration?

Step 1: Click on "Create new Integration"

Step 2: Give your Private Integration a name and description to help you and your team identify what it's for.

Step 3: Select the scopes/permissions that you want the private integration to have access to on your account. Ensure that you are selecting only the required scopes for better data security.

Step 4: Copy the token generated and share it with your third-party app developer. 

Please ensure that you are sharing the token with trusted parties only. Do not share it publicly.

Note: Don't forget to copy the token generated as you won't be able to do it again later.


What are some best practices to maintain security of my private integration token?

We recommend that you rotate your Private Integration tokens every 90 days.

Here's how you can do it.

Step 1: Navigate to Private Integrations under settings, and click on the Private Integration you have created.


Step 2: Click on "Rotate and expire this token later".

Step 3: Click "Continue" in response to the warning message if you are sure that you want to proceed with rotation. 

Step 4: Copy the new token and update it on your third-party app. You will have a 7 day window where both the old and the new tokens will continue to work. After 7 days, the old token will expire. In this 7 day window, you will have the option to:

1. "Cancel rotation" if, for example, your developer needs more time to update the token on the third-party app.

2. "Expire Now", if, for example, the third party app has been updated with the new token.

Note: Don't forget to copy the token generated as you won't be able to do it again later. 

My token has been compromised? What should I do?

Step 1: Navigate to Private Integrations under settings, and click on the Private Integration you have created.


Step 2: Click on "Rotate and expire this token now".

Step 3: Click "Continue" in response to the warning message if you are sure that you want to proceed with rotation. 

Step 4: Copy the new token and update it on your third-party app.

Note: Don't forget to copy the token generated as you won't be able to do it again later.

Can I edit the Private Integration permissions without updating the token?

Yes, you can edit the Private Integration name, description and scopes/permissions any time after you've created it.

Here's how you can do it.

Step 1: Navigate to Private Integrations under settings, and select "Edit" from the three-dot menu.

Step 2: Update the Private Integration name and description if required. Click on "Next".

Step 3: If required, update the scopes/permissions that you want the private integration to have access to on your account. Ensure that you are selecting only the required scopes for better data security. Click on "Update" to save the updates made.

Note: Updating the Private Integration details does not generate a new token. The existing token will continue to work.

How do I delete the Private Integration once I no longer need it?

You can delete the Private Integration once you no longer are using the third-party app.

To do so, navigate to Private Integrations under settings, and select "Delete" from the three-dot menu.


Google Business Page

Seamlessly connect one or multiple Google Business Profile pages to a sub-account. By connecting multiple pages, you gain the ability to view, track, and monitor all related assets, such as messages, leads, and reviews, within a single sub-account.

TABLE OF CONTENTS

How to Connect Multiple Google Business Profile Pages

To connect your Google Business Profile (GBP) pages, visit the Integrations page located under Sub-Account Settings. Proceed to the GBP Integrations section.

Note: If you cannot see the Google Business Profile option on the Integrations page, please ensure your Google account is connected. This step is essential and precedes the connection of GBP pages to your sub-account.


Initiate Connection:

Click on 'Connect' to start the authorisation process and fetch the list of pages to which you have administrative access.


Select Pages: 

From the list of available pages, select one or multiple pages you wish to connect with your sub-account.

Configure GBP Messaging:

GBP messaging enables you to retrieve messages sent to your GBP page directly into your CRM. These messages are sent by customers via the GBP page chat. You can enable or disable GBP messaging for the selected pages according to your preference. It's possible to enable GBP messaging for all selected pages or customize settings as needed.

Enable Call Tracking:

You may choose to enable call tracking for a GBP page based on your preferences. Please note that call tracking can only be enabled for a single page at a sub-account level and only at one sub-account level per page.

Finalize Connection: 

Click on 'Connect' to finalise the integration.

Check Connection Status: To view the connection status, click on the 'Refresh' icon.

Upon successful connection, the details of the connected pages will be displayed in the GBP section.

Learn how to effortlessly add or remove Google Business Profile pages and adjust GBP messaging and call tracking settings within your sub-account. This guide provides a simple step-by-step process to manage your GBP pages.


Please note that the "Manage Pages" option is available only after the successful integration of GBP pages into your sub-account. To learn how to connect multiple GBP pages to a sub-account, click here.


TABLE OF CONTENTS

Manage Pages:

To add or remove pages or to change GBP messaging or call tracking options, click on 'Manage Pages'.


Update Settings: 

Make the necessary adjustments and click on 'Update' to apply the changes.


Note: The changes made at the page level do not impact previous data or records and only affect data on a going-forward basis based on the changes.


Verify Updates: 

Click on the 'Refresh' icon to check the update status of the connection.

Upon successful connection, the details of the updated pages will be displayed in the GBP section.

This article explains how to track assets such as messages, leads, and reviews from your connected Google Business Profile page in a sub-account.


TABLE OF CONTENTS

Messages

When a customer visits your GBP page and sends a message via the chat section, the message is fetched in the connected sub-account under the Conversations page.

Based on the inbound message received, you can further engage with your customer directly from your CRM (Conversations page level) by sending an outbound message.

The message will also display the GBP page name from where it was initiated. This feature is particularly useful in identifying the specific business page a customer is reaching out from, especially if you have multiple business pages connected to the sub-account.

Ratings & Reviews

When you receive a review from a customer, the review data is accessible on the Reviews page under the Reputation module. Here, you can view, track, and respond to reviews received from the connected Google Business pages to your sub-account.

Each review also indicates the business page name on which it was received, which is crucial when managing multiple pages connected to the sub-account.


If multiple pages are connected to a sub-account, you can configure the reviews link for each one and select a primary page. This allows you to send your contacts a review request link to gather more Google reviews for your business.

This configuration is available from the Reputation Management tab within the Sub-Account Settings module.


Contacts

You can view the contact or lead record created from messages or reviews for your connected GBP pages within the Contacts module. 

Click on a contact to visit their details page, where you can find the source and page details from where the contact was generated.

What is happening?

Google is sunsetting its Google Business Profile - Chat starting from Jul 15, 2024. We understand that this is a frustrating situation, and we are here to help you through this change.

Timeline:

  • Beginning July 15, 2024, your contacts won't be able to start new chat conversations with your business from Google. Contacts in existing chat conversations will see a notification from Google about the feature phaseout. 

  • On July 31, 2024, the chat feature will be removed from Google Business Profile. You won’t receive new chat messages. 

Will my contacts be notified about this change?

Beginning July 15, 2024, contacts in existing chat conversations will be notified about the feature phaseout. These notifications will be shown in existing chat conversations until July 31, 2024, when GBP chat will no longer be supported.

What should I do now?


  • If you have ongoing conversations with your customers on GBP Chat, please seek their contact details so that you may continue conversing with them on phone or any alternate channel post July 31.
  • If you currently use 'GMB Messaging' action in your workflows, please note the action will start getting skipped starting from Aug 1. Please edit your workflows to take appropriate alternate actions.
  • If your profile currently does not have a phone number or if the number is hidden, we recommend adding one to your Business Profile by July 31 so customers can continue to contact you directly. Learn more about how to edit your business phone number.

WhatsApp Integration

Setup

In Business Suite, you can export a file that contains the information that people submit through your Instant Form. You can also download this data from Ads Manager, request it through the API or access it through an integrated CRM system. We recommend that you download your leads data directly from Business Suite if you don’t have a CRM system integrated with Facebook.

To download leads data from Business Suite:

  1. Go to Business Suite.
  2. Click More Tools from the menu.
  3. Click Instant Forms.
  4. Click Download next to the form with the leads you want to export.
  5. Choose how you want to download your leads:
    • Click Download New Leads if you only want to export the leads that you’ve received since the last time you downloaded.
    • Click Download by Date Range if you want to download all the leads you’ve received during a certain time period. After you select this option, choose the preferred date range and click Download.
  6. A window appears with your form information. Click CSV to download the leads data in your preferred file type.

Note: You have 90 days from the time a lead submits their form to download their information. Leads expire after 90 days. We recommend that you export your leads data regularly.

When you download your file, if you don't see an Ad ID or Ad Set ID field, it may be because:

  • The lead was generated via organic reach.
  • The lead was submitted via an ad preview.
  • You don’t have advertiser privileges on the ad account that created the lead ad campaign.

To troubleshoot your file download:

If you can’t download your leads file:

  • Check with your Business Manager admin to see if they’ve customized access permissions in Leads Access Manager.
  • If they haven’t customized permissions, reach out to your Facebook Page admin to give you the correct access. Before customization, only Facebook Page admins can download leads.
  • If they’ve customized permissions, make sure they’ve given you the correct access. After customization, only people assigned access permission can download leads.

To Import The Leads Into the CRM:


(New UI)

  • Navigate to Contacts and click the Import Contacts Bulk Action
  • Select your CSV file and click Next
  • Map the fields from your Facebook Lead Form to your CRM fields and click the Next button
  • On the Details tab, click the Advanced dropdown, add a tag for these leads (optional), and toggle on "Add To Workflow/Campaign" and select the Workflow or Campaign that you'd like to add the leads from the CSV to

(Old UI)

  • Navigate to Contacts and click the Import Contacts Bulk Action
  • Select your CSV file and click Next
  • Map the fields from your Facebook Lead Form to your CRM fields and click the Next button
  • Review the sample data and click Continue
  • Select your Duplication Strategy
  • Select or create a tag to be applied to everyone in the CSV
  • In filters, type tag, then select the tag you created in the previous step
  • Select all the contacts
  • Click the "Add To Campaign/Workflow" Bulk Action
  • Click Proceed then select the Campaign/Workflow from the dropdown, give the action a name, then click the "Add to Campaign/Workflow" button

TABLE OF CONTENTS


Q. Can I use my existing WhatsApp number for the WhatsApp Business Platform?

Yes, you can use a phone number that is already associated with a WhatsApp Messenger or WhatsApp Business Account.

Q. Failed to send a message because this user's phone number is part of an experiment

Starting June 14, 2023, roughly 1% of WhatsApp users will not receive marketing template messages from any business unless one of the following conditions is met:

If you send a marketing template message to a customer who is part of the experiment group, your message will not be sent and you will not be billed for it since no conversation was created

Q. What steps do I need to take to use my existing WhatsApp number?

To use your existing number, you need to delete the existing WhatsApp account associated with that number. Follow these steps:

  1. Open WhatsApp.
  2. Go to Settings > Account > Delete my account. For more information, refer to the guide on how to Migrate an Existing WhatsApp Number to a Business Account.

Q. Can I use my number on both the WhatsApp Business Platform and WhatsApp Business App simultaneously?

No, once you migrate a phone number to the WhatsApp Business Platform, you cannot use that number on the WhatsApp Business App concurrently. Your number must be used either on the WhatsApp Business Platform or the WhatsApp Business App, not both.

Q4: Will I lose my data after migrating my WhatsApp number to the WhatsApp Business Platform?

Yes, you will lose all data associated with WhatsApp after migration. Meta does not allow data transfers between the platforms. It is highly recommended to take a backup of your data before proceeding with the migration.

Q5: How do I backup my data before migrating my WhatsApp number?

To backup your data:

  1. Open WhatsApp.
  2. Go to Settings > Chats > Chat backup.
  3. Follow the prompts to back up your data to your preferred location (e.g., Google Drive or iCloud).

Q. What is Meta’s new update for the WhatsApp Business Platform (API)?

Meta has introduced Frequency Capping to limit the number of marketing messages sent to WhatsApp users with Indian phone numbers. This restricts the number of marketing messages a person can receive from any business in a given period. Meta introduced frequency capping to reduce spamming and over-sending messages to WhatsApp users, improving the overall user experience and providing businesses a better opportunity to engage with customers effectively.

Q. How does this impact your deliverability?

Frequency capping works on a first-come, first-served basis. Marketing messages will be delivered until the limit is reached. Any messages beyond this limit will not be delivered.

Q. What kind of messages are exempt from Frequency Capping?

Frequency capping only applies to promotional and marketing template messages that require opening a new conversation. It does not apply to:

    •    Session Messages: Support messages within existing customer service interactions.

    •    Click to WhatsApp Ads: Conversations initiated by users clicking on WhatsApp ads.

Q. Does Frequency Capping affect all users?

No, Frequency Capping only applies to marketing messages sent to users in India (+91 country code).

What determines the capping for a WhatsApp Business Account with multiple phone numbers?

The restriction is based on the total number of messages received by individual users from any business. It is not determined by the number of messages received from one specific business.

Q. What are the benefits of verifying my Facebook Business Manager account?

Once Meta verifies your Facebook Business Manager account, you can initiate unlimited business conversations on WhatsApp.

Q. What can I do if my Facebook Business Manager account is not yet verified?

While your verification is pending, you can:

  • Initiate up to 250 business conversations in a 24-hour rolling window.
  • Respond to customer-initiated conversations without any restrictions.
  • Have two WhatsApp business numbers in an unverified Facebook Business Manager account.

Q. What happens if my business verification is unsuccessful?

If your business verification is unsuccessful, you can continue using your WhatsApp business number with the restrictions mentioned (i.e., 250 business conversations in a 24-hour period and responding to customer-initiated conversations without restrictions).

Q. How do I request verification for my Facebook Business Manager account?

To request verification, you need to provide proof of your legal entity and access to the business. Detailed instructions can be found in the guide on Verifying your Business in WhatsApp Business Manager.

Opt-In Engagement: Send messages only to customers who have explicitly opted-in.

  • Segment Your Contact List: Group your audience based on common characteristics to send targeted messages.
  • Personalize Recommendations: Use customer behavior and purchase patterns to send personalized product recommendations.
  • Emphasize Quality Over Quantity: Ensure your messages add value and resonate with your customers’ needs.
  • Engage via Two-Way Conversations: Create meaningful interactions to keep customers engaged and interested in your brand.

Q. WhatsApp is free to use for personal messaging. So, what do "WhatsApp conversation charges" refer to?

While the WhatsApp app and WhatsApp Business app are free, businesses using the WhatsApp Business API to communicate with customers at scale are subject to conversation charges. 

These charges apply when a business sends notifications to customers via the WhatsApp Business platform, especially if the customer has not responded within the last 24 hours. The cost depends on the customer's country code. 

TABLE OF CONTENTS


Enhance Customer Experience with a Marketing Opt-Out Button

Your business can now incorporate a marketing opt-out button in new marketing templates. This button enables customers to opt out of marketing messages while still receiving essential service communications. While this feature is optional, including it can bring several benefits.


Benefits of Adding a Marketing Opt-Out Button

  1. Reduce Block Rate

    • Lower Risk of Campaign Stoppages: High block rates can lead to campaign suspensions or a decline in your phone number's quality rating. Allowing customers to opt out instead of blocking your business ensures smoother campaign operations.
  2. Facilitate Faster Scaling

    • Minimize Quality Issues: As your marketing outreach scales on WhatsApp, quality issues often arise from customers blocking certain templates. By offering an opt-out option, you can reduce block rates, thereby enabling faster increase in messaging limits.
  3. Respect Customer Preferences

    • Tailored Communication: Providing an opt-out option allows customers to choose how they want to receive communications, preserving your ability to send crucial transactional and customer care messages.
  4. Gain Valuable Insights

    • Customer Feedback: Unlike blocked numbers, opt-outs provide visibility into customer preferences, enabling you to refine and improve your marketing campaigns.

Creating a High-Quality Opt-Out Experience


To ensure a positive user experience, consider the following best practices for designing your opt-out flow:

  1. Honor All Opt-Out Requests

    • Respect Customer Choices: Ensure that once a customer opts out, you cease sending marketing messages from all of your WhatsApp numbers to avoid negative experiences and potential block rate increases.
  2. Send Confirmation Replies

    • Acknowledge Opt-Outs: Confirm opt-out requests and offer an option to opt back in for those who may reconsider. Additionally, request feedback on why they opted out or their content preferences to enhance your messaging strategy.
  3. Strategic Placement of Opt-Out Button

    • Optimize Frequency:Avoid adding the opt-out button to every message to prevent encouraging unnecessary opt-outs. Instead, include it in strategic messages such as:
      • The first message a customer receives from your business.
      • Messages sent after a significant period without marketing communication.
      • Messages targeted at unengaged customers.

By thoughtfully integrating a marketing opt-out button, you can improve customer satisfaction, maintain high campaign quality, and gain valuable insights to better tailor your marketing efforts.

Lead Connector Mobile APP

Get Started

IN THIS ARTICLE

Get early access to new mobile features before anyone else, and help shape the future of LeadConnectors iOS & Android apps! Compared to the standard mobile app, you’ll receive bug fixes and updates much quicker !

Lead Connector beta for iOS

How to sign up

Like many other apps, Lead Connector iOS beta is distributed through TestFlight.


Go here to install the TestFlight app on your device if you don’t have it already.Once the TestFlight app is downloaded to your device, click on this link to download the Lead Connector iOS beta app. If you already have the standard Lead Connector app installed, the beta version will replace it.

Note: Apple only allows up to 10,000 people to sign up for a beta app through TestFlight. First come, first served!


How to submit feedback


Feedback is a gift! Help Lead Connectors engineering team make our mobile apps even better by sending bug reports and feedback:

  • In the Lead Connector Beta app, press the power button and volume up button at the same time to take a screenshot. Tap the “Share” button at the top right, then scroll down to see the “Share Beta Feedback” button in the share sheet.

  • In the TestFlight app, tap on “Lead Connector Beta,” then tap the “Send Beta Feedback” button.

How to leave the beta

In the TestFlight app, tap on “Lead Connector Beta,” then scroll to the bottom of the page. Tap the “Stop testing” button to be removed from the beta.


Lead Connector beta for Android

How to sign up

Scroll to the bottom of the page until you see the section titled “Join the beta.”

Then tap the “Join” button — that’s it!

How to submit feedback

Feedback is a gift! Help Lead Connector's engineering team make our mobile apps even better by sending bug reports and feedback:

  • Open the Play Store
  • At the top right, tap your profile icon
  • Tap “Manage apps & device”
  • Tap “Ratings & reviews”
  • Scroll until you find Lead Connector in the list, then tap “Write feedback”

How to leave the beta

Go to Lead Connector’s app listing in the Google Play Store here. Scroll to the bottom of the page until you see the section titled “You’re a beta tester.” Tap the “Leave” button to be removed from the beta.

Participation is entirely voluntary. Before you sign up, please keep in mind that by accessing and using our beta apps, you are acknowledging and accepting any risks from using an app that has not yet been released to the general public. For example, beta apps can contain more bugs than our publicly available products. 

Your decision to participate in beta testing is also subject to any applicable Beta Services terms in your agreements with us. 

Overview

How to create a new invoice

How to edit your invoice info

How to add taxes to your invoice

How to add a discount to your invoice

How to send your invoice

How to check the status of your invoices


Overview

You can now send invoices to your customers/clients using the products that you have created in your sub-account.


How to create a new invoice

  1. Click on the three lines in the top left of the app and select the Invoicing Tab

  2. Click on the button "+" and start creating a new invoice.

Note:

Add Global terms of services/notes by clicking on the gear wheel icon in the top right. You can also do this for the individual invoice in the third "Terms" step:


How to edit your invoice info

Step 1: When you begin creating an invoice you will first add the client and edit the Issue and Due dates.


Notes:

On mobile, you cannot edit the "from info", image, or invoice number at this time.


Step 2: Click The "+Add Item" to add the products that you have created on your products tab. You can also create a new product here.


Step 3: Once you add the product it will allow you to edit the price and quantity.


How to add taxes to your invoice

You can select "Taxes" on the "add item" page then select the checkbox next to your taxable options.


Or you can select the "+ Add Taxes" button on the "Edit Item" page and select the same options.


How to add a discount to your invoice

You can add a discount to this invoice by clicking on the "discount" tab and adjust it using the slider.


How to send your invoice

Step 1: Once you preview the invoice, you can send it to your client using the buttons at the bottom. Test invoice on the left or send live invoice on the right.


Step 2: You can send the invoice through email and/or text as you want here.


How to check the status of your invoices

Step 1: Go to the Invoicing tab, where you will see the list of invoices and they will be color-coded for the statuses Draft, Due, and Overdue.


Step 2: You can search invoices or filter the invoices by status and date range as well.

Notes:

There is no transaction tab in mobile

WordPress Integration

WordPress Folder

Our WordPress Hosting system has a few error codes that are unique only to our system and need specific troubleshooting steps to take care of them. 


Covered in this Article

What is the meaning and Troubleshooting for each of these errors?


What is the meaning and Troubleshooting for each of these errors?


File Corrupted:

It can be that in this WordPress installation or in your source WordPress installation (from where you created this file), the file became corrupted and cannot be used for this import. Please delete this file and try again.


Plugin Issue:

The error message may look something like: "Plugin named “yith-topbar-countdown” is corrupted."

The Error can be in this WordPress installation or it can be in your source WordPress installation (from where you have created this file), please delete this plugin and try again.


Unknown Error (where both the Plugin and File could be corrupted): 

It will detect plugin issue first & display the plugin error on the UI)

The plugin named “yith-topbar-countdown” is corrupted. The Error can be in this WordPress installation or it can be in your source WordPress installation (from where you have created this file), please delete this plugin and try again. Once you have done that if the file is corrupted too then the error will change and show the file corruption error discussed above, you can then delete the file and try again in that case.

A WordPress file manager is a plugin that enables users to perform file management tasks from the WordPress dashboard. Instead of logging in to your control panel or File Transfer Protocol (FTP) client, you can access the WordPress website files from a single location.

Covered in this Article:

Why use this plugin instead of having FTP Access?

How to install the WP file manager plugin?


Why use this plugin instead of having FTP Access?


FTP is inherently a non-secure way to transfer data. When a file is sent using this protocol, the data, username, and password are all shared in plain text, which means a hacker can access this information with little to no effort.

WP File Manager provides an intuitive user interface with a clear structure pane and display.

The plugin is free to download and use, but you need to purchase a license to access its advanced features such as private folder creation and control file operations for different user roles. These are useful if you have a team managing multiple websites.


How to install the WP file manager plugin?


You can install this plugin by going to your Plugins tab in the WP admin view like this:


1. Go to your WP Admin view
2. Click on Plugins
3. Click on Add New
4. Search for WP File Manager. Select the one shown in the gif above.
5. Install and activate it.


You can read more about this plugin here:

https://wordpress.org/plugins/wp-file-manager/


Please Note:

Just like the dangers with FTP access, if you are not careful with what kind of file you are handling using this plugin, it could still cause issues.

Please restore your WordPress to your most recent stable backup if you come across any issues.

How to add Domains to your WordPress website?

Adding a domain to a WordPress site is necessary to make the website accessible to the public through that Domain. A domain serves as the website's address, and visitors can use it to access the site.

The article provides step-by-step instructions for adding a primary domain, additional domains, and a root domain (also known as an apex domain or naked Domain) to a WordPress site.

It also highlights that users may need a staging domain before adding domains to their WordPress website to see how their Website looks before they attach their domain to it. It also provides specific instructions for users with a domain in GoDaddy.

Location Settings

Modules & Fields 1

The Company Object Automation settings give users the ability to repurpose business details fields for the company. The migration will help users transfer field data, create new companies & map respective contacts under them seamlessly.


Covered in this Article:

How to use the Company Object Automation?

Different Situations to consider

Limitations and Expected Behavior


How to use the Company Object Automation?

To access the Company Object Automation please head to sub account Settings> CompanyTab:
Once in the desired window, if you check mark Create & Associate companies with contacts, You will be prompted to begin the process through which all contacts that have a Business Name written in the Business Name field will be added to Companies that have that business name.

Please Note

The business name ignores case sensitivity. E.g If a contact has a business name “Burger King” and another contact has “burger king”, one company will be created for Burger King, instead of two. The business name doesn’t ignore spaces in the business name. E.g If a contact has the business name “BurgerKing” and another contact has “burger king”, two companies will be created for both business names. 
The system cannot identify Two differently spelled Business Names as belonging to one company. E.g A contact with the Business Name: 'Ice Cream Sunday" will not be added to the same company as another contact with the business name: "Ice Cream Sundae"
Even one alphabet being different would lead to a separate company being created for the contact.

Upon check marking the  Create & Associate companies with contacts check box, you will have the option to save this change. A prompt will ask you whether you would like to proceed with this:

Upon clicking Yes, All contacts that have their Business Name field filled out in the General Info Section 

of their contact page will be added to a Company with the same name as the Business Name. 

If a company of that name does not exist, one will be created for them.

You will see a confirmation message if the process successfully starts:

The Business Name field is the Unique Identifier in this regard. Case Sensitivity is not an issue but 

Spacing and Spelling are deciding factors. 

The following fields if filled out for the contact in the General Info tab would also be automatically 

mapped into the Company that gets created:

Street address

City

Country

State

Postal code

Website 


Street Address and Website have been purposefully left blank for the sake of this example:


Different Situations to consider:

If the business name is unique and present in a single contact.

A new company will be created with the business name value present in the contact. 

And the contact will be associated with the company.

If the business name and its details are similar in multiple contacts.

A new company will be created with the business name value. All contacts will get 

associated with the newly created company.

If the business name is the same in multiple contacts but its details vary between contacts. 

A new company will be created with the business name value. All contacts will get 

associated with the newly created company.The below details will be considered 

for the latest contact created.

Street address

City

Country

State

Postal code

Website


Limitations and Expected Behavior:


The setting feature is only available for admin users (agency & sub-account). Team 

members with the User Role will not have the ability to begin the migration process.


      Please Note:

Users with User Role will still see the setting, they just would not be able to do anything to it.


Once the automation settings are turned on, it will migrate all the existing contacts 

with business name. Once the migration is completed, it will automatically sync new

contacts with business name field value.

If a contact has a company associated with it already, it will not be migrated to a different company even if the Business Name is different at the time when the process is started. The migration for existing contacts can only happen if the contact doesn’t have any association with a company.

 Please Note:

Changing the Business Name for contacts already added to a Company will have no impact on the Automation.

If the automation settings are turned off, the auto sync or the migration will stop. Upon turning on the migration or auto sync will begin. 

The following Audit logs for all the activities are present for this feature.

  • Who is the User who initiated the settings option.
  • Which Contact got updated with company association.
  • Company creation.
  • Company update.

If the settings are turned off in between existing contact migration and restarted, it will start the migration process from where it stopped and complete for the remaining contacts.

The feature is applicable for contacts added by bulk import, public API, forms, etc. It will live sync between business name and company.

Please Note:

The CSV file being imported must have a column with the Column Header "Business Name", and the respective Business Names must be filled out for contacts for the contacts to get added into a company upon being imported into the CRM. (Provided that the Company Object Automation is enabled). 

If you make any errors during the import and the wrong Company gets associated to the contacts with misspelled Business Name or spacing in the Business Name that does not match the Business Name for the Company, then you will need to delete the contacts that have the issue and re-import the CSV with the correct Business Name.(Any data lost due to the deletion will not be recovered because the contact is not being restored, a new version of the contact is being created)

This process doesn’t have backward compatibility. Once a company is created based on the business name, any change in the company name or its details doesn’t reflect back on the Business Name field and other synced fields in the contact's General Info.

This doesn’t support business name update functionality. Which means once a company is created using business name, any update in business name will not affect the company attributes or its relation with the contact. 

Please Note:

The Company Object automation only serves to associate existing or new contacts, THAT ARE NOT LINKED TO A COMPANY ALREADY, with Companies that share the same Business Name. If no such company exists then a company with that Business Name will be created.

Sub-Account Settings

Would you like to ensure you never miss a call and potentially lose business opportunities? LeadConnector offers a missed-call-text-back feature that can help you with just that.

With this feature, you can automatically send a text message to missed calls, allowing you to take advantage of every chance to connect with your clients or prospects. 

Our how-to guide will give you everything you need to know to set up and use the missed-call-text-back feature.

By streamlining your communication, you can focus on growing your business. So, let's get started!

The Affiliate Manager

Affiliate Manager Workflow

Workflows have automated actions to manage affiliates efficiently, including adding contacts to the affiliates list, updating their status, and adding or removing them from a campaign. The Affiliate Created trigger is also available, simplifying managing affiliates and making the journey more organized and efficient.

Covered in this Article:

What is the Affiliate Manager Workflow capability?

Who are these new Workflow Actions and Trigger useful for?

What are the benefits of these features?


How to set up the Affiliate Manager Workflow Actions and Trigger?

The Affiliate Created Workflow Trigger

Affiliate Workflow Actions

Add to Affiliate Manager

Update Affiliate

Add to Affiliate Campaign

Remove from Affiliate Campaign


What is the Affiliate Manager Workflow capability?

The Affiliate Manager now supports several automated actions and triggers to help manage affiliates efficiently. The four steps in the Workflow include adding a contact to the affiliates list with an active status by default, updating an affiliate's status as active or inactive, adding an affiliate to a campaign, and removing an affiliate from a campaign. steps

Additionally, the Affiliate Manager now features a trigger called Affiliate Created, activated when an affiliate is created. This new automation capability can help streamline and simplify managing affiliates, allowing for a more organized and efficient affiliate management journey.

Who are these new Workflow Actions and Trigger useful for?

The new automation features for the Affiliate Manager are helpful for anyone who manages a network of affiliates, such as affiliate managers, marketing teams, and business owners. These features can help streamline managing affiliates, allowing users to automate various tasks and ensure that affiliates are appropriately categorized and assigned to the appropriate campaigns. correctly

What are the benefits of these features?

The new automation features in the Affiliate Manager offer several benefits, including:

Increased efficiency: Automation can help streamline and simplify managing affiliates, saving users time and resources.

Better organization: The new features allow for more organized and structured management of affiliates, ensuring that each Affiliate is appropriately categorized and assigned to the appropriate campaigns.

Improved accuracy: Automation can reduce errors and improve accuracy in managing affiliates, ensuring that the right actions are taken at the right time.

Increased revenue: By automating various tasks, users can focus on more critical aspects of their business and potentially increase revenue and profitability.


How to set up the Affiliate Manager Workflow Actions and Trigger?

Head to Automation>Workflows>Create Workflow.

Click on Start from Scrarch> Create New Workflow (If your Workflow does not already exist)

The Affiliate Created Workflow Trigger

Click on Add new Workflow Trigger>Search for Affiliate Created>Choose i.t


Click on Save Trigger

This workflow trigger will be fired off when an Affiliate is created in that sub-account.

Affiliate Workflow Actions

There are four actions available for the Affiliate section of Workflow Actions.

Add to Affiliate Manager

Adds a contact to the Affiliates list in the Affiliate Manager with status as active by default.

Update Affiliate

Updates the affiliate as either active or inactive.

Supported options:

  • Mark as Active
  • Mark as Inactive

Add to Affiliate Campaign

Adds an affiliate to a campaign in the Affiliate Manager>Campaigns tab. It lets you choose the desired Affiliate Campaign from a dropdown.

Remove from Affiliate Campaign

Removes an affiliate from a campaign. It lets you choose which campaign to remove them from using a dropdown.

Affiliates

The Client Portal is a dedicated platform to enhance your affiliates' interaction with your business. This secure, user-friendly interface provides affiliates access to critical information like tracking leads, commissions, payouts, and customer data tied to their affiliate links. It fosters smooth communication and streamlined operations between your organization and its affiliates.

Covered in this Article:

What is the Client Portal?

Usage Cases for Affiliate Manager data visibility on the Client Portal:


How can Affiliates Access the Client Portal?

Adding Affiliate to Campaign: 

Affiliate Sign-Up: 

Affiliate Login: 

Accessing the Affiliate Dashboard: 


What can my affiliates see in the MyPortal?

Dashboard Screen: 

Leads/Customers Screen: 

Commission Screen: 

Quick Pointers:


FAQs

Q: Where can my affiliate view their performance statistics?

Q: How can affiliates view their payment information?

Q: Can my affiliates see the details of the leads and customers who have signed up through their links?

Q: What if the affiliate is part of an inactive campaign?

Q: Can affiliates see the reasons why customers canceled?

Q: How often are the affiliate stats updated?


What is the Client Portal?

Client Portal is a centralized platform enabling clients to interact with your business across multiple domains. Logging into the portal allows clients to view and manage their affiliate commissions, join community groups, and access their membership courses. This one-stop access point enhances customer service and promotes client retention by facilitating easy communication and self-service.

Please review these articles for more details on the Client Portal:

How to set up the Client Portal?

How can my customers use the Client Portal?


Usage Cases for Affiliate Manager data visibility on the Client Portal:

Tracking Campaign Success: The dashboard on the Client Portal shows the count of leads, customers, and canceled customers who have signed up through an affiliate's links. This information can help your affiliates assess the success of their marketing efforts. They can identify which campaigns are working best and where to improve.

Viewing Payment Information: By accessing the Commission screen, affiliates can view their earned commissions, the amount owed to them, and the total revenue they have generated for your business. This transparency can encourage trust and motivate them to improve their performance further.

Identifying Effective Channels: By analyzing the leads and customers who have signed up through their links (accessible on the Leads/Customers screen), affiliates can identify which channels or platforms bring in the most sign-ups. They can then focus their efforts on these channels to maximize conversions.

Planning Future Campaigns: All the statistics in the Client Portal can inform future marketing campaigns. Affiliates can identify successful strategies from their stats and replicate these in future campaigns.

Evaluating the Impact of Inactive Campaigns: Affiliates who are part of inactive campaigns can still view their stats, even if they can't use their affiliate links. They could use these statistics to evaluate the potential impact of these campaigns if they were to become active again.

Analyzing Customer Behavior Post-Sign-Up: With information on canceled customers, affiliates can understand the reasons behind customer drop-offs and strategize ways to minimize them.

Improving Communication with the Business: Regularly checking their stats allows affiliates to have informed discussions with your team about their performance, issues, or suggestions for the affiliate program.

Please note: The information in the Client Portal can only be as accurate as the input data. Ensure all relevant data for your affiliates is correctly and promptly entered and updated.


How can Affiliates Access the Client Portal?

Adding Affiliate to Campaign: 

As an account owner, navigate to the Affiliate Manager and add your affiliate to an active campaign. Once added, they will automatically receive an email invitation to sign up on the MyPortal app.

Please Note:

If your affiliate does not receive the invitation email, advise them to check their spam or junk folders. If the email is not there, double-check that you entered their email address correctly and that the campaign is active.


Affiliate Sign-Up: 

Your affiliate should click the link in the invitation email. This will redirect them to a sign-up page. Ask them to follow the prompts to create their account.

Please Note:

If your affiliate is having trouble signing up, advise them to ensure they enter the correct details and have a strong internet connection.

Affiliate Login: 

Once your affiliate has created their account, they can log in to the MyPortal app using their credentials or a one-time password provided during the sign-up process.


Please Note:

If your affiliate is having trouble logging in, advise them to ensure they are using the correct credentials. If they forgot their password, they can reset it using the "Forgot Password" function.

Accessing the Affiliate Dashboard: 

Once logged in, your affiliate will land on the Affiliate Dashboard, where they can view their stats and affiliate links.

Please Note:

If the affiliate dashboard is not immediately visible upon login, instruct your affiliate to click on the 9 dots in the top right corner and choose "Affiliates."

This process ensures your affiliate has access to the MyPortal app, enabling them to keep track of their stats, manage their affiliate links, and easily access necessary information.


What can my affiliates see in the MyPortal?

In the MyPortal app, your affiliates can access various information and insights. Here's what they can see:

Dashboard Screen: 

Here, affiliates can view all their affiliate links associated with different campaigns they are part of. They can monitor the count of Leads, Customers, and Cancelled Customers who signed up through their affiliate links. Additionally, they can view their payment information, such as the total amount paid to them, the amount owed by the affiliate admin, and the total revenue they've generated for your business.

Please Note:

Affiliates should remember that their statistics and results might vary across different campaigns.

Leads/Customers Screen: 

On this screen, affiliates can examine the details of leads and customers who signed up through their affiliate links. This data is crucial for understanding their reach and the effectiveness of their promotional efforts.

Commission Screen: 

This screen provides a breakdown of the customers who signed up via their affiliate links, the commission amount owed to the affiliate, and the status of their payout. This allows them to track their earnings and payment status efficiently.

Please Note:

If the commission isn't reflecting in cash flows as expected, it could be due to various factors, such as return policies or the payment cycle. The Affiliate Manager just calculates the ideal amount. Make sure your affiliates know that.

Quick Pointers:

Affiliates should be aware that if they are added to an inactive campaign, they can view their stats, but their affiliate link will be disabled, preventing its use for that particular campaign.


FAQs

Q: Where can my affiliate view their performance statistics?

A: Affiliates can view their stats on the Dashboard screen in the Client Portal. Here, they can see their affiliate links, count of leads, customers, and canceled customers that have signed up through their links.

Q: How can affiliates view their payment information?

A: Affiliates can view their payment details on the Commission screen in the Client Portal. This screen shows the total amount paid to the affiliate, the amount owed by the affiliate admin, and the total revenue generated by the affiliate.

Q: Can my affiliates see the details of the leads and customers who have signed up through their links?

A: Yes, affiliates can view these details on the Leads/Customers screen in the Client Portal.

Q: What if the affiliate is part of an inactive campaign?

A: Affiliates can still view their stats even if they are part of an inactive campaign. However, their affiliate link will show as disabled, and they won't be able to use it until the campaign is activated.

Q: Can affiliates see the reasons why customers canceled?

A: The Client Portal shows the count of canceled customers but doesn't provide specific reasons for cancellation. However, this information can be valuable in identifying trends or issues that may need to be addressed.

Q: How often are the affiliate stats updated?

A: Affiliate stats are updated in real-time, so affiliates can always access the most up-to-date information in the Client Portal.

Conversations Tab

Conversations View

A Contact Engagement Score is a metric used to measure how actively and effectively a contact or lead interacts with an organization or business. It's commonly used to assess the level of interest, involvement, or responsiveness of a contact or lead. The score helps businesses prioritize their efforts in communicating with a lead, lead nurturing and sales prospecting. Here's a breakdown of the components and purpose of a Contact Engagement Score

To calculate the score, users can typically track various interactions between the contact and organization. These interactions can include email opens, calendar appointments, form submissions, and more. Each interaction type can be weighted differently based on its significance.

TABLE OF CONTENTS

Manage Scoring

  • Edit Score Profile Name and Description: With Score Builder, you can easily customize the name and description of your score profiles to ensure they align with your specific business needs and objectives.

  • Draft/ Publish : By default the score profile stays in draft state. Once the profile is published, the score will be reflected to all the contacts

Rules and score builder

  • Rule Customization: The system allows you to edit and fine-tune your scoring rules as needed.

  • Add or Subtract Points: You have full control over the scoring rules. Using the score builder, you can create rules to add or subtract points based on specific criteria, such as engagement, behavior, or any other relevant factors.

  • Saving Changes : Once any new rule is added or old rule is edited, the changes need to be saved to the score profile


Sorting and filtering in Conversations

  • Score Display: In the conversations module, users can find scores visibly associated with each contact. This at-a-glance view helps you quickly identify and focus on contacts with the highest scores.

  • Sort Contacts: Users can sort contacts based on their scores, helping you quickly identify high-priority contacts and those who require more nurturing.

  • Filtering Options: Users can filter contacts based on score ranges, allowing users to segment and target contacts with similar engagement levels.

The Conversation left panel is a new addition to the Conversations UI, which helps users filter conversations & perform various actions on them.

Features:

Bulk actions (limited to 100 conversations at a time)


You can perform Conversation specific Bulk Actions to handle multiple conversations at a time, You can perform the following Conversation Bulk Actions:

  1. Mark conversations as Read: All conversations will be marked as read
  2. Mark conversations as Unread: All conversations will be marked as unread
  3. Mark conversations as Starred: All conversations will be marked as starred
  4. Mark conversations as Unstarred: All conversations will be marked as unstarred
  5. Delete conversations: Conversations will be deleted

Filter conversations (quick filters)


You can filter Conversations based on a few filters, allowing you to narrow down your Conversations View to something you need now.

The following filters are available:

  • By conversation type
  • By assignee
  • By last message channel: Filter the conversations whose last message was from the selected channel.
  • By last message type: Filter the conversations whose last message (outbound) was from the selected type.
  • By last message direction: Filter the conversations whose last message direction was from the selected type.
  • By last outbound message type.
  • By the last outbound message action: Manual or Automated (This filter applies to messages post 9th May 2023)


Sort conversations


You can sort your Conversations on the basis of time. It helps in going through your conversations more easily.

You can sort it as follows:
- Latest to oldest

- Oldest to latest


Please Note

This will also work in combination with the Quick filters mentioned above to make Conversations more structured. 
So, in essence if you have filters applied and sort based on oldest or latest the system will also account the filters you have selected


Starred functionality:


A conversation can be marked starred. By doing so, the conversation will have an icon attached to it for identification.

To mark a conversation as starred:

Click on the star icon in the upper right corner of the conversation preview window.

If you want to unmark a conversation as starred, simply click on the star icon again.

Our email composer is equipped with the functionality of CC and BCC capabilities, providing a robust emailing experience. This feature allows users to effectively manage their communication by engaging multiple stakeholders in a single thread while preserving individual confidentiality. As an integral part of our user-friendly solutions, this feature continues to redefine user control in communication, in alignment with our commitment to offering feature-rich email experiences.

Please note:

This feature is available only in the New Message Composer and can be accessed via Labs.

Covered in this Article

What is the CC and BCC capability in the Email Composer?

Usage Cases:


How to use the CC and BCC feature?


FAQs

Q: Will a new contact be created if I add an outside email to the CC/BCC fields?

Q: What happens if I add an existing contact’s email address in the CC/BCC fields?

Q: Is the CC/BCC feature available for all email channels?

Q: How can the CC/BCC feature improve my email communications?


What is the CC and BCC capability in the Email Composer?

The CC (Carbon Copy) and BCC (Blind Carbon Copy) capabilities in the Email Composer enable you to send emails to additional recipients.

The CC function allows you to email additional recipients beyond the primary ones in the 'To' field. When you use the CC function, the email addresses of all recipients (primary and CC'd) are visible to all who receive the message.

On the other hand, the BCC function also allows you to send emails to additional recipients, but in a more private manner. When you use the BCC function, the email addresses of the BCC'd recipients are hidden from all other recipients. This means that people who receive the email will not know that the BCC'd recipients are also receiving it, thus ensuring their privacy.

Usage Cases:

Project Updates: If a team is working on a project and the project manager wants to send an update to the team members and keep higher management or other departments in the loop, they can use the CC function. The team members would be in the 'To' field, and the higher management or other departments would be in the 'CC' field. This ensures that everyone has the same information about the project's progress.

Customer Communication: In customer service situations, the support representative might be communicating directly with a customer (the 'To' field), but they might also CC their manager or another team (like the technical team) if they want to keep them informed or require their input on the conversation.

Confidential Matters: If a manager wants to email a staff member but also wants to inform the HR department without the staff member knowing, they could use BCC. The staff member's email would be in the 'To' field, and the HR department would be in the 'BCC' field. This way, the HR department stays informed about the communication without the staff member knowing.

Mass Email without Revealing Addresses: If a company wants to send out an announcement or newsletter to multiple recipients without each recipient seeing the others' email addresses (for privacy reasons), they could use the BCC field. This way, each recipient receives the email without seeing who else the email was sent to.

Vendor Communication: If a business communicates with various vendors or suppliers and needs to send a similar message to all, they can put the primary vendor in the 'To' field and CC the rest. This way, all vendors know about each other, promoting transparency, but the main communication is addressed to the primary vendor.


How to use the CC and BCC feature?


Accessing the Feature: Open the email composer by clicking the "New Email" button or "Reply" in an existing email thread.


Locating the Fields: You will see the CC and BCC fields alongside the regular "To" field. They are easily accessible and integrated seamlessly within the composer interface.

Adding Recipients: Click on the CC/BCC field to expand it. You can now enter the recipients' email addresses you wish to CC or BCC. You can select an email address from the dropdown list (which contains all your contact emails) or manually type in a new email address.


Collapsing the Fields: After adding the recipients, click on the CC/BCC field again to collapse it. The added recipients will be saved.


Syncing Changes: The new feature also supports 2-way sync. Any changes to the email recipients (added or removed) in our system will be reflected in Gmail/Outlook and vice versa.


Replying to Emails: You can only do a "reply all" to any email with CC or BCC recipients. It's important to note that you cannot remove CC/BCC recipients in the middle of a thread.


FAQs

Q: Will a new contact be created if I add an outside email to the CC/BCC fields?

A: No, a new contact will not be created if you add an outside email to the CC/BCC fields.

Q: What happens if I add an existing contact’s email address in the CC/BCC fields?

A: If you add an existing contact’s email address in the CC/BCC fields, the conversation will only show under the primary contact’s thread (the 'To' recipient) and not under the thread of the CC/BCC contact.

Q: Is the CC/BCC feature available for all email channels?

A: Yes, the CC/BCC feature is compatible with all email channels, including Mailgun, Leadconnector (2 Way Sync) - Gmail and Outlook, SMTP email, Custom Providers, and Custom Conversations Providers.


Q: How can the CC/BCC feature improve my email communications?

A: Using the CC/BCC feature, you can efficiently manage your email communications by involving multiple parties, either openly or confidentially. This offers flexibility and enhances communication by keeping all relevant parties in the loop.

This document explains how to use the workflow action - Log External Call, to log calls from third-party calling tools into the CRM.

Covered in this Article:

  1. What is the Workflow Action - Log External Call?
  2. How to use this action?


What is the Workflow Action - Log External Calls?

Using this workflow action, you can post your external calls, that take place from third-party calling tools, to the CRM. This ensures that all your communication details are centralized within the CRM for better tracking and management. You can also pass the call recordings using this action and this will be visible on the Conversations section of contact.

How to use this action?

You can effectively use this action with the Inbound Webhook Trigger. This trigger provides you with a webhook URL that you can call to share the call details, whenever a call takes place in your calling system.

Configuring the Inbound Webhook Trigger: Help Document

Once the trigger is configured, add the If/Else brach with direction field to separate inbound and outbound flows.

Note: direction field can be accessed from Inbound Webhook Trigger option

After creating two branches for Inbound calls and Outbound calls, Add "Create Contact Action. This will identify the contact on which the call should be posted using the phone numbers that you pass in the webhook. 

In Create Contact Action, map the Phone field to "From Number" in Inbound call flow and "To Number" in the Outbound call flow. This will create/identify the contact associated with the given phone number. 

Post this, Add the Log External Call action. 

For each field, Direction, Date, To, From, Call Status and Attachment, update the related values by clicking on custom values icon > Inbound Webhook Trigger.

Once the workflow is published, external calls will be logged in the CRM and visible in Conversation section of the contact.

Q. What attachment types are supported in Conversations?

A: Conversations supports the following attachment types: .pdf, .docx, .doc, .csv, .xlsx, .xls, .txt, .jpg, .jpeg, .png, .gif, .svg, .mp4, .mpeg, .mp3, .wav, .wave, .aiff, .aif, .aifc, .gsm, .ulaw, .vcf, .vcard, .pptx

Q: Why am I receiving a delivery incomplete error email from Gmail when I use a BCC address while sending emails from my 2-way sync email?    

A: You may receive a "Delivery incomplete" error from Gmail when using BCC addresses. Despite the error, your email might still be successfully posted to the CRM. This occurs because we use BCC for logging purposes, and Gmail doesn't get a delivery receipt for this BCC address. So, though the email is logged successfully you might receive the error email

LeadConnector Email

What is LeadConnector Email?

LeadConnector Email acts as an email service provider hosted by the CRM, which has Incredible Deliverability, Error Monitoring, and Better Compliance and is much cheaper when compared to any of the email service providers in the market.


Why was this feature built?

LeadConnector Email is designed to help businesses avoid the hassle of signing up for any 3rd party email service provider. In the past, when a business signed up it would need to either integrate with Mailgun or any other email service provider.

Historically, configuring SMTP has been a significant challenge for new businesses regarding getting up and running. With LeadConnector Email, sending & receiving email will work right out of the box with excellent deliverability.


LeadConnector Email Pricing

LeadConnector Email charges $0.675 for 1000 emails for all the plans at a lower cost than most major SMTP providers compared to $0.80/1000 with MailGun.


LeadConnector Email Verification Pricing (Upcoming feature)

You can turn on email verification with LeadConnector Email at $2.50 per 1000 email verifications (compared to $12.00/1000 with Mailgun!)


Ramp-Up Model:

  • Every new sub-account (location) on the LeadConnector Email System will follow the "Ramp Up Model."
  • The Email limit is multiplied each day by the number of days (till the 10th day) the sub-account has spent with us. Starting the 10th day, the sub-accont will have the limit set to 15,000 Emails/day. Below is the table which will give you a clear idea:

Day

Limit [Email]

1

100

2

200

3

300

4

400

5

500

6

600

7

700

8

800

9900
10th Day & Ongoing15,000

Please Note:

The daily counter resets daily at midnight 00:00:01 AM UTC. If the limit is reached before the rest time, the account is locked for the rest of the period.

FAQ

How can I send more than 15,000 Emails per day?

Once your sub-account hits the 10th-day mark (15,000 Emails per day), you may reach out to support and request a Limit extension.

How do I see my usage summary?

Head into your sub-account Settings > Phone > Usage Summary

Email marketing is a great way to reach customers and increase sales. But if you're not careful, you could end up in trouble. A dedicated sending domain gives you control over what appears to be coming from your business. That means you can avoid spam filters and other issues that might make your messages get caught by unwanted mail servers.

Don't let your email marketing efforts go unnoticed! Get started right away with a dedicated sending domain.


Please Note: 

Dedicated sending domains are only applicable to the users in the LC - Email system.

Covered in this article:

What is a Dedicated sending domain?

How to create a dedicated sending domain?

How to set up a dedicated sending domain for Targeted Email Categories?

How to set up a default header for a dedicated sending domain?

Ability to turn ON/OFF email tracking


FAQ


What is a Dedicated sending domain?


A dedicated sending domain allows you to send emails that appear to be coming from your brand, and this can help you maintain a better reputation with email services. Any company can create a dedicated sending domain, and it's quick and easy.

By default, all emails sent from our platform will show the name of our email-sending servers in the "sent on behalf of" or "sent via" email headers:


When you set up your own custom mail server domain, you will see a different "mailed-by", "sent on behalf", or "sent via" field.


How to create a dedicated sending domain?

You can create multiple sending domains under your account and make one active.

  1. Navigate to Settings - >  Email settings - >  Email Services


  2. If you are in the LC email system, you can find the Dedicated domain button, else please switch to the LC email system to create a custom sending domain.


  3. Click the 'Dedicated domain' button


  4. Add your domain details

    Here are instructions for common providers:

    Note
    The propagation process can take up to 24 hours. If it has been longer than 24 hours please double-check your DNS settings by following the process above


  5. Verify Domain
    Apply your new DNS records to your company’s DNS provider’s platform to activate the sending domain. Every domain host will have a slightly different method of doing this.

How to set up a dedicated sending domain for Targeted Email Categories?

You can set up domains under your account only for the Sub-account created domains. A maximum of 5 domains can be assigned to a single type.

  • Navigate to Sub-account Settings - Email Service -> SMTP Service -> Dedicated Domain and IP -> Domain Configuration
Currently domains can be assigned to Campaign, Bulk email, One-One Conversation and Workflow emails.
Default dedicated domain will be used for all other emails.

How to set up a default header for a dedicated sending domain?

You can set up default "From address and Email" for dedicated domains under your account only for the Sub-account created domains.

  • Navigate to Sub-account Settings - Email Service -> SMTP Service -> Dedicated Domain and IP -> Set headers unnder dedicated domain.

How to enable/disable the default unsubscribe link

Navigate to Settings -> Business info. Under the "General Section," you can find the settings

Check/uncheck to enable and disable the settings

Note

Before disabling the option make sure you have added an unsubscribe link on all emails sent out from the system. When a sub-account recieves a high email complaint/spam, sending will be temporarily disabled.


Customize the default unsubscribe link

Navigate to Settings -> Business info. Under the "General section," you can find the settings to control unsubscribing. Click Customize.


Ways to add the unsubscribe link

1. Directly add an unsubscribe tag in the email template.

2. Enable the global unsubscribe option without adding an unsubscribe tag in each email.


Digital laws might differ from country to country, but almost every country states that you must have an unsubscribe link in your email. The most popularly referenced law is -- US’s CAN-SPAM (Controlling the Assault of Non-Solicited Pornography And Marketing) legislation enforced by the Federal Trade Commission.

In May 2018, GDPR became a compulsory rule for any brand with subscribers in the EU.

According to article 17 of GDPR, ‘Right to erasure’, data subjects (subscribers) have the right to ask for their data to be deleted. In that case, data controllers have to comply with it. They have to delete any data when it’s no longer required for the purposes for which it was collected or the data holder/subjects withdraw consent for it to be used.

If a contact unsubscribes from an email list, they are exercising their 'Right to erasure', and the data controller (the email list owner) has to unsubscribe them and delete their data.

Non-compliance with GDPR can lead to a fine amounting to €20 million or 4% of annual global turnover, whichever is higher.


1 . Shun customer frustration: Many subscribers consent to newsletters without knowing what they will deliver. After receiving the email copy, they realized it was irrelevant to them. Then if they want to unsubscribe from the newsletter and fail to find the link. You know how frustrating it is when you can’t see the unsubscribe link inside the email. Marketers need to understand the interests and preferences of different subscribers and allow them to opt-out of the email list. It improves the email marketing strategy’s outcome as you are allowing inactive subscribers to leave the contact list.      

2. Collect feedback: You can collect valuable feedback from those subscribers who are no longer part of your contact list. You can use those feedback to understand the loopholes and optimize the email communications to meet your subscribers’ needs. 

3. Enter into the inbox: Unsubscribe links increase the possibility of entering the subscribers’ inbox rather than going into the spam folders. If people search for an unsubscribe link and don’t find it, they will put that email in the spam folder. Your account can be suspended if your spam rate exceeds the open rate.

4. Adapt anti-spam legislation: While including the unsubscribe link, every country has its law and order. It is compulsory in anti-spam legislation to give a predefined law for email marketers.  


FAQ

Go to Sub-account -> Settings -> Business Info -> General, where you can customize the opt-out message, below is the screenshot for reference:

What happens if my email already has an unsubscribe link?

In case the message already has an unsubscribe link, an unsubscribe link will be added from our side.

How to Connect Outlook Two Way Email sync?


Steps to connect

Please go to the sub-accounts Settings page. Go to the Profile tab and scroll down to the section Email (2-way sync)


Select Outlook, your email provider & click on Connect.


Complete the authorization by entering your Outlook email ID credentials.


Approve for permissions requested for LeadConnector:


On the profile page, scroll down to the section Email (2-way sync) to view your email in the connection status.


How does the 2-way sync work between the CRM and your email account?

You would need to send an email to a contact from the CRM to initiate the sync between both platforms.

Please note

The first outbound email needs to be initiated from the CRM to establish the sync


All subsequent messages in the email thread (initiated from the CRM) will be in sync. Outbound
emails sent from your email will start reflecting in the CRM and vice versa. reflect


An email thread initiated from your email will not sync with the CRM. Only email threads that were formed from the CRM will be in sync. created

If an outbound email was sent (while the sync was in active state) and later the sync was disconnected from the CRM, the subsequent messages in the thread will stop syncing. This will also stop syncing new outbound emails sent from the CRM.


Please note

Attachments of up to 3 MB size work across this sync, any attachments larger than this size will cause the message to not sync over. 
Supported file types: JPG,JPEG,PNG,MP4,MPEG,ZIP,RAR,PDF,DOC,DOCX,TXT

Other functionalities

Update Email: This helps users change their connected email ID to another one without disconnecting the previous connection.

New outbound emails from the CRM will start syncing with the newly added email address. Upcoming messages in the previously connected email ID (same thread) will stop syncing between the CRM & personal email. 

Disconnect Email: This helps users to disconnect their connection and stop the sync with the CRM. Post disconnect, emails or messages will not sync between both platforms.


Auto Bcc Sync

Auto Bcc Sync allows you to include the smart Bcc address in the Cc or Bcc field when sending an email from Outlook. Doing so will automatically add the conversation and contact to your CRM, streamlining communication and ensuring all relevant data is centralized.


Does Two-way sync only work with individual emails or bulk emails and workflows?

How the sender domain mapping works for different types of emails:

Individual Email: On connecting a personal email account (Outlook), the outlook email ID will be considered as the sender domain for the emails sent by the user for individual emails.

Bulk Email: If the user enters their email ID (after setting up the two-way sync) under the “From Field”, the user email ID will be considered the sender domain for the bulk emails. If the field is blank, the sub-account level provider will be considered the sender domain.

Bulk Email: If the user enters an email ID different from their email ID connected (Outlook), it will consider the sub-account level provider as the sender domain.

Workflow & Automation: Emails will continue to go from sub-account level providers.

What is this feature?

Our innovative Risk Assessment feature is invaluable for your email marketing endeavors. It scrutinizes your imported contact list, providing a comprehensive overview of email deliverability and potential risks.

Delving into the specifics, it uses our internal Bulk Verification technology to dissect the email list, dividing addresses into categories such as 'deliverable,' 'undeliverable,' 'catch-all,' and 'unknown'. It further segments these categories by risk level: 'high', 'low,' 'medium,' and 'unknown'. This granular insight enables a clearer understanding of your contact list's deliverability prospects.


But it doesn't stop at merely providing data. It enhances your email strategy by helping reduce bounce rates and unnecessary blocks on your email-sending capabilities. It also prompts enabling the email verification feature for those not using it, further improving the overall success rate of your email campaigns.

In essence, this feature is your strategic partner in optimizing the deliverability and effectiveness of your email marketing campaigns, helping you reach your audience more consistently and efficiently.


Risk Categories

Risk CategoriesDescription

High
Email addresses falling into this category are highly likely to be undeliverable. This could be due to several reasons, such as the email account being non-existent, the domain not having any MX records, or the recipient's mailbox being full.
MediumEmail addresses in this category may or may not be deliverable. This could be because the email server responded ambiguously, the domain was identified as a catch-all, or the email address was generated randomly.
LowEmail addresses in this category are likely to be deliverable. This indicates the server responded positively to the validation request, and the email address appears properly structured and associated with a legitimate domain.
UnknownEmail addresses in this category could not be validated due to unforeseen errors or temporary issues with the recipient's email server. The deliverability of these emails remains uncertain unless re-validated later.

Usage Cases:

Bulk email validation is a powerful tool for businesses and organizations of all sizes, and it is used in several practical scenarios. Here are some examples:

Email Marketing Campaigns: Businesses regularly email marketing campaigns, sending newsletters, promotional emails, or updates to their customers. Using a list of unverified emails can lead to high bounce rates, negatively affecting the sender's reputation and deliverability. Bulk email validation helps businesses clean their email lists and ensure they reach their intended audience.

User Registration Validation: When users sign up for a service, they often provide an email address. However, they might make a typo, use an email address that doesn't exist, or provide a fake one. Bulk email validation can help to verify that these emails are valid before they are added to the company's database, ensuring that the company can communicate effectively with its users.

CRM Data Cleaning: Over time, email addresses in a company's Customer Relationship Management (CRM) system can become outdated. People may leave jobs, change their email addresses, or abandon old accounts. Regularly validating these email addresses in bulk ensures the company's CRM data remains up to date.

E-commerce Platforms: Online retailers must communicate with customers about orders, shipping, and other related issues. Bulk email validation ensures that transactional emails (like order confirmations) and marketing emails reach the customers' inboxes.

Community Updates: Non-profit organizations, clubs, or communities often must send updates to their members. Bulk email validation ensures that these emails don't bounce back and the information reaches all intended recipients.

Education Institutes: Universities, colleges, and schools often communicate with students, parents, or staff through email. Whether it's fee updates, event announcements, or educational material distribution, these institutions must ensure that their emails are not sent to invalid addresses.

Research and Surveys: Many researchers and companies rely on email to distribute surveys and gather responses. They need to ensure they're sending these critical communications to valid email addresses to get accurate and reliable data.

Job Portals and Recruitment Companies: They often communicate with job seekers and employers via email, sending job notifications, interview schedules, and more. Bulk email validation can help these companies maintain effective communication.


How to use this feature?

Upon importing a CSV to the CRM, if your sub-account is on the LC Email SMTP and you have not enabled the individual Email Validation feature, Your imported CSV will be analyzed in the backend. And then a popup will be displayed, and an Email sent to the Sub account team members about the risk analysis of that CSV import's Email Addresses. The Email and Popup will encourage users to enable Email Verification.

Body of the Email that will be sent (Example data):

Subject line: Email content for list of high risk
_______________________________________
Hi [Friendly Business Name],

We scanned your latest Contact Import and found the following with the email addresses:

Deliverable: 71.84%
High Risk: 17.81%

Activating native email validation can eliminate potential risks by ensuring that you don't send to non-valid email addresses. Once activated, the system will not attempt to send to any email address marked as invalid.

Support article link: [Insert Link].

If you have any further questions or need assistance managing your email list, please feel free to contact our support team using the blue check mark in-app. We are here to help!

Best regards,

[Admin name]

Risk Assessment tab:

The Risk Assessment tab in Settings> Email Services> Risk Assessment will keep track of historical data for the imports regarding Email Addresses Risk Assessment.

The Risk Assessment tab provides a comprehensive overview of your email verifications and their results. Here's a breakdown of the user interface:

Records: This shows how many bulk email verification records or jobs are displayed. 

Date Range: The date range provided at the top,, indicates the time frame for the email verification records displayed.

Import Name: This column lists the name of each email verification job. It fetches the name of the Bulk Import action from Bulk Actions. Each name should be unique, as that helps you identify and track the respective job.

Created at: This column displays the exact date and time each job was created. It's formatted in the pattern "Day Month Date Year Time Zone."

No. of Emails: This column shows the total number of email addresses included in each job for verification.

Deliverable (%): This column indicates the percentage of email addresses in the job verified and found to be deliverable or valid.

Undeliverable (%): This column shows the percentage of email addresses in the job that was verified and found to be undeliverable or invalid.

Unknown (%): This column displays the percentage of email addresses in the job that could not be conclusively verified, meaning their deliverability status remains unknown.

Pagination: The "Page 1 of 1" at the bottom suggests that you're on the first page of the results. If more records could be displayed on one page, you would use these controls to navigate the pages.


FAQs

What does the Deliverable percentage in the Risk Assessment tab mean?

The Deliverable percentage indicates the proportion of email addresses verified and found valid and reachable in a given job. This percentage is calculated by dividing the number of deliverable email addresses by the total number of email addresses in the job, then multiplying the result by 100.

How is the Undeliverable percentage calculated in the Risk Assessment tab?

The Undeliverable percentage represents the proportion of email addresses in a specific job verified and found invalid or unreachable. This percentage is determined by dividing the number of undeliverable email addresses by the total number of email addresses in the job, then multiplying the result by 100.

What does the Unknown percentage in the Risk Assessment tab signify?

The Unknown percentage shows the proportion of email addresses in a particular job that could not be definitively verified. This means that their deliverability status is unclear. It is calculated by dividing the number of emails with unknown status by the total number of emails in the job, then multiplying the result by 100.

What is the "Import Name" in the Risk Assessment tab?

The "Import Name" is a unique identifier for each job or batch of email addresses you submit for verification. It allows you to track and manage each job separately.

Why might the date and time in the "Created at" column be important?

The date and time information in the "Created at" column helps you understand when each email verification job was initiated. This can be particularly useful for tracking progress over time or determining the order in which jobs were processed.

Why isn’t every email verified?

Not all email addresses can be verified for various reasons, such as server restrictions, privacy settings, or network issues. These email addresses are categorized as 'Unknown'.

What happens if the email server doesn't respond in time?

If the email server doesn't respond in a timely manner, the verification system may categorize the email address as 'Unknown.' The system could not determine whether the email address is deliverable or undeliverable.

What do I do if I see many 'Unknown' email addresses in my list?

Many 'Unknown' results might suggest server issues or other technical problems. You may want to consider re-running the verification process at a later time. If the problem persists, consider reaching out to Support. The formatting of the email address could be an issue, or the CSV format might have some problems.

What should be the next step after getting the Risk Assessment report?

After receiving the Risk Assessment report, you should consider removing or re-checking the 'Undeliverable' and 'Unknown' email addresses from your list before executing any email campaign. This can help improve your campaign's deliverability rate and overall effectiveness.

What does "No. of Emails" mean in the Risk Assessment tab?

The "No. of Emails" represents the total count of email addresses included in a particular batch or job for verification. This gives you an idea of the scale of the email verification job.

Why do different jobs/batches have different Deliverable, Undeliverable, and Unknown percentages?

Different jobs or batches may have varying percentages of Deliverable, Undeliverable, and Unknown emails due to the quality of the email addresses in each batch. For instance, a batch containing older or outdated email addresses may have a higher Undeliverable percentage than a batch with recently collected addresses.

What can I do to improve the deliverability percentage?

To improve deliverability, you can collect the email addresses through reliable sources, update your email lists regularly, and use double opt-in methods to ensure the email addresses belong to people genuinely interested in receiving your communication.

Why are some emails categorized as Deliverable, but they still bounce?

Deliverable emails can still bounce due to the recipient's mailbox being full, the mail server being temporarily unavailable, or the email being marked as Spam by the recipient's email service.

Can I re-run the email verification for a specific batch?

Yes, you can re-run the email verification for a specific batch. This could be particularly helpful in case a significant percentage of emails were marked as Unknown, which might be due to temporary server issues.

How often should I verify my email lists?

The frequency of email list verification can depend on various factors like list growth, bounce rates, etc. However, it's a good practice to verify your email list before any significant email campaign.

How does the email verification process impact my overall email marketing strategy?

Email verification is crucial for maintaining a healthy email marketing strategy. It helps you remove invalid or undeliverable emails, thus improving the deliverability rate, protecting your sender reputation, and increasing the effectiveness of your email campaigns.

Does the verification process respect user privacy?

Yes, the email verification process respects user privacy. It doesn't involve accessing the contents of any email, but rather, it checks whether an email address is valid and capable of receiving emails.

Is the email verification process secure?

Yes, the email verification process is designed to be secure. The data you submit for verification is typically processed over secure connections, and the resulting information is handled according to the service provider's data handling and privacy policies.

Workflow AI

What is Workflow AI?

Workflow AI is a revolutionary workflow action that harnesses the power of artificial intelligence to enhance your business automation strategies. It integrates seamlessly with your CRM, responding intelligently to various triggers and actions to streamline your workflows. Utilizing advanced AI like GPT-4, this action generates dynamic and contextually aware responses, enriching your communication processes. It interoperates with various platforms, from social media to e-commerce and learning management systems, enabling diverse applications. Workflow AI also supports intricate data formatting and computations, further ensuring precision and efficiency in your operations. As a workflow action, Workflow AI empowers your business to be more proactive, responsive, and adaptable.

Usage Cases in Symphony with other Workflow Actions and triggers:

Public Figures' Social Media Auto-responder: Use Inbound Webhooks from supported social media platforms to trigger a Workflow AI response. The response can be a general appreciation message for every new follower or a direct message.

Automated Birthday Wishes: Trigger a 'Birthday Reminder' to activate Workflow AI, sending a standard birthday wish to email or SMS to contacts.

Fitness Progress Updates: Once a 'Lesson Completed' trigger is activated in a fitness app, the workflow could send the user progress updates via SMS or email.

E-commerce Abandoned Cart Recovery: Upon an 'Abandoned Checkout' trigger from Shopify, send a Workflow AI-generated reminder email or SMS about the abandoned carts.

Automated Webinar Follow-ups: Using the CRM's 'Appointment Status' trigger after a webinar, the workflow could send all attendees a follow-up email via Workflow AI.

Real Estate Opportunity Management: Upon the 'Opportunity Status Changed' trigger, automatically update Google Sheets with new data and send update emails to potential clients.

Course Completion Certificates: After 'Product Completed' is triggered in an online course, use Workflow AI to generate a congratulatory message and certificate to be sent to the course finisher.

Automated Restaurant Reservation Confirmation: When 'Customer Booked Appointment' is triggered, the workflow could send a Workflow AI-generated confirmation message with booking details.

Product Recommendations: After 'Order Placed' from Shopify, a preliminary step fetches relevant product data, which feeds into Workflow AI to generate product recommendations via email or SMS.

Post-Purchase Survey: Trigger 'Payment Received' to activate Workflow AI, sending customers a thank-you message and a post-purchase survey link.

Job Application Auto-responder: Using the CRM's native forms for job applications, once a 'Form Submitted' trigger is activated, it could trigger a Workflow AI response, sending an acknowledgment to each applicant.

Study Plans: Upon 'Lesson Started', trigger a workflow to create a study plan using Workflow AI and send it to the student via email or SMS.

Financial Advice: After 'Payment Received' is triggered, use Workflow AI to generate financial advice based on payment history and send it via email or SMS.

CRM Event Follow-up: After the 'Order Submitted' trigger is activated, the workflow could send a follow-up email via Workflow AI, asking for feedback on the customer's shopping experience.

Automated E-commerce Product Reviews: After an 'Order Fulfilled' trigger from Shopify, use Workflow AI to email the customer requesting a product review.

TikTok Influencer Campaign Management: Upon 'TikTok Form Submitted', the workflow could automatically add the influencer to the Affiliate Manager and send them a welcome message via Workflow AI.

Automated Event RSVPs: Use an 'Inbound Webhook' from an event registration form to trigger a Workflow AI response, sending an RSVP confirmation to each registrant.

Fitness Goal Tracking: After a 'Task Reminder' trigger related to a workout schedule, use Workflow AI to send updates and motivation to the user.

Client Onboarding in SaaS Companies: Upon 'Membership New Signup', use Workflow AI to send a welcome message and onboarding instructions to the new user.

Hotel Booking Confirmation: Upon the 'Customer Booked Appointment' trigger, the workflow could send a Workflow AI-generated confirmation message with hotel booking details.


How to set up Workflow AI-Chat GPT?

Create a workflow or use an existing workflow. After adding an appropriate Workflow Trigger, Scroll to Actions and add the Workflow AI- Chat GPT Action:


Prompt:

Ask ChatGPT for anything to generate completions for. E.g., Could you generate a response for a customer message?


Dynamic prompts can be created by utilizing custom values.


You can begin by trying the prompt already loaded into the examples.


Temperature:

Sampling temperature refers to the parameter used in generating AI text with varying levels of randomness. It is set between the range of 0 and 1. Higher values, such as 0.8, result in more diverse and random output. In contrast, lower values, like 0.2, produce more focused and predictable responses. Adjusting the sampling temperature allows users to customize the level of creativity and control in the AI-generated content.


Output

After setting up the ChatGPT, you can use the results in further actions in your Workflow. {{chatgpt.1.response}}

Sample Prompts

1. Generate a response

Reply to customer message

Prompt:

Your name is {{user.name}}. You are a helpful, creative, clever, and very friendly assistant. Generate a best response email to {{contact.name}} from {{user.name}} for the below message. 
{{message.body}}

2. Generate Email/SMS content

Dynamic content for emails/sms

Prompt:

Generate email content without subject to promote the product in this link YOUR_WEBSITE to {{contact.name}} from {{user.name}}

3. Check Intent

To check whether the message has positive or negative intent with the power of Workflow AI and take actions accordingly

Prompt:

Just reply only with POSITIVE, if the below message has POSITIVE INTENT and negative if the message has NEGATIVE INTENT 
{{message.body}}

4. Translate

Translate your default content to the contact's language

Prompt:

Translate the below content from English to DESIRED_LANGUAGE 
Hey {{contact.full_name}}, Thanks for reaching us. Let us know how we can help you!

FAQs

Q: Can I customize the behavior and responses of the Workflow AI Action?

A: Absolutely! You can configure the Workflow AI Action by setting the desired temperature, which controls the randomness of the generated responses. Higher temperatures produce more creative but less predictable responses, while lower temperatures produce more focused and deterministic outputs.

Q: Are there any limitations or considerations when using the Workflow AI Action?

A: While the Workflow AI Action offers powerful capabilities, it's important to note that it relies on the underlying ChatGPT model. The responses generated by the AI may not always be perfect, and it's recommended to review and validate the output before sending it to customers. Additionally, extensive testing and monitoring are crucial to ensure the quality and accuracy of the generated responses.

Q: Can I use other Workflow actions and Triggers with the Workflow AI Action?

A: Absolutely! The Workflow AI Action can seamlessly integrate with other Workflow actions and Triggers to enhance the capabilities of your workflows. Here are some examples:

Custom Lead Qualification:

Trigger: Inbound Webhook with lead data.

Action: Engage with the lead using ChatGPT within the Workflow AI Action. Based on the conversation, use other Workflow actions to qualify the lead and trigger appropriate actions, such as assigning a sales representative or updating the lead status.

Intelligent Customer Support:

Trigger: Customer Replied or Inbound Webhook with support ticket data.

Action: Utilize ChatGPT within the Workflow AI Action to understand the customer's query or issue. I'd like you to combine it with other Workflow actions to generate a well-informed and personalized response. Additional actions can include updating the ticket status, assigning it to a support agent, or sending a response via email.

Dynamic Content Generation:

Trigger: Inbound Webhook with a dynamic content request.

Action: Generate dynamic content using ChatGPT within the Workflow AI Action. I'd like you to combine it with other Workflow actions to process the generated content, make modifications or validations, and deliver it through the desired communication channel.

Contextual Sales Recommendations:

Trigger: Contact Changed or Inbound Webhook with contact data.

Action: Analyze the contact's profile and previous interactions using ChatGPT within the Workflow AI Action. Based on this analysis, use other Workflow actions to generate personalized sales recommendations. These recommendations can be sent via email, SMS, or integrated with a CRM dashboard for the sales team.

Automated Event Registrations:

Trigger: Inbound Webhook with event registration data.

Action: Confirm event registrations and provide additional details using ChatGPT within the Workflow AI Action. Combine it with other Workflow actions to process registration data, update attendee lists, and send personalized event reminders or follow-up messages based on the ChatGPT-generated content.

By combining the power of the Workflow AI Action with other Workflow actions and Triggers, you can create intelligent and dynamic workflows that automate processes, personalize interactions, and streamline your business operations.

Membership and Communities

Memberships

Step 1: Choose a system theme

Creating a product will by default select the classic theme, but we provide different system themes to choose from to best match your digital product with your personal brand! Keep in mind that each Theme will provide a different look, feel, and overall experience for your Members

How to select a theme

  • Select the Product you wish to apply a theme 
  • Click Customize

  • Theme gallery is the placeholder for system themes which is part of this release and user-created themes (My Themes) will be coming in subsequent releases. Theme gallery allows users to apply a theme or customize an existing theme.

Step 2: Customize your theme

Customize the product page of the theme

  • In the theme, gallery click on customize to open the customizations builder.
  • Customize the theme settings.
  • To customize the sections of your page, simply click into the Section you would like to edit in the sidebar editor on the left-hand side. Once you have clicked inside of a section, you can see all of the different customization options laid out. 

The following set of properties can be changed under theme settings

        1. Primary Color - This Applies to Button, Top Icons, Lesson Progress, Course Title, Category Title, Lesson title, Instructor Title

        2. Secondary Color - Instructor Name, Instructor Description, Lesson Description, Category Description, Button Text

        3. Primary Font - This Applies to Button, Top Icons, Lesson Progress, Course Title, Category Title, Lesson title, Instructor Title

        4. Secondary Font - Instructor Name, Instructor Bio, Lesson Description, Category Description, Button Text

        5. Logo placement - It decides if the logo will be placed in the header or hero section 


The following set of properties can be changed under Sections

  1. Header:

Navigation:

Sites->Membership->Products->Customize->Gallery>Customize>Sections—> Header

Background: 

Background color picker


Alignment: 

Can be left, Right or Center

  1. Hero

Navigation: 

Sites->Membership->Products->Customize->Gallery>Customize>Sections—> Hero

Size: 

Extra Small, Small, Medium, Large

Course Title: 

Font, Alignment

Course Description: 

Font, Alignment

Background: 

Image-Size Dev team, Transparency, Color Picker

Button:

Content, Font, BG Color, Alignment

  1. Lesson Progress

Navigation: 

Sites->Membership->Products->Customize->Gallery>Customize>Sections—> Lesson 

Progress

Background: 

Color

Font

Progress Color:

Colour

  1. Course Body

Navigation:

Sites->Membership->Products->Customize->Gallery>Customize>Sections—> Course Body

Category Font:

Type

Size

Colour

Sub Category Font:

Type

Colour 

Size

Category Description Font:

Type

Colour

Size

Lesson Font:

Type

Colour

Size

Lesson Description Font:

Type

Colour

Size

Background: 

Image

Color, Transparency

  1. Instructor

Navigation:

Sites->Membership->Products->Customize->Gallery>Customize>Sections—> Instructor

Background:

Color

Heading Font:

Colour

Type

Size

Name Font:

Colour

Type

Size

Title Font:

Colour

Type

Size

Bio Font:

Colour

Type

Size

The following set of properties can be changed under Sections in Lesson page:

  1. Lesson Body:

Navigation:

Sites->Membership->Products->Customize->Gallery>Customize>Lesson>Sections—> Lesson Body

Background: 

Background color 


Title: 

Font type

Font Colour

Description:

Font Type

Font Colour

Button:

Content

Colour

Font Type

Font Colour

Next Lesson:

Background Colour

Title:Font,Colour

Next Lesson Button-Colour,Font Type,Font Colour

Lesson title:Font Colour

       2.  Course Navigation:

  Background Colour

  Category:Font Type,Font Colour

  Lesson: Font Type,Font Colour

  Highlight:Colour,Font Colour

  Bread Crumb:Font Type,Font Colour

  Next Category:Background Colour,Font Type,Font Colour

       3.   Instructor

Navigation:

Sites->Membership->Products->Customize->Gallery>Customize>Sections—> Instructor

Background:

Color

Heading Font:

Colour

Type

Size

Name Font:

Colour

Type

Size

Title Font:

Colour

Type

Size

Bio Font:

Colour

Type

Size

Please Note:

When "save changes" button is clicked after customizing anything in the theme settings it will reflect in the preview.

Reset to default will change all the settings to default values of the theme.

If sections are customized after theme setting are changed, sections customization will override theme setting customizations.

Step 3 : Apply or save your theme

Now that you have picked a theme for your Product and customized your Product Pages, the last step is to apply it.

Once your theme is applied this will be the final preview your Members will see and interact with!

  • Select your Product.
  • Click Customize.
  • Browse the theme gallery and click on apply for the theme you wish to apply
  • Alternatively, you can choose to customize the theme and then apply by clicking on apply on the top right corner

Save Theme Button:
Save the theme for global use in your location by using the save theme button. When you click on "save changes" the changes will only be stored for the theme and will not be available for global use.

The theme can then be saved for global use in the locations if the user clicks on the "save theme" button.

Please Note : 

"Save Theme" will save only the latest changes which are stored after save changes are clicked. All "unsaved changes" won't be reflected.

When a template is customized and saved for global use it won't affect all the other products which are already using the same theme. 

When a user applies the theme again to a product the new changes should start reflecting.

Applying the theme

Apply a theme to a specific product


Clicking on "apply" from the theme gallery will apply the theme to the product directly.

You can customize the theme and then after clicking on save changes you can click on the apply button to apply the theme to the particular product. Apply button will change to applied.


 Please Note: 

When a theme is applied using the apply button it will only get applied to the selected product and  customization set won't be available globally to the t in the location.


Save Changes:

Customize and save drafts of a theme at the product level. You can customize a system-generated theme and save it as a draft without applying it to any of the products.

When you click on "save changes" the changes will be stored for the theme as a draft.

The Draft theme (With changes) can be applied later to the product. Draft themes are not global and won't be available across all locations.

Please Note :

If "save changes" is clicked on a theme which is not applied to a product, then the theme will be updated with the changes and can be used in the same product at a later point. It won't change the theme properties globally.


Instructor details, Favicon, and Logo: 

  • Navigate to product details
  • Click on customizations
  • Update the instructor details, favicon, and logo 

Communities

Communities is an interactive, centralized platform that combines various educational resources, allowing members to create, connect, and engage in groups based on specific interests. It facilitates interactive discussions and knowledge sharing among members by offering features such as domain setup, group creation, customization, and user management. This versatile platform effectively blends learning, networking, and community building into a seamless user experience.

Communities can be enabled for sub-accounts under Labs

Covered in this Article


What is the Communities feature?

The Communities feature is a comprehensive tool provided by the CRM platform that enables the creation and management of online communities. It is a hub for discussion, learning, networking, and knowledge-sharing.

Key Components of the Communities Feature:

Group Creation:

Users can create multiple groups based on specific interests, topics, or industries, including the option to soft delete and restore groups for better control. These groups serve as sub-communities where members can engage in focused discussions, share insights, and collaborate on projects.

Domain Setup:

The platform allows users to set up their custom domain or use a pre-configured subdomain, providing a personalized experience for community members.

Community Customization:

Users can customize their communities, including group name, description, URL, branding (colors, logos, cover images), promotional links, and the ability to toggle the visibility of phone numbers and email addresses under the Social Media section. This allows users to create a unique and branded experience for their community members.

Group Management:

The person who creates a group becomes the owner and assumes administrative responsibilities and privileges. This feature offers different roles for group management, including admins, moderators, and members, each with its permissions and responsibilities. Enhanced filtering options enable users to sort by user status and roles, and security measures are in place to protect email visibility.

Membership Management:

Potential members can join a group by creating a community profile and signing up via the group's unique URL. Once they sign up, they can participate in any available community groups. Additional features include easy search for members and direct access to profiles from the View Members page.

Learning and Networking Opportunities:

The communities provide a platform for users to learn from various courses, participate in discussions and events, vote in polls, and connect with like-minded individuals.

Usage Cases:

E-Learning Platforms:

An organization offering various online courses could use the Communities feature to set up different groups for each course or subject. This allows learners to engage in focused discussions, share insights, ask questions, and collaborate on projects about their course. Instructors can share resources, answer questions, and facilitate discussions.

Corporate Communication:

The Communities feature could allow various departments to collaborate in a large corporation. Each department could have its group, enabling focused discussions, announcements, document sharing, and project collaboration. It could also be used for company-wide announcements and discussions.

Product Development:

Tech companies could use Communities to set up groups for beta testers of their new products. These users can share their feedback, report bugs, and suggest improvements, while the company can provide updates, answer questions, and gather valuable user insight for product enhancement.

Customer Support:

Companies can create a community where customers can join groups based on their product or service. Within these groups, customers can ask questions, share tips and tricks, and provide product feedback. On the other hand, companies can offer support, share product updates, and engage with their user base.

Professional Associations:

Associations or clubs could use the Communities feature to engage their members. They could have different groups for various activities or interests, allowing members to join the ones they are interested in. These groups can be used for sharing information, planning events, and having discussions.

Marketing Agencies:

Agencies could set up communities for their clients, with separate groups for different services or campaigns. This allows for efficient coordination and communication about project updates, performance metrics, and other relevant discussions.


How to set up and configure the Communities feature in your sub-account?


Step 1: Setting up your Communities Domain

Please Note:

If you have already configured a domain for your ClientPortal, you will not need to do so again for your Communities portal as Communities uses the same domain as the Client Portal.

To configure your domain for communities, follow these steps:

Start by accessing the "Communities" section within the Memberships area in the sidebar.

Head to Settings


It will automatically navigate you to Client Portal's Domain Settings, as both features use the same domain.

Please Note:

At this point, you have two options available to you:


Option 1: Utilize a pre-configured subdomain under "clientclub.net". This subdomain is already set up and ready to be used immediately. Simply select this option if it suits your needs. You will still need to scroll down and hit Update Domain to get this to work.

Option 2: Set up your own custom domain. If you prefer to use a domain that you own, follow the next steps.


To configure a custom domain for your client portal, follow these steps:

  1. Using the left sidebar, navigate to the Sites tab then the Client Portal section. Proceed to the "Domain Setup." area.


  2.  
  3. Click on the option for a Custom domain and input your desired domain name. 


Before you can successfully set up an A or CNAME record, you must ensure that you have already configured your domain registrar to point to the specific IP address or server provided to you. This is an essential step in ensuring that your domain correctly refers to your server, enabling it to function properly.

A Record, also known as an Address Record, maps your domain to an individual server IP address. On the other hand, a CNAME record, or Canonical Name record, is used to map your domain (or subdomain) to another domain name.

Here's a step-by-step guide on how to add A records and CNAME records:

  • Login to your Domain Registrar's dashboard.
  • Navigate to the DNS settings.
  • Here, you will find an option to add a new record.
  • Select the type of record you want to add (A or CNAME).
  • Enter the details - for an A record, this would be the IP address 34.136.231.88
  • ; for a CNAME record, this would be the target domain preview.clientclub.net
  • Save your changes.


Different registrars might have slight variations in the procedure, so here are some specific guides for popular registrars:

GoDaddy

NameCheap

Bluehost

HostGator

Google Domains


Please note:

It's important to replace the "designated IP address or server" placeholder with your actual IP address or server information in the record. Make sure to fill out this field accurately, as it's essential to correctly configure your domain settings.

Once you have entered the DNS records in your Domain registrar, give it a reasonable time to propagate them (depending on your domain registrar), and hit Update Domain.

Please note:

While the following resources provide a good general overview, the exact time of DNS propagation can vary due to several factors, such as the TTL set for the DNS record, your ISP's update frequency, and geographical factors. Typically, it is suggested to allow between 24 to 48 hours for DNS propagation.

Siteground: "Understand DNS Propagation & Why it Takes so Long"
GoDaddy: "What factors affect DNS propagation time? | Domains"
HostGator: "Propagation Times | HostGator Support"
DomainKing.NG: "DNS Propagation – how long does it take?"
AccuWeb Hosting: "How long Nameservers propagation could take after ..."
Namecheap: "DNS Propagation – Explained - Domains"
Webcentral: "What is the standard DNS propagation period?"

Step 2: Setting up Groups

After setting up your domain, you will have the ability to create groups within a community. Please note that the domain setup process is separate from creating community groups. With enhanced features, you can create, delete, and restore groups, allowing for more robust management.

In communities, groups refer to specific spaces or subdomains where members can connect.

Each subaccount can create multiple groups, allowing for more focused discussions and collaboration within specific areas of interest.

To initiate the creation of a group, access the "Communities" section of the platform. Head to "Groups".

Locate and click the "Create Group" option.

Here, you will be presented with a form or settings page to fill in the necessary details for your group.

Group Name: This field is where you provide a unique name for your group, which will serve as the main identifier for your community. This should be related to the group's purpose or topic. For example, if you're creating a group about digital marketing, you might name it "Digital Marketing Enthusiasts."

Group URL (Group Slug): This is the unique web address where your group will be located. It should be easy to remember and share. Typically, it might be a simplified or abbreviated version of your group name, such as "digital-marketing," if your group name is "Digital Marketing Enthusiasts."

Group Description: This section should briefly outline what your group is about, the kind of discussions that will take place, and what members can expect from being a part of the group. For instance, you might describe the Digital Marketing Enthusiasts group as "A community for digital marketing professionals and enthusiasts to share strategies, tools, and trends in the industry."

Brand Color: Choose a color that represents your group or your brand. This color will be used in your group's design to provide a consistent look and feel.

Favicon: This small icon will appear in the browser tab when someone is viewing your group. Ideally, It should be a small version of your logo or a symbol representing your group.

Cover Image: The main image will appear at the top of your group's page. It should be visually appealing and relevant to your group's topic. The recommended aspect ratio is 16:9, and the image should be clear at a resolution of 200x200 pixels.

Logo: This is the main logo for your group, which will appear in various places, such as the group switcher. It should ideally be square, with a 1:1 aspect ratio, and clear at a resolution of 200x200 pixels.

Once you have filled in the required details, create the group using the provided options or buttons.


Please Note:

The individual who initiates the group creation process automatically becomes the owner of that group, assuming administrative responsibilities and privileges within the group.

Step 3: How do members get added to the group?

To enable members to join your group, you must provide them with a unique URL specific to the group within your community. This URL will direct them to a customized page where they can sign up and create a profile shared across all the groups within the community. Here's a detailed version of the process:

Invite Potential Members: You can send personalized invitations via email, SMS, or other communication platforms, providing potential members with the group's unique URL.

Joining the Group: Members can click on the provided URL, leading them to a dedicated page where they can join the group.

Please Note

Members can join multiple groups within the community based on their interests, preferences, or professional needs, fostering a more dynamic and interactive community experience.

Send an email or SMS to potential members, providing them with the group's URL and inviting them to join.


Members can click on the provided URL, leading them to a page where they can join the group.

Upon clicking "Join Group," they will be prompted to sign up for the client portal.


Once they sign up or log in, they gain access to the client portal and can choose to participate in any of the available groups within the community.

Members can join multiple groups within the community based on their interests or preferences.


Step 4: Customizing your Groups

You can customize your community groups to align with your brand and community objectives. The initial customization you performed in Step 2 sets the default for your group, but additional options are available to refine your group's appearance and functionality further. Here's a comprehensive guide:

Details:

Group Name and Description:

You can choose a suitable name for your group that aligns with its purpose.

Add a descriptive group description to provide information and context to potential members.

Group URL:

Customize the group's URL to make it more relevant or memorable for your audience.

Each Community Group is initially assigned a default URL, but you can personalize it according to your preferences.

Please Note:

You can only modify the group URL once, so it's crucial to double-check your desired URL before saving the changes.
  • Access the group settings by clicking on the settings icon at the top of the page.
  • In the left menu, locate and click on the "Details" section.
  • You will find the option to change the group URL within the Details section.
  • Once you have made the necessary adjustments, save the changes.
  • Congratulations! Your group now has a customized URL. To confirm the update, you can revisit the settings modal and ensure that your current URL reflects the newly set one.

By following these steps, you can customize your Community group's URL. Please review your changes before finalizing them, as there is a one-time limitation on modifying the group URL.


Branding:

Primary Color: Choose a color that mirrors your brand, providing consistency throughout the group.

Group Logo: Upload a logo that will appear in the group switcher for easy identification.

Cover Image: Add a visually appealing image that resonates with your group's theme or branding.

Favicon: Include a small icon for browser tabs, reinforcing your group's visual identity.

Select a primary color that represents your brand identity. This color will be reflected throughout your group, creating a cohesive visual experience.

Upload a group logo in the group switcher, allowing members to identify and navigate to your group easily.

Add a cover image to personalize the group's appearance and showcase relevant visuals or branding elements.

Include a favicon, a small icon displayed in the browser tab, to further enhance your group's branding.

Promotional Links:

Integration: Incorporate promotional links within your group, adding a title and corresponding URL.


Visibility: These links can be seen by your community members, facilitating the sharing of relevant resources or announcements.


By leveraging these customization options, you can tailor your community group to create a unique and branded experience for your members.


Activate or Deactivate your groups:

You can delete and restore groups easily, giving you better control over group management.
Head over to Memberships> Communities> Status tab for your desired group:


You can switch it to Active to activate your group or Inactive to Deactivate your group.

You can filter your list of visible groups by whether they are Active or Inactive by clicking on this filter:


Step 5: Sub Account Users Inside community groups

  • Creation of Community Group: All user levels, including account users, admins, agency users, and agency admins, can create a community group.
  • Ownership: Upon creating a group, the user becomes the owner of that particular group. It's crucial to note that once ownership is established, it cannot be transferred to another individual.
  • Admin Privileges: Sub-account and agency admins are automatically granted admin rights within the community when they access it via the platform. These privileges enable them to oversee and manage various aspects of the community group.
  • Moderator Role: In contrast, sub-account and agency users are assigned the role of group moderators when they log in from the builder platform. This role permits them to handle day-to-day moderation tasks within the group.
  • Effective Management: This hierarchy and distinction of roles ensure that the community group is effectively managed and moderated. Admins have broader control, while moderators focus on maintaining a positive community environment.
  • User Participation: Through these role assignments, sub-account admins, agency admins, sub-account users, and agency users can all actively engage in and oversee the community groups within the platform, each according to their specific permissions and responsibilities.

FAQs

Q: Can I integrate my existing website with my Communities platform?

A: Direct integration of your existing website with the Communities platform is unavailable. However, a connection between the two can be established by sharing links to your Community groups on your website and, likewise, placing website links within your Community. This approach ensures seamless navigation for users between both platforms.


Q: Is there a limit to the number of groups I can create within my Community?

A: As of the current phase, there are no restrictions on the number of groups or users within the groups you can create in a Community. It's important to be aware that this may be subject to change in the future, so staying updated with the platform's policies and guidelines is advisable.

Q: What happens if I change the URL of my community group?

A: Modifying a community group's URL has significant implications on its accessibility. Any previously distributed links containing the old URL will become inactive. Users will need to utilize the newly updated URL to gain access to the group. Careful consideration and communication of such changes are essential to avoid confusion.

Q: Can I monitor the activities within my community groups?

A: Monitoring capabilities are provided for admins and group owners within community groups. These roles have access to oversee discussions, handle membership, and if necessary, intervene to ensure a conducive and engaging community atmosphere.

Q: How can I promote active engagement in my community groups?

A: Fostering active participation within community groups can be accomplished through various methods. Regularly disseminating compelling content, posing intriguing questions, organizing events or challenges, and stimulating members to exchange views and ideas are all effective ways to invigorate engagement. It is the continuous interaction and encouragement that creates a lively and interactive community environment.

Comprehensive Guide on Members Management Inside Community Groups

Community groups within a CRM platform are the beating heart of an online community. They foster interactive discussions, connect individuals with shared interests, and serve as knowledge-sharing hubs. Managing these groups effectively is crucial for maintaining a healthy and productive environment. This article provides a comprehensive guide on managing members within community groups.

Understanding Member Roles

A well-structured community group has a hierarchy of roles, each with distinct responsibilities and capabilities. Here are the four key roles:

1. Owner:

As the highest-ranking role, an Owner holds full administrative control over the group, even the authority to delete the group if necessary.

2. Admin:

Admins manage group members effectively. They can add or remove members and assign administrative privileges, thus allowing others to assist in managing the group.

3. Moderators:

Moderators maintain the group's integrity. They monitor and moderate content within the group, ensuring it adheres to community guidelines and fosters a respectful environment.

4. Contributors:

Contributors are the group's lifeblood, driving discussions and engaging with content. They can post discussions, add comments, and show their engagement with likes.

Understanding these roles enables effective management and moderation, ensuring each member can participate appropriately.

RoleCreate PostsModerate PostsManage MembersDelete Group
Owner✔️✔️✔️✔️
Admin✔️✔️✔️
Moderator✔️✔️
Contributor✔️

Here's a breakdown of the table:

Create Posts: This is the ability to create and publish new posts in the group. All roles except for 'Owner' and 'Admin' may or may not have this ability, depending on the settings established by the 'Owner.'

Moderate Posts: This is the ability to moderate, edit, or delete posts made by other group members. This ability is typically reserved for 'Owners,' 'Admins,' and 'Moderators.'

Manage Members: This includes adding new members, changing members' roles, and removing members from the group. Typically, this ability is reserved for 'Owners' and 'Admins.'

Delete Group: This is the ability to delete the group entirely. This ability is typically reserved only for the 'Owner' to prevent accidental or unauthorized deletion of the group.


Inviting Members to the Group

In the near future, we have plans to introduce in-app methods for inviting members to join your group. However, currently, you can initiate the process by copying the group URL and utilizing it in email and SMS campaigns to invite your members to join the community group. Here's a rephrased version:

In the upcoming updates, we will introduce convenient in-app methods to invite members directly to your group.

In the meantime, you can begin by copying the unique group URL provided.

Utilize this URL in your email and SMS campaigns, encouraging your members to join the community group. 

Including the group URL in your campaigns enables your members to access and join the community group easily.

Please Note:

You can create custom values for each Group URL and drop the custom values in your email/sms campaigns and automations. That way if you decide to change a Group URL you can just go ahead and change it in the custom values and send it again to everyone who has received it and to new entrants.


As we continue to enhance the platform, we aim to introduce more streamlined and integrated ways of inviting members to join your group within the app.


Modifying Member Roles and Access Control

Admins and owners can manage the access of group members within the community. To modify the access of a member, follow these steps:

  • When logged in to the group, navigate to the "People" tab at the top of the page.
  • In the "People" tab, you can search or apply filters to locate the specific member you wish to modify.
  • Once you have found the member, click the three dots icon on their profile's right side.
  • Select the appropriate role or access level you want to assign to the member from the options presented.
  • By choosing the relevant role, you can effectively update and manage the member's access within the group.
  • By utilizing the "People" tab and the available options, admins and owners can easily control and adjust the access levels of group members based on their responsibilities and permissions.

    Changing Member Email/Phone Visibility:


    Users can click on their initials on the top right to access their View or Edit Profile area. From here, they can access the Social Media tab to choose whether or not they wish their Email/Phone to be visible. 

Removing Members from a Group

Admins and owners have the authority to manage group members' access, including the ability to remove them from the group. To revoke access from a member, follow these steps:

  • While logged in to the group, navigate to the "People" tab at the top of the page.
  • In the "People" tab, you can search or apply filters to locate the specific member you wish to remove.
  • Once you have identified the member, click the three dots icon on their profile's right side.
  • From the options available, select the "Remove from Group" option.
  • By selecting this option, you effectively remove the member's access and privileges from the group.
  • By utilizing the "People" tab and following these steps, admins and owners can easily manage the access of group members, including the ability to remove them from the group when necessary.

Migrating Members from Existing Communities

Transitioning to Communities from an existing platform is a straightforward process. 

  • Create a group within Communities, ensuring the group name matches or aligns with your existing platform.
  • Configure the branding of the group to maintain consistency with your previous platform. This includes selecting the same custom domain and group name you have used before.
  • To facilitate a smooth transition, sending welcome emails to your existing clients, notifying them about the move to Communities, and inviting them to join the new group are recommended.
  • As a welcoming gesture to new members, pin a post in the group that provides a warm introduction and sets the expectations for their participation.

FAQs

Q: Can I set up an automated invitation for new clients added to my CRM?

A: As of now, Communities doesn't support automated invitations. However, it is a feature we want to add in the future. You can manually invite new clients by copying and sharing the group URL.


Q: I have a large list of potential members. Is there a way to invite them all at once?

A: You can invite multiple members at once by sending out a mass email or SMS campaign with the group URL included. This makes it easy for them to access and join the community.

Q: Can members invite others to the group, or is this feature exclusive to admins and owners?

A: Typically, members can share the group URL with others, effectively inviting them. However, to maintain control over group membership, Admins and Owners can remove anyone they do not wish to allow in a group. Private Groups are in the timeline for later.

Q: I sent an invitation, but the member hasn't joined yet. Can I resend the invitation?

A: Absolutely. It's possible the invitation was missed, or they haven't had a chance to join yet. Resend the group URL to give them another opportunity to join.

Q: Can I personalize the invitation sent to potential members?

A: Invitations can be personalized within your CRM, email, or SMS platform when you share the group URL. However, the Communities platform currently doesn't support the personalization of invitations within the system.

Q: What happens when an invited member tries to join the group?

A: When an invited member clicks on the group URL, they are directed to the group where they can request to join. They are admitted automatically upon signing up.

Q: Can I track who has accepted the invitation and joined the group?

A: Yes, within the "People" tab in your group, you can see all the members of your group, including those who have recently joined. This allows you to keep track of membership and engagement levels.

Content Management in Communities encompasses several components facilitating a dynamic and engaging community environment. These include:

Group Channels: These are thematic or topic-based categories within a community group that aids in organizing discussions and facilitating relevant conversations. Admins have the exclusive privilege to create these channels.

Posts: These are the main form of content within a group. Members can create rich posts which can be associated with a specific channel. Posts can include various types of content, such as texts, images, videos, and other attachments, providing a comprehensive way to share information or spark discussions.

Home Timeline: This centralized hub displays posts from all members across all channels within the group. It provides a comprehensive overview of the group's activities, keeping members updated on the latest conversations and developments.

Embedding Videos: Posts in the community can host videos from various platforms like YouTube, Vimeo, Wistia, and Loom. This allows for more engaging and interactive content within posts.

Attachments: Posts within the community also support including various file formats such as images, GIFs, and other media. This feature further enriches the content of the posts.

Comments and Likes: These serve as key drivers for engagement within the group. Members can comment on posts, include various types of content in their comments, and express their appreciation for posts and comments through likes.

Post Deletion: Admins and moderators can delete any posts within the group that violates the community's guidelines. Additionally, members have the right to delete their posts and comments.

Together, these components provide a comprehensive Content Management system within Communities, fostering vibrant and interactive discussions and promoting community among members.

Usage Cases for different combinations of Content Management:

Brand Awareness Campaign: A company can use Communities to raise awareness about its new product line. The company created a new group channel specifically for this campaign, and regular posts are made featuring images, GIFs, and embedded videos showcasing the products. Invitations are sent to customers and potential clients to join the community and participate in the discussion. This strategy utilizes Group Channels, Posts, Video Embedding, and Inviting Members.

Customer Support Forum: A software company uses Communities to provide customer support. Different group channels are set up for different software modules. Customers post their queries or problems in the respective channels, and the company's support team responds promptly, including video tutorials and document attachments when necessary. The Home Timeline keeps all members updated on ongoing issues and their solutions. The company can also use this community to invite new users. This case employs Group Channels, Posts, Attachments, Home Timeline, and Inviting Members.

Education/Training Program: An online education platform can use Communities to deliver its courses. Different group channels are set up for different courses or topics. The instructors can create posts for each lesson, embed videos, attach lesson materials, and start discussions. Students can ask questions or discuss the material in the comments. The Home Timeline helps students to stay updated on new posts and ongoing discussions across different channels. This scenario leverages Group Channels, Posts, Embedding Videos, Attachments, Comments and Likes, and Home Timeline.

Internal Communication for Businesses: A company can use Communities to facilitate internal communication. Various group channels are created for different departments or project teams. Team members create posts to update their progress, ask questions, share relevant materials, etc. The Home Timeline ensures everyone stays updated on what's happening in other teams or departments. The company also can invite new employees to the relevant groups. This situation combines Group Channels, Posts, Attachments, Comments and Likes, Home Timeline, and Inviting Members.

Community Engagement for NGOs: A non-profit organization can use Communities to engage with its community of supporters and volunteers. Various channels can be created based on different programs or causes. The organization can post updates, share stories, ask for feedback, or start discussions related to their work. Supporters and volunteers can respond with comments or likes, share their thoughts, and spread the word. This application utilizes Group Channels, Posts, Comments and Likes, and Home Timeline.


How to Manage Content in Communities?

Creating Group Channels:

Multiple channels are available within each group to categorize discussions and facilitate organized conversations. Only admins have the privilege to create these channels. 

  • To create a channel, locate and click the "Add Channel" button in the group interface's left bar.
  • A modal window will appear, prompting you to provide specific details for the channel creation.

    Channel Name

    For instance: "Marketing Reports"
    This should be a brief, succinct name for your channel that encapsulates its purpose. You have a limit of 15 characters for this field, meaning your channel name should be short.


    Channel Description

    Example: "A space for dialogue and sharing around our marketing reports."
    This is a brief summary of your channel and the discussions it intends to facilitate. It should provide a clear context for potential members. Remember that you have a maximum of 60 characters for this description, so it should be concise yet informative.


    Channel Icon

    Select a distinctive icon that visually symbolizes your channel. This icon will be displayed next to your channel name, offering members a visual cue that helps them identify your channel quickly.

  • In the modal, enter a suitable name for the channel that clearly represents its purpose.
  • Additionally, provide a brief channel description to give members an understanding of the topic or theme of the channel.
  • Select a cool channel icon from the available options to enhance the visual appeal.
  • Once you have entered the channel name, description, and selected an icon, create the channel.

How to create a post

Members can create rich posts within the group, each associated with a specific channel. Before creating a post, ensuring the desired channel has been created is important. Here's a rephrased version of the process:

  • To create a new post, navigate to the desired channel within the group.
  • Enter a suitable title for your post within the channel, summarizing the content or topic.
  • Provide a detailed description of the designated area for context and additional information.
  • You can include attachments such as videos, PDFs, images, and GIFs to enrich your post.
  •  

Additionally, our platform supports video embedding from popular sources like YouTube, Vimeo, and Loom.

Post Title:

What's your headline? Please provide a concise yet descriptive title to summarize your post content.


Post Body:

Write your main content here. Be it an announcement, question, or discussion starter, express your thoughts clearly and engagingly.


Add Image:

You can add visual appeal to your post by including images. Click the upload button or drag and drop an image file into the designated area. You can upload files in SVG, PNG, JPG, or GIF formats, with a maximum size of 800x400px.


Add Video:

Include videos in your post for a more dynamic presentation. Upload an MP4 video file by clicking the upload button or using the drag-and-drop feature.


Embed Youtube or Loom Video:

  • Posts in the community support hosting videos from various platforms such as YouTube, Vimeo, Wistia, and Loom. If you wish to attach a video from another platform to your post, follow these steps:
  • Locate the video you want to share on the respective platform.
  • Obtain the share link of the public video from that platform.
  • Navigate to the "Create Post" section within the community.
  • At the bottom of the post-creation interface, click on the video icon.
  • In the designated text area, paste the share link of the video that you obtained earlier.
  • After pasting the link, Click on Add Link and the video will be embedded within your post.


Add Attachment:

Supplement your post with files like PDFs, CSVs, or XLSX files. To upload, click the upload button or drag and drop the file into the designated area.


Add Link:

Hyperlinking text in your post can lead readers to additional resources or relevant content. To add a hyperlink, highlight the text you want to link, paste your URL in the designated area, and click 'Add Link'.


Add Emoji:

Make your post more engaging and expressive by adding emojis. Search for or select an emoji from our extensive library, which includes a wide array of emojis divided into standard categories.


Channel Dropdown

You can choose which Group Channel you want to post in and create a new Group Channel when adding a new post.


Publish Post

Once you have finalized the content of your post, click on the "Publish Post" button to publish it.


Home Timeline

To get a comprehensive overview of what is happening inside your group, navigate to the home timeline. It is the designated space where you can view posts from all members across all channels in one convenient location. Regularly checking the home timeline lets you stay informed and engaged with the ongoing conversations and updates within your group.

The home timeline serves as a centralized hub that displays posts from all members across all channels within the group. Accessing the home timeline lets you conveniently stay updated on your group's latest activities and discussions.


Comments and Likes

, Posts within the group provide the functionality for comments and likes, which are crucial in driving engagement. Comments can include various types of content such as images, videos, and links. 

Comments and likes serve as important drivers for engagement within the group. To comment on a post, follow these steps:

  • Open the post you wish to comment on within the group.
  • Within the post, you will find a comment section where you can start writing your comment.
  • Feel free to express your thoughts, provide additional information, or engage in a discussion related to the post.
  • Furthermore, comments can include attachments such as images, videos, and links, allowing for a more dynamic conversation.
  • Additionally, you can reply to a specific comment within the thread, further fostering discussions and interactions.
  • You can like a Post or Comment by hitting the thumbs-up icon.

Deleting a Post

Admins and moderators have the authority to delete any posts within the group if they find them to be in violation of the terms and conditions. Additionally, members can delete their posts and comments. Follow these steps to delete a post:


  • Locate the post you want to delete within the group.
  • On the right side of the post, you will find three dots icon.
  • Click on the three dots icon to reveal a dropdown menu of options.
  • From the menu, select the "Delete Post" option.
  • By selecting this option, the post will be permanently removed from the group

FAQs

Q: How many images can I attach to a single post?

A: You can attach as many images as you like to a single post. However, we recommend limiting the number of images per post to ensure optimal loading times and readability.

Q: Can I change the title of my post after it has been published?

A: Yes, you can edit your post title after publication. Go to the post, click on the three dots icon at the top, and select 'Edit Post'. You can then modify your title as needed.

Q: What is the maximum size of video files I can upload?

A: File Size restrictions will be defined later for this feature. For optimal performance, we recommend keeping your video files below 100MB. (This is not the official file size limit.)

A: When you add a hyperlink to your post, users can click on the linked text to be taken directly to the linked URL. This is a great way to provide additional resources or references without cluttering your post.

Q: Can I use emojis in my post title?

A: Yes, you can use emojis in your post title. However, remember that using emojis should enhance the readability and understanding of your title, not detract from it. Always consider your audience and your post's context when choosing emojis.

How to access the importer

  • Go to Memberships > Courses > Products > Create Product > Import


Best Practices:

  • To optimize your experience, it's recommended to refrain from using custom CSS. 

  • Create a backup of your themes. This precautionary step allows you to revert to your original settings if needed.
  • Initiate the migration during off-hours to minimize any potential impact on your learners while using the course.


Steps to import course

Follow these steps to import your courses:

Step 1: Create a Learner profile

  • Create a learner profile on the platform you are importing from
    • Ensure you are creating a new contact within the platform you are importing from using the system provided email ID. 
  • Once created, go back to the Course Importer screen and enter the password you used to create the account in the previous step.
  • Add the learner domain in the domain field (the domain where you enter learner login credentials).
  • Click the "Import" button

Step 2: Importing process

  • Once the import process has started, it will log you in via learner credentials and start importing the courses.
  • While progress will be shown, make sure to click the "Refresh" button to get an accurate status.
  • To cancel the importing process, click the "Cancel" button.
  • Tabs can be switched while importing, but do not close the tab or window.
  • All videos, images and text content will be migrated for courses (and lessons).

Note: The import will only bring in lessons that have been published. Additionally, the assignments, quizzes, and assessments will not be included in the import process.

The preferred themes for the Library and Product sections are Encore Site and Premier Product, respectively.

Step 3: Successful importation 

  • Once the courses are successfully imported, they will appear under the Products section.
  • Last updated will appear under the Import section, stating when the last process took place.

FAQs

  • What causes an authentication error?

Authentication errors appear when the added domain or credentials are incorrect. To resolve this, carefully verify the credentials again and ensure they are correct before initiating the import process.

  • What causes a "course import failed" error?

    Possible reasons for import failure:
    • Incorrect Theme: Ensure that the selected theme is correct.
    • Credential Verification: Double-check the accuracy of the provided credentials.
    • Valid Domain: Confirm that the provided domain is compatible with the "/login" path. For example, "domainName/login" should lead to the login page.
    • Retry Option: If the import fails, users can click on "retry" to resume the process from where it left off.
    • Cancellation Clarification: If a user cancels the import, it will be considered as canceled by the user, and any new imports will start from the beginning.


How do levels and points work? 

Points are earned when others like your posts, comments, and replies. 1 like = 1 point for the post or comment author.


Number of points required to reach a certain level:

Level 1 - 
0 points
Level 2 - 
5 points
Level 3 - 
20 points
Level 4 - 
65 points
Level 5 - 
155 points
Level 6 - 
515 points
Level 7 - 
2015 points
Level 8 - 
8015 points
Level 9 - 
33015 points


After reaching a level:

  • A member's profile badge will reflect their current level.
  • Users can accordingly see the points required to reach the next level
  • The circular progress bar is completed after a level is reached

Note that the member levels are at the group level. A member at level 3 will be at that level in that particular group. If they join another group, they will start at level 1, like all new members.

Leaderboard

Users can also view leaderboards for the group they are currently in to see how their levels stacks up against other members. This will give a preview of which courses unlock at certain levels as well as the custom level names for each group.
You can find members who earned the highest points in the past 7 days, 30 days, and overall.


Rewards

  • Rewards - Group admins/ owners can choose to add offline rewards as texts. Maximum 3 rewards can be added. Example - Win $50 after reaching level 5. 
  • To add a reward (as an admin), go to Settings > Gamification & Rewards > Rewards.
  • Once Rewards are added, they are reflected on the left nav bar inside the Leaderboard Tab.

Note that rewards cannot be linked to any gamification level as of now. All rewards added need to be managed offline.

Contacts / SmartLists

Contact

Multiple Phone Numbers for a Contact allows users to efficiently manage multiple phone numbers for a single contact efficiently, thereby improving communication and organization. From adding and editing multiple numbers to designating a primary contact, this feature is about optimizing user experience and streamlining workflows.


This feature can be found under the Labs section in the Sub-Account Settings. By default, it is turned off and users need to enable it manually.


Covered in this Article:

What is this feature?

Usage Cases:


How to use this feature?


FAQs

Q: What happens if I don't designate a primary phone number?

Q: Can I call on any of the additional phone numbers?

Q: What new features are expected to be added in the future?

Q: Will the additional phone numbers sync with my other devices where I have mobile apps installed?

Q: Can I change the labels once they're set?

What is this feature?


The Multiple Phone Numbers for a Contact feature is designed to enhance the user experience in managing contact information within a CRM system. Here are some detailed aspects of this feature:


Adding Multiple Phone Numbers: This feature enables users to add up to eleven phone numbers for a single contact. This capability provides greater flexibility for users who frequently need to manage clients or leads with multiple contact numbers. This could include home, work, mobile numbers, or different numbers that a client prefers to use at different times.


Convenient Management and Editing: All the phone numbers added to the contact can be easily managed and edited within the contact details page. This feature makes it easy to update contact information as it changes, ensuring that the CRM always contains the most accurate and up-to-date information.


Designation of a Primary Phone Number: Users can designate a primary phone number for all actions and interactions with the contact. This primary phone number will be the default for all communication activities unless otherwise specified, ensuring consistency in communication.


Phone Number Labels: To better categorize and differentiate the contact's phone numbers, users can add labels to each phone number. Current labels include Home, Landline, Mobile, and Work. Each label can be selected only once for a contact.


Calling on Additional Phone Numbers: The feature also allows users to call on any of the additional phone numbers, giving them more flexibility in communication.


Upcoming Enhancements: Future enhancements to this feature include conversation support for additional phone numbers, bulk import functionality for adding multiple phone numbers, and availability of additional phone numbers during Contact Export.


Usage Cases:
Streamlined Customer Service: A business could use this feature to reach its customers more effectively. The service representative can try another if a customer cannot be reached on one number. This flexibility can lead to faster resolution times, higher customer satisfaction, and improved customer retention rates.


Effective Sales Process: In sales, time is of the essence. Sales representatives can quickly try another if a lead is not responding to one number. This feature could help reduce the lead response time and increase the likelihood of converting leads into customers.


Enhanced Marketing Campaigns: Businesses running multichannel marketing campaigns could use different phone numbers to reach customers based on their preferences or past responses. This can help improve campaign success rates and deliver personalized customer experiences.


Reliable Vendor Management: Companies often deal with vendors who have multiple contact points. Storing and categorizing these within the vendor contact can improve communication efficiency and ensure seamless operations.


Effective Employee Communication: In larger corporations, employees might have different contact numbers for different departments or roles. Storing and managing these multiple numbers can streamline internal communication and enhance productivity.


Emergency Response Situations: Multiple contact numbers can be a lifesaver in healthcare or disaster management industries. Emergency response teams can reach out to patients or affected people more effectively if one contact number is not available or reachable.


Managing International Business Contacts: For businesses operating in different countries, keeping track of international dialing codes and multiple phone numbers for overseas contacts can be challenging. This feature can help manage such information conveniently, leading to smoother international communication.


How to use this feature?


Add multiple phone numbers to contact:


Go to your contacts page.


Create a new contact or choose an existing one. You can add multiple phone numbers for both new contacts and by editing existing ones.


You will see a 'Phone Numbers' section within the contact's details.
Click on 'Add Phone Numbers.'


Please Note:

You can do this up to 11 times per contact. Including the original primary number.

Edit or manage phone numbers:


To edit a phone number, click the 'Edit' button next to the phone number.

You can then change the phone number, delete it, or change the associated label.


Designate a primary phone number:


You can set one of the phone numbers as the 'Primary Phone Number.'

The primary phone number will be the default contact point for all interactions with that contact.

To do this, click the 'Mark as Primary' checkbox next to the phone number you want to designate.


Add labels to phone numbers:


To help categorize the phone numbers, you can add labels such as 'Home,' 'Landline,' 'Mobile,' and 'Work.'

Choose the appropriate label from the dropdown menu when adding or editing a phone number.


Make a call on an additional phone number:


You can call any of the added phone numbers from the contact's details.

Click on the 'Call' button next to the phone number you wish to call.


FAQs
Q: What happens if I don't designate a primary phone number?
A: In such cases, the first phone number you entered will be treated as the primary contact number.


Q: Can I call on any of the additional phone numbers?
A: Yes, you can call on any additional phone number.


Q: What new features are expected to be added in the future?
A: We're working on adding conversation support for additional phone numbers, a bulk import functionality for adding multiple phone numbers, and making the additional phone numbers available during contact export.


Q: Will the additional phone numbers sync with my other devices where I have mobile apps installed?
A: Yes, as long as your devices are connected to the internet, the additional phone numbers will sync across all your devices.


Q: Can I change the labels once they're set?
A: Yes, you can edit the labels anytime you want from the contact details page.


Marketplace Apps

How to Find an App

  1. In your account, click on the App Marketplace option in the left menu bar.
    ** Note: If the App Marketplace option isn't visible, activate it from the sub-account labs.

  2. Use the search bar to input the app name or browse through the list.

  3. To narrow down your search, use the left sidebar menu to filter results by category.

  4. Click on an app that catches your interest to view in-depth details about it.
Reviewing App Details

Upon selecting an app, you’ll find:

  • App Name
  • Tagline
  • Comprehensive App Description
  • App Images
  • App Category
  • Version of the App
  • Name of the App Provider
  • App pricing: Free or paid. If paid, it's pricing information and plans supported.
  • Distribution Type
  • Permission Details: Delve deep into this section to understand the extent of access the app will have post-installation.
  • Features or Plugins Included: These can range from custom conversation providers to workflow actions and triggers.
  • Resources: Contains links to the app provider’s website.

    ** Note: Support for third-party apps is provided by their respective developers.


Installing & Uninstalling Apps

How to Install an App 

1. On the app details page, click Install in the top-right corner.


2. Revisit the app's information and, if content, click ‘Allow & Install’.


3. Follow the subsequent steps in the provider’s connection flow. This might involve logging into the app account and granting necessary permissions.


4. Post successful installation, any additional features/plugins bundled with the app will be integrated into the sub-account. These plugins/features can include:

- Custom conversation providers
- Workflow action or triggers

** Note: Installed apps are accessible under the 'Installed' tab.


Install a Paid App

Certain apps can be paid in nature. Depending upon the payment preference selected by the app provider (within the platform or External payment page), the payment will be processed during the installation process.

  • On the app details page, click Install in the top-right corner.
  • Revisit the app's information and pricing details, if content, click ‘Allow & Install’.
  • Select the plan you wish to proceed with and click on 'Confirm'
  • On confirming, the app amount you opted for will be charged on your card on file and the installation will be successful.

  • Please note that if you don't have a card added at the account level, you won't be able to proceed with the installation. Please visit company billing page, add your card details & retry installing the app.

  • If the app payment needs to be done outside the platform, on clicking 'Allow & Install' during the installation process, you will be redirected to the app provider's pricing and payment page. Select the pricing type and complete the payment. On successful payment, you will be redirected to App Marketplace with the app being in 'Installed' state. 

Install an app with distribution type agency & subaccount


1. Agency & Subaccount: Such apps are installable at both agency and subaccount levels. Installation and uninstallation actions for this distribution type must begin at the agency level.


2. Distribution type Sub-account: These apps are only available at the sub-account level. Actions related to these apps can only be executed at the sub-account level.


How to Uninstall an App

  1. Click on the App Marketplace option.
  2. Navigate to ‘Installed Apps’.
  3. Choose the app you wish to disconnect.
  4. Click ‘Uninstall’ located in the top-right corner.
  5. Confirm the action in the dialog box by selecting Uninstall.

    ** Note: Uninstalling an app will also remove any associated plugins/features from the sub-account.

    - Custom conversation providers
    - Workflow action or triggers

Client Portal Web and Mobile APP

Step 1: App Customisations
The App Icon Image will be used to create the app icon that appears in the app drawer, loading screens and on various store listings.

The Image needs to be uploaded only in PNG format with resolution 1024 X 1024


You can add custom carousel to help guide first time users through the experience.Edit each carousel description.

Images need to be uploaded in SVG format with dimension 392 X 440


Colors will dictate branding for your app.Enhance you presence by including your own brand colors

Enter the Hex Code of your primary colour


Play Store Graphic is used to depict your branding in google play store.

Required dimension is 1024 X 500 In PNG Format


Step 2: Business Profile
Google Developer account

It's necessary to register for a Google Developer account in order to upload Android apps. Your Developer account is where you'll submit, as well as manage your apps. It costs a one-time fee of $25.

We recommend setting up a second Google account for this purpose, so you can separate it from your other Google services (Gmail, Google Drive, Google+, etc.) if you already have a personal account.
How-To:

Register for an Android Develop account here

You'll need to log into the Google account you'd like to use.

You'll be taken through a 4-step registration process. Check the agreement box and click Continue to payment.


Next, a pop-up window will prompt you to input your billing information. After you've filled it out, click Pay.


NOTE: For both the developer accounts, please make sure to choose Organization for the entity type / account type and that the names match. We will run into App submission issues if you do not do this.
To create this account, you'll need a "D-U-N-S" number for your organization.


Apple Developer Account

All apps in the iTunes Store are submitted through Apple Developer accounts. In order to publish your app for iOS devices, you will need to sign up for an Apple Developer account. Apple requires each business to have their own account

Enrolment is $99, and renews annually.

Membership is now available at no cost for eligible organizations, including non profit organizations, accredited educational institutions, and government entities based in the United States. Click Here for more details on eligibility requirements.

Step by Step Guide for enrolling. If you run into any issues, we recommend contacting Apple support directly at 1-800-633-2152.

Step 1 : Create your ID -Go to https://developer.apple.com/programs/enroll. You will then be asked to enter or create a new Apple ID. We recommend you create a new Apple ID that reflects your business name. This way your personal ID is separate from your business account

Step 2 : Developer Agreement - You will be prompted to read and verify that you have read Apple’s Developer Agreement

Step 3 : Choosing An Entity - Here you will be prompted to select an Entity Type. There are three options: Individual, Organization, or Government Organization. The entity type is what Apple uses to display as your Developer Name. For example, as an Individual, your Developer Name will be your full name. As an Organization, your Developer Name will be your Business’ Name.

We highly recommend that you register as an Organization. Apple has emphasized per Item 4.2.6 in the Developer Agreement that the App Name and Developer Name need to match in order for your application to be approved


If Enrolling as an Organization,You'll need an Apple ID as well as the following to get started

A D-U-N-S® Number Register Here - Learn More

Legal Entity Status: Your organization must be a legal entity so that it can be entered into contracts with Apple. Apple does not accept DBAs, fictitious businesses, trade names, or branches.
Legal Binding Authority as the person enrolling your organization in Apple’s Developer Program, you must have the legal authority to bind your organization to legal agreements. You must be the organization’s owner/founder, executive team member, senior project lead, or have legal authority granted to you by a senior employee.If your legal status is a sole proprietorship/single person business, enroll as an individual.

Step 4 : Contact Information : After you select your entity type, Apple will want you to enter and confirm your contact information

Step 5 : Payment & Confirmation : After entering in your payment information, Apple will ask you to complete and confirm your purchase.


Step 6: Email Confirmation : You should receive an email confirmation of your order with a link to verify your email address. Follow the instructions to confirm your account. Now you are an Apple Developer!

Additional Items:

Your account renews yearly and is required so your application runs properly

Log into itunesconnect.apple.com and developer.apple.com using your Apple ID login information

Confirmation of your account can take up to 48 hours by Apple

In order to successfully publish iOS applications, ensure you have logged in and accepted any additional Terms of Service prompts, and that you do not have Two Factor Authentication enabled.

NOTE: For both the developer accounts, please make sure to choose Organization for the entity type / account type and that the names match. We will run into App submission issues if you do not do this.
To create this account, you'll need a "D-U-N-S" number for your organization.

Step 3: Terms And Condition Page
You TnC page must have (EULA) and these terms must make it clear that there is no tolerance for objectionable content or abusive user
If you do not already have T&C page, you can do a Google search for a T&C builder and guide. termsfeed.com.
Step 4: Privacy Policy URL
For privacy policy and T&C, these page should NOT contain any links to the original landing page where you sells your plans/subscriptions, otherwise, Apple would reject the App submission.

You can build your Privacy Policy page on this website freeprivacypolicy.com

Step 4: Android and IOS Review
Once Step 4 is completed our team will start developing your app and will connect with you if anything else is requeired.
Typically it takes 7-10 working days to get the app live if the data is submitted correctly.
FAQ
Q: What happens after I submit the customized Whitelabel app for review and approval?
A: After you submit the app for review, the team will review the details and send it for approval to the respective app stores (e.g., App Store and Play Store). The app undergoes a standard review process conducted by the app store's guidelines. Once approved, the app will become live and accessible to users.


Q: Can I distribute the Whitelabel app through app stores other than the App Store and Play Store?
A: Currently, distribution of Whitelabel apps through the App Store and Play Store is supported`. These are the most widely used app distribution platforms, ensuring maximum reach and accessibility for your app. Our Team may not directly support alternative distribution methods.


, and that you do not have Two Factor Authentication enabled.

Custom Values

CONTACT

Contact > Full name: {{contact.name}}

Contact > First name: {{contact.first_name}}

Contact > Last name: {{contact.last_name}}

Contact > Email: {{contact.email}}

Contact > Phone: {{contact.phone}} or **{{contact.phone_raw}}

Contact > Phone (Recommended for trigger links & UTM): Tel:{{contact.phone_raw}}

Contact > Company name: {{contact.company_name}}

Contact > Full Address: {{contact.full_address}}

Contact > Address 1: {{contact.address1}}

Contact > City: {{contact.city}}

Contact > State: {{contact.state}}

Contact > Postal Code: {{contact.postal_code}}

Contact > Time Zone {{contact.timezone}}

Contact > Date of Birth: {{contact.date_of_birth}}

Contact > Source: {{contact.source}}

Contact > Website: {{contact.website}}

Contact > ID :{{contact.id}}

USER 

User > Full Name: {{user.name}}

User > First Name: {{user.first_name}}

User > Last Name: {{user.last_name}}

User > Email: {{user.email}}

User > Phone: {{user.phone}} or **{{user.phone_raw}}

User > Signature: {{user.email_signature}}

User > Calendar Link: {{user.calendar_link}}

User > Appointment Phone: ** {{appointment.user.phone_raw}}

User > Twilio Phone: {{user.twilio_phone_number}}

User > Twilio Phone raw format: {{user.twilio_phone_number_raw}}

APPOINTMENT 

Appointment > Title: {{appointment.title}}

Appointment > Start Date Time: {{appointment.start_time}}

Appointment > Start Date: {{appointment.only_start_date}}

Appointment > Start Time: {{appointment.only_start_time}}

Appointment > End Date Time: {{appointment.end_time}}

Appointment > End Date: {{appointment.only_end_date}}

Appointment > End Time: {{appointment.only_end_time}}

Appointment > Day of the week:{{appointment.day_of_week}}

Appointment > Name of the month:{{appointment.month}}

Appointment > Timezone: {{appointment.timezone}}

Appointment > Cancellation Link: {{appointment.cancellation_link}}

Appointment > Reschedule Link: {{appointment.reschedule_link}}

Appointment > Meeting Location: {{appointment.meeting_location}}

Appointment > Notes: {{appointment.notes}}

Appointment > Add to Google Calendar: {{appointment.add_to_google_calendar}}

Appointment > Add to Ical&Outlook: {{appointment.add_to_ical_outlook}}

Appointment > Recurring > Repeats: {{appointment.recurring.repeats}}

Appointment > Recurring > Times to repeat :{{appointment.recurring.times_to_repeat}} 

Appointment > Assigned user > Full Name:{{appointment.user.name}}

Appointment > Assigned user > First Name:{{appointment.user.first_name}}

Appointment > Assigned user > Last Name :{{appointment.user.last_name}}

Appointment > Assigned user > Email: {{appointment.user.email}}

Appointment > Assigned user > Phone: {{appointment.user.phone}}

Appointment > Assigned user >Phone (raw format):{{appointment.user.phone_raw}}

Appointment > Assigned user >Signature:{{appointment.user.email_signature}}

Appointment > Assigned user > Twilio Phone:{{appointment.user.twilio_phone_number}}

CALENDAR

Calendar > Name: {{calendar.name}}

Campaign > Event, Date, Time: {{campaign.event_date_time}}

Campaign > Event Date: {{campaign.event_date}}

Campaign > Event Time: {{campaign.event_time}}

MESSAGE 

Message > Message Body: {{message.body}}

Message > Message Subject :{{message.subject}}

ACCOUNT 

Account > Name: {{location.name}}

Account > Full Address: {{location.full_address}}

Account > Address Line 1: {{location.address}}

Account > City: {{location.city}}

Account > State: {{location.state}}

Account > Country: {{location.country}}

Account > Postal Code: {{location.postal_code}}

Account > Email: {{location.email}}

Account > Phone: {{location.phone}}

Account > Phone (raw format) : {{location.phone_raw}}

Account > Website: {{location.website}}

Account > Logo URL: {{location.logo_url}}

Account > Owner > First Name: {{location_owner.first_name}}

Account > Owner > Last Name: {{location_owner.last_name}}

Account > Owner > Email: {{location_owner.email}}

Account > ID: {{location.id}}

RIGHT NOW 

Right Now > Second: {{right_now.second}}

Right Now > Minute: {{right_now.minute}}

Right Now > Time 24h Format: {{right_now.hour}}

Right Now > Time  AM/PM Format: {{right_now.hour_ampm}}

Right Now > AM/PM: {{right_now.ampm}}

Right Now > Day of the week extended english :{{right_now.day_of_week}} 

Right Now > Name of month : {{right_now.month_name}}

Right Now > Day: {{right_now.day}}

Right Now > Month: {{right_now.month}}

Right Now > Month Extended English:{{right_now.month_english}}

Right Now > Year: {{right_now.year}}

Right Now > Date (month/day/year): {{right_now.middle_endian_date}}

Right Now > Date (day/month/year): {{right_now.little_endian_date}}

Right Now > Day of the week: {{right_now.day_of_week}} 

ATTRIBUTION

Attribution > First > Session Source: {{contact.attributionSource.sessionSource}}

Attribution > First > URL: {{contact.attributionSource.url}}

Attribution > First > Campaign: {{contact.attributionSource.campaign}}

Attribution > First > UTM Source: {{contact.attributionSource.utmSource}}

Attribution > First > UTM Medium: {{contact.attributionSource.utmMedium}}

Attribution > First > UTM Content: {{contact.attributionSource.utmContent}}

Attribution > First > Referrer: {{contact.attributionSource.referrer}}

Attribution > First > Campaign Id: {{contact.attributionSource.campaignId}}

Attribution > First > FB Clickld: {{contact.attributionSource.fbclid}}

Attribution > First > Google Clickld: {{contact.attributionSource.gclid}}

Attribution > First > UTM Keyword:{{contact.attributionSource.utmKeyword}}

Attribution > First > UTM Match Type:{{contact.attributionSource.utmMatchType}}

Attribution > First > Ad Group ID: {{contact.attributionSource.adGroupId}}

Attribution > First > Ad ID: {{contact.attributionSource.adId}}

Attribution > Lastest > Session Source: {{contact.lastAttributionSource.sessionSource}}

Attribution > Lastest > URL: {{contact.lastAttributionSource.url}}

Attribution > Lastest > Campaign: {{contact.lastAttributionSource.campaign}}

Attribution > Lastest > UTM Source: {{contact.lastAttributionSource.utmSource}}

Attribution > Lastest > UTM Medium: {{contact.lastAttributionSource.utmMedium}}

Attribution > Lastest > UTM Content: {{contact.lastAttributionSource.utmContent}}

Attribution > Lastest > Referrer: {{contact.lastAttributionSource.referrer}}

Attribution > Lastest > Campaign Id: {{contact.lastAttributionSource.campaignId}}

Attribution > Lastest > FB Clickld: {{contact.lastAttributionSource.fbclid}}

Attribution > Lastest > Google Clickld: {{contact.lastAttributionSource.gclid}}

Attribution > Lastest > UTM Campaign :{{contact.lastAttributionSource.utmCampaign}}

Attribution > Lastest > UTM Keyword :{{contact.lastAttributionSource.utmKeyword}}

Attribution > Lastest > UTM March Type:{{contact.lastAttributionSource.utmMatchType}}

Attribution > Lastest > Ad Group ID: {{contact.lastAttributionSource.adGroupId}}

Attribution > Lastest > Ad ID: {{contact.lastAttributionSource.adId}}

**The raw format is used to remove the brackets and dashes. This is ideal when dealing with international phone numbers

Sites

Blogs

Changes Made to Blogs

A blog, born from the fusion of "web" and "log," serves as a digital stage where authors curate captivating narratives, offering readers a gateway to diverse worlds of knowledge and creativity. It's a dynamic platform where passion meets prose, transforming the mundane into the extraordinary with every click.

Based on the feedbacks and constant iteration, blogs changed its perspective by making following things simpler!

1. URL simplification

We have removed b and c in the URLs. Our blogs will function in the following manner 

a) For example if the Domain is: abc.com

  • User can specify the abc.com/blog as /blog as the slug. (If the domain page already exist, it will add other unique parameters after scanning all the urls and domain in funnels/websites)
  • The blog post name is defined as abc.com/post/post-name
  • The category url will be abc.com/blog/category/category-name
  • Tag url will be abc.com/blog/tag/tag-name
  • Author will be abc.com/blog/author/author-name
 
 b) For example if the subdomain is: blog.abc.com
  • User can specify the blog.abc.com, they will be required to add slug but it will not be considered.
  • In Domain, please go to Edit and add the default page of Blog Home.
  • The blog post name is defined as blog.abc.com/post/post-name
  • The category url will be blog.abc.com/category/category-name
  • Tag url will be blog.abc.com/tag/tag-name
  • Author will be blog.abc.com/author/author-name
 

2. Automated Sitemap

Whenever a blog post is published, the user is not required to update sitemap every time they publish blog or add robot txt. Sitemap for domain will get automatically updated whenever the blog post is published. 


3. Open Each Blog Post in New Page

Blog post pages will open in new page, it will not open in same page. We allow customisation of look and feel with form (subscribe form) or add custom comment area or any other customisation like text/subtext/calendar

4. Strong SEO with Canonical Tags

In SEO, canonical tags suggest to Google which version of the page it should index, consolidate link equity (ranking strength) to, and show in search results.

5. Customize with Different Layouts and Designs

Blog can be created with custom layout with the option to show what you like in the card view of blog.


New Blog Flow - How it Works

How the blogs flow and work is a very important function. The flow allows blog creators to design the blogs in a way that best captures and holds their audience's attention, and allows readers to better navigate the blog for easy reading and usability. Below is an image of our new blog flow design that will give you a better idea of how we enhanced that process for both the blog creators and blog readers!
If you want to take a closer look at the new blog flow, use the link below to gain access to our Canva design where you can zoom in and see all the details of how the blog flow was redesigned!
Link for Blog Flow File - 

What Happens to Old Blogs and Blog Posts?

 
The old blog which were added to the funnels and websites work as they were working and will allow users to create new blog posts. The old blog will have issues in regards to url simplification, canonical url to solve the SEO indexing issues, automatic update to XML Sitemap. All the blog posts will become part of Default blog.
To solve these problems, it is better and recommended to move to the new blog and new blog posts. For new sub-account getting created after release, it will work with the new blog flows. 

How to Migrate Blog Post to Revamped Version?

1. Go to Sites > Blogs

2. In the Blogs, there will be option of Default Blog which were hosted in Funnels/Website.

3. In the Default Blog, it will have the blog posts.

4. Select the checkbox of blog post

5. Click on Move Blog the selected blog post

NOTE: The old URL of the blog post will break and get updated with the new URL!

Blog can be customised by visting the blog name, click on three dot edit to edit the blog site.  
 
  1. Go to Sites > Blogs
  2. In the list view of Blogs, click on the name of Blog.
  3. Once you open the Blog, it will show Edit the Blog Site button (beside the New Blog post option) and it will show the list of Blog Posts
  4. Once you click on Edit the Blog Site, it will open the Blog editor with all the elements and global sections 
  5. It will allow users to edit the layout, what shows in card of blog list, edit the style blog post. 
  • Layout -


  • What to show in card of Blog List


  • Edit the style for Blog Home and Blog post -Image, Post, Tags, Heading, Title, Description, Author, Publish date and Author


To manage the blog pages like home and post, it will allow users to create blog posts and delete the blog.


Blog provides the Section Templates, Global Sections and other elements like Buttons, Social Media Icons, Images and Progress Bar. Section Templates will get shared between Funnels, Websites and Blogs.

Blog can be created by navigating to Sites from the subaccount.
 

Flow for Blog -

1. Navigate to Sites >  Blog

2. Create new Blog by setting up following things - 

  •  Add name of the Blog 
  • Select the domain and add slug (optional)
  • Add the description - approx number of character is 250 for SEO purpose


Note - please add the domain


a. For example if the Domain is abc.com

- User can specify the abc.com/blog as /blog as the slug. (If the domain page already exist, it will add other unique parameters after scanning all the urls and domain in funnels/websites)

- The blog post name is defined as abc.com/post/post-name

- The category url will be abc.com/blog/category/category-name

- Tag url will be abc.com/blog/tag/tag-name

-Author will be abc.com/blog/author/author-name

b. For example if the subdomain is blog.abc.com

- User can specify the blog.abc.com, they will not be required to add slug.
- The blog post name is defined as blog.abc.com/post-name
- The category url will be blog.abc.com/category/category-name
- Tag url will be blog.abc.com/tag/tag-name
- Author will be blog.abc.com/author/author-name

4. After adding the details, you will land on list view to create new blog posts and edit the blog site.

5. To edit the blog site layout, list view and card details and blog post page.  User can do the following 
  • User can select the layout designs
  • User can manage how will the card will look like. 
  • User can manage the style - Image, Post, Tags, Heading, Title, Description, Author, Publish date and Author


To manage the blog pages like home and post, it will allow users to create blog posts and delete the blog.
 
If you are hosting duplicate content in multiple pages of landing page, setting a canonical URL will tell search engines which content contains the preferred version. 
 
A canonical URL is the version of a webpage chosen by search engines like Google as the main version when there are duplicates. This selected URL is prioritized to avoid showing repetitive content that does not provide unique value in search results.

 
Consider these two URLs:
 

In this example, Google will likely choose the canonical URL for indexing and ranking. The canonical page is also called the “principal,” “primary,” or “representative” version. A canonical tag, also known as rel="canonical" tag, is a snippet of HTML code that allows you to define the “primary” version in a set of duplicate or near-duplicate pages on your site.
 
How to Set Canonical Link for Blog?
  1. Go to Sites > Blogs
  2. Edit the Blog by clicking the name of blog with the button of Edit Blog Site
  3. When you publish the content of Blog, it shows in canonical links.
 

How to Set Canonical Link for Blog Post?
  1. Go to Sites > Blogs
  2. Go the blog name and click on it
  3. In the blog, there will be blog posts created for content distribution.
  4. Once the blog post is content is ready, if you click on Continue.
  5. The blog post allows you to set canonical link. 
Adding search and category navigation help in building better SEO hierarchy on the content, it allows users to scan and better understand the content on Blog. 
 

How to add Search and Category Navigation for Blog?
  1. Go to Sites > Blogs
  2. Once you go to Blogs from the list, click on the name of blog and in the list view of blog there is option to Edit the Site
  3. After going to specific blog site editor, there will be option of in Elements of Category Navigation. 
  4. Drag and drop the Category Navigation element
  5. While editing, it allows user to add more category in navigation. For Example, click on the Category 1 to edit the Category name and link to the category associated with the blog post. Please do the similar to other category options too. 
  • For Adding the Blog Search, there is option to enable or disable.


Having XML sitemaps allows search engines to crawl and index a website sufficiently, and allowing all search engines to be notified of the site map by inserting it into the robots.txt file. In a nutshell, sitemaps enhance the ranking of a website in search engine results, thus boosting the SEO efforts.
 

New Blog allows automatic sitemap, which means everytime a post is published the sitemap gets automatically updated.
 

How does it work?
 
  1. Go to Domain
  2. Add the domain -Follow this article for Domain setup https://help.gohighlevel.com/support/solutions/articles/155000000734-how-to-use-the-domain-connect-feature-
  3. After adding the domain, in three dots the option to visit the XML Sitemap
  4. In XML Sitemap, step one is to select the landing pages/funnel to add by selecting the blog home and blog post option.
  5. In step two, click on generate Sitemap 


Example - 
 
RSS stands for Really Simple Syndication. It's an easy way for you to keep up with news and information that's important to you, and helps you avoid the conventional methods of browsing or searching for information on websites. 
 

RSS Link for blogs can be used to send newsletters using Email Campaign or scheduling post automation using RSS function in Social Planner. 
 
Prerequisite - Domain needs to be associated 
 

How does it work?
  1. Go to Sites > Blogs
  2. In Blogs, there is option of "Settings" with gear icon beside the New Blog Option
  1. Go the RSS option
  1. Select the Blog option from the dropdown
  2. Enter the number of posts to be present in the RSS link
Note - maximum can be 100 posts
 
  1. Copy the URL and you can use it anywhere in Emails RSS Campaign or Social posting with RSS
Note - If you change the option in dropdown in RSS, it doesn't affect the other RSS url which you copied and used, it will keep working.

Websites

How Authorization Works

  • This is not turned on by default  and will require a couple of quick extra steps, covered below
  • The system will remove the monetary value placed in the "authorized amount" from the client's bank account before crediting it back later.
  • If the account does not have the funds during the authorization process, they will not be allowed to continue to the next step.
  • Upon authorization approval, the system will credit back the account for the amount used to authorize.
  • If you have any "Trial days" attached to the plan, those will kick in as soon as the card is authorized.
  • Funds may take up to 5 business days before being returned to the client's bank account
  • It ONLY works with Subscriptions and Payment plans.

Please Note: 

If you would like to authorize payment before purchase for all your plans, this process will need to be repeated for each plan attached to the payment form.

If you are using Version 1 of the Website builder, click here

Related article: What's the difference between Version 1 & Version 2 of the page builders


Setting up Authorization

1. Head into the website and find the step where the order form is placed

Click on the "3 dots"

Click on highlight

2. Click on "Products"

If you do not see any products attached to your page, you will need to add them before continuing. 

Click on "Products"

3. Click on the "Edit" icon

This will open the product settings. In this example, there are two plans (monthly $149 & Annual $1490) where "Authorization" will need to be turned on.

First, we will start with plan 1 (monthly $149), then return and repeat this process for plan 2 (Annual plan $1490).

Click on "Edit" icon

4. Scroll to the bottom and click on "Additional Options"

Scroll to the bottom and click on "Additional Options>"

5. Click on "Custom Authorization" and add your amount

Please Note:

Keep in mind the amount you place here will be deducted from the clients account.

If the funds are unavailable they will not be able to proceed. In this example: The system will take "$1" out of the clients account and then refund the "$1" back.

The refund process may take up to 5 business days before returning the amount taken. ONLY works with Subscriptions and Payment plans.

The number should be:
equal to or more than 1, 
number of decimals should be just two. 
Should NOT be a negative number

6. Click on "Save."

Make sure to hit "Save". That's it.

How to authorize card payments using the older version of the website builder 

If you are using Version 2 of the Website builder, click here

Related article: What's the difference between Version 1 & Version 2 of the page builders


How Authorization works:

  • This is not turned on by default  and will require a couple of quick extra steps, covered below
  • The system will remove the monetary value placed in the "authorized amount" from the client's bank account before crediting it back later.
  • If the account does not have the funds during the authorization process, they will not be allowed to continue to the next step.
  • Upon authorization approval, the system will credit back the account for the amount used to authorize.
  • If you have any "Trial days" attached to the plan, those will kick in as soon as the card is authorized.
  • Funds may take up to 5 business days before being returned to the client's bank account
  • It ONLY works with Subscriptions and Payment plans.

Please Note: 

If you would like to authorize payment before purchase for all your plans, this process will need to be repeated for each plan attached to the payment form.


1. Head into the website and find the step where the order form is placed

Click on the "3 dots". 

Click on highlight

2. Click on "Products"

If you are not seeing any products attached to your page, you will need add them first before continuing. 

Click on "Products"

2. Click on the "Edit" icon

This will open the product settings. In this example, there are two plans (monthly $149 & Annual $1490) where "Authorization" will need to be turned on.

First, we will start with plan 1 (monthly $149), then come back and repeat this process for plan 2 (Annual plan $1490).

Click on "Edit" icon

4. Click on Authorize Card

Click on Authorize Card

5. Type the dollar amount you would like to "authorize"

Please Note:

Keep in mind the amount you place here will be deducted from the clients account. If the funds are unavailable they will not be able to proceed. 

In this example: The system will take "$1" out of the clients account and then refund the "$1" back.

The refund process may take up to 5 business days before returning the amount taken. Only works with subscription and payment plans
Type the dollar amount you would like to "authorize"

6. Click on "Currency"

Enter the currency you wish to use

Click on "Currency"

7. Click on USD

For this example, we will use USD.

Click on USD

8. Click on Update

Make sure to hit "Update", that's it.

What are Sites?

Sites give you the ability to create client-facing websites within HighLevel. Create that perfect home page for your business. Whip up a landing page to capture more leads. The possibilities are endless.

Within HighLevel, we have two types of Site Builders; while they are similar they do have different functionality.  Let’s review each type of Site.

  • Funnels - In general, funnels have a very direct sequence of pages, which is why we offer split testing on funnels only. Funnels are a step-by-step series of web pages, generally used for a specific purpose like capturing leads or booking appointments. Learn more about funnels here.

  • Websites - A place to build web pages for any use case, such as a homepage for your business. There is generally no path of progression that contacts are led through, which is why we do not offer split testing on websites. 

Though you can use Websites for much the same reasons as funnels, websites are different in some small ways.

Which one should I choose? Funnels or Websites?

In all but a few ways, Funnels and Websites are the same. They both house a group of webpages and they can be used for various purposes despite which one you choose. What matters is if you want to use a Split Testing feature on a web page and the page views UI.

The main differences between funnels and websites?

  1. Split Testing in Funnels - You can only split test on Funnels. Split Testing in funnels is when you create a variation of a page to see which is better.

  2. eCommerce (Online Store) - Only websites can create and utilize the eCommerce (Online Store) feature.

  3. Page View UI - There are different page view UI depending on if you are in the funnel or website views. 

Getting Started with Site Templates

When you go to create a new site, you will have the option to choose from hundreds of templates. Once you have selected a template, you can edit any or all of the parts when you have selected it. We encourage you to check out them all! 

After selecting the template it will load the template. If you aren’t already, navigate into one of the pages by clicking “Edit” page to open up the site builder to edit a specific page.


Site Builder Overview

The same functionality and hierarchy of elements exist in both the Funnel and Site Builder. Let's hop in and check out our Site Builder and how you use it to create sites.

Site Builder Navigation Bar

The site builder navigation bar lives at the top of the builder and allows you to toggle between all of the various features. We will review each of these tabs below.


Adding a New Element

Rows and columns are the building blocks of your site and are used to house elements. To add an element, like an image, you need at least one section, one row, and one column. Then you will be prompted to add an element. There are many elements, each element is unique. 

Now let’s add an element to your site. In the top right of your site editor, you can select "add element" to see your options for what objects can be added to your site. Once you have chosen the element you would like to add, click and drag the element to the area you prefer.

Understanding Element Nesting

Every element on a webpage requires a section. Within this section, you need to have at least one row. This row needs to have at least one column. Adding all three of these (Section > Column > Row) we are then able to add an element from the "+Add Element" bar. 

From largest to smallest, we have:

Sections (Green) > Rows (Blue) > Columns (Pink) > Elements (Orange)

About sections, rows, and columns...

  1. You cannot add a section within a section. Nor can you add a Row within a row or a column within a column. You also cannot add an element within an element.

  2. You can add multiple rows into a section. Within a row, you can add multiple columns. Within a column, you can add multiple elements.

  3. You must have at least one section, one row, and one column to add an element.

Element Settings

To edit a specific section, row, column, or element, hover over the element then click on the gear setting icon that appears. In addition, clicking on any part of the element will also automatically open the pop-out settings menu on the right. 

Within these settings, you can add padding, margin, change visibility, and much more. Also, note the "General" and Advanced Tabs which offer more settings you can use to make your site great.

Padding and Margin

When you want to move or put space between an element on your webpage - you are going to be adjusting the Padding or Margin. This is done within the object settings, clicking on the object will pop out this settings menu on the right.

Padding - This will add space WITHIN a section, row, column, or element. Padding will add space from the outside of the object inward. 

Margin - This will add distance OUTSIDE of a section, row, column, or element. Giving space between other objects.

Moving an Element

You can move an object by using the up or down arrows seen when hovering over the object. This will shift the element up or down based on the elements around it. In addition, you can move an object by hovering over the object, and then clicking and holding the move icon. This will let you move the object. Release the held click to drop it into its new place.

  1. Option 1: Up/Down Arrows – will move the object up or down based on the objects around it.

  2. Option 2: Click and Drag – will allow you to click and drag it where you want it.

Cloning an Element

Hovering over any object will give you the ability to clone that object and everything within it. All settings and objects within the cloned section will be duplicated and then added below. This is great when you have a format or object that you want to use again or somewhere else on the site page.

Deleting an Element

If you need to delete or remove an object, hover over the object then select the trash can symbol. This will delete the object. You can use the Undo/Redo to add it back if you need to.

Layers

Layers help you view all of the various objects and how they are nested within the Website Object Hierarchy. Helpful when you have misplaced an object or hidden it from both mobile and desktop view.

Pages

View and navigate to other web pages within your Funnel or Website from the pages tab. Giving you the ability to quickly move between web pages when editing multiple web pages. You can access this tab from both the right and middle site builder navigation bar.

Tracking Code

In the event you would like to add a tracking code to the header or footer of your webpage, you can do so from this Tracking Code page. 

Custom CSS

When you want to add custom CSS to your website to your website, you can from the custom CSS tab. You can consult a developer for how to use and create a code for your unique needs.

Typography

You can change the default font for your webpage headlines and content as well as your text and link colors within the typography. 

Background

To change the default background image or background color of your webpage you can select the Background tab. This will add a background behind your sections. If you have a background image or color set on a section, row, column, or element, it will be behind this.

Want to set a video background for a Section? Learn how here: Video Background

Pop Up Settings

Most users dislike pop-ups, but the sad fact is that they still convert rather well, despite their bad rap. When you want to add a popup, you can do so from the Pop Up. After selecting it, you will use the pop-out setting menu on the right to edit the properties. 

You can show a pop-up by adding a button and then have the button action deploy the pop-up. You can also use the pop-up settings to “Show Popup on” Exit or time delays - select the popup then see the settings on the right-hand side.

SEO Meta Data

Here, you can edit the SEO metadata, this will show up in search engine results when searched. In addition, it will show in the tab settings of your browser, when you share your site link and more. It might seem small but having your SEO settings set up is important - it helps search engines find your site and when sharing a link, it helps users trust the link.

Preview Custom Code

If you have custom code on your site, providing it was installed successfully, this button loads this custom code so you can see it within the builder. Another option is previewing the page. If your custom code is not working as planned, please consult a developer.

2 Column Mode Versus Auto Mode

When you are using the builder you can choose to have the right popout lay over top of the webpage or you can set it to two-column mode, which will push the webpage into two columns. The first column is the webpage, the 2nd is the settings tag that popout on the right. 

Undo/Redo

When you open and begin editing your site, you may find the need to undo a change you made. You can undo or redo your actions at the top right of your site builder navigation bar. 

*This will only work for your current session, meaning when you reload or leave the page, you may not be able to undo or redo it as a new session will begin. The versions, outlined below, are great for restoring previous versions of the site.

Versions, Preview, Save, and Publish

In the top right-hand side of your site builder, you will locate versions, preview, and save buttons. Let’s go through each of them below.

  1. Versions - selecting versions will take you to previously saved versions of your site. Helpful when you want to view or revert previously saved versions of your site.

  2. Preview - create a preview version of your site page for you to see as if it is a live site. Great for testing and seeing what your recent edits look like for a live visitor.

  3. Save - you can click the save button to save an unpublished version of your site. This same version will be overwritten after every save. This is different from the published live version of your site. This means your site visiting will not see any of the changes made on this version until they are published.

  4. Publish - Publishing will activate the current saved version of your site to be posted live to the internet. Now site viewer will see the most recent published version of your site.

Site Builder Tour Complete!

Now that we are done exploring all of the parts of our site builder, let’s learn how to edit the mobile view of our site.

Editing the Mobile View of Your Site

Every site builder has both a mobile and desktop view. Unless you edit an object, the desktop and mobile views will be identical. When you go to review your mobile view of your site, you will likely find some aspects of your site you wish to change or adjust for your mobile viewers. This makes sense, mobile and desktop screens are different sizes. So we will need to adjust how the mobile view looks to best suit mobile viewers. Let’s learn how to edit your mobile view below.

Mobile Mode

At the top of your editor, you will see a button for Desktop Mode and another called Mobile Mode. Selecting the “Mobile Mode” will toggle to the mobile view editor of your site.

All Website objects by default are mobile and desktop visible. However, you can change this, which will help greatly in some circumstances.

Changing Object Visibility to Mobile/Desktop Only

More than likely, you will find you need to create a unique section, row, column, or element for mobile view only. You can edit the visibility of your elements with the visibility setting. Select any object, go to settings, then advanced settings. This is very helpful when optimizing the look and feel of your desktop or mobile views for your site.

After toggling, you will only be able to see the elements based on how you toggle them. So if you removed Desktop, you would only see the element on the mobile editor view on the live mobile view of a website.

Mobile Responsiveness Settings

Within your object settings, you will see mobile responsive toggles that allow you to edit an object's settings unique to mobile or desktop. For example, the image below shows an image element alignment settings. This means you can change how this element looks on the desktop view, then toggle to the mobile view and edit the mobile settings to be unique from the desktop view.

You will find mobile responsive settings like this on several object settings. We are always working to add in more.

Pro Tips for Mobile Mode Editing

There are a number of of tips and tricks to learn when editing your mobile site, let’s check out a few:

  1. Finish Desktop Mode First

    1. More often than not, completing a full version of your desktop view of your site makes it easier to edit your mobile view. So get that desktop view looking stellar THEN start working on your mobile view after your desktop view is the way you like it.

  2. Mobile Navigation Menus

    1. If you have a site navigation menu, create a Global Section with Mobile-only visibility. This can be added to the mobile version of each of your pages for a clean and consistent look. You can do the same for the Desktop Navigation menu.

  3. Duplicate an Object and Change Visibility

    1. If you cannot get a section or object to look good on mobile without editing the desktop view, create a mobile-specific section. You can do this easily with the “duplicate” function. Which will create a copy of the object. Then you can change the visibility of one to desktop only and the new one to mobile only. Now we can edit the mobile one without messing up the desktop. This is great for images.

  4. Learn how to see the Mobile View of your Site on Your Desktop

    1. Did you know… you can see the mobile view of your site from your computer? Learn how here.

Mobile View Complete!

Now that we have a kill desktop and mobile view of our site, it’s time to finalize some backend settings as we go LIVE!

Site Settings & Publishing

Now that your site is built let’s review the backend settings of our site. Let’s walk through each of the backend site settings together.

Site Pages/Steps

This is where all of the pages or steps of your site live. You can edit or preview a page from here. We land here before entering into the Site Builder. Upon exiting the Site Builder, we also land here.

Attaching a Product to Your Site Page (Order Forms)

To use order forms on your site, you must attach a product you have created in HighLevel to your specific page. Products need to be added to the page a viewer will use to checkout and purchase your product.

On Websites, you click the three dots on the top right of the page, then select products. For funnels, you select the step, then select products in the top right tab.

After arriving on the Products tab for a page, we will need to add the HighLevel Product. If one isn’t created in your Sub-Account already, you will need to create one. You can learn more about our Payments features here.

Site Stats

Stats will give you insights into the number of page views and opt-ins you have had on your site. In addition, you can see the number of sales and even earnings. Learn more about stats and what they count here: Understanding Stats. 

Site Sales

Reveals each transaction that has occurred on your sites. For Version 2 sites, we have moved this to the Payments Tab > then select Orders and Transactions tabs.

Site Settings

Site settings give you the ability to attach your domain, update the default path, add a favicon, and more! Let’s unpack each of these together.

  1. Name - is the name you give your site. This does not appear to your customer, this is for internal use only.

  2. Domain - is the domain you choose to assign to your website. For example: gohighlevel.com is our domain we attach to our Site. Without a domain, people will be unable to visit your site. Unless you use a preview link, but these are uncustomizable and not recommended.

  3. Path - is the default path or extension for your site. It looks like this when used, gohighlevel.com/about → the  “/about” is the path. Each page on a funnel or website will have its own path, and no two pages can be directed to the same path. 

  4. Favicon - is the small icon that appears at the top of your browser tabs when someone opens and views your site. You must add a shareable image URL here, after being added, it will load the favicon for all of the pages of your site. Learn how to upload, store, and copy the share link in HighLevel here (LINK TO FAQ).

  5. Head tracking code - installs a site-wide tracking code into the header.

  6. Body tracking code - installs a site-wide tracking code into the body.

  7. Payment mode - if you have products attached to your site, then you can automatically switch your payment mode to test or live. Test, allows you to use Stripe testing cards` to fill out the form and then run a test. Great for testing your funnel. However, as you get closer to launch, a live purchase is encouraged - you can always refund yourself. 

  8. Image Optimization - will automatically adjust your images to load faster. It is on by default and is generally not recommended to disable it as faster loading times result in a superior page experience for viewers.

  9. Optimise Javascript - Javascript is custom code you can install to run special operations on your sites. Oftentimes, JavaScript can impact loading speeds, enabling this will assist in page loading. The External Javascript will be lazy hydrated for better page load performance.

  10. GDPR Complaint Fonts - depending on your legal needs, GDPR complaint fonts can be enabled, removing all of the fonts, so your site can work to become more compliant with laws and regulations. Always consult a lawyer to ensure you are fully compliant.

  11. Chat Widget - Your chat widget can be customized and set up under Sites > Chat Widget. Enabling this will deploy this chat widget to all of your websites. To deploy on specific webpages, keep this disabled then copy the code to the specific pages you want the widget on. Learn more about your chat widget here: HighLevel Chat Widget: How to Add It to Your Pages in Minutes

Publishing/Page Settings

To change the name of a step or site as well as the path or extension… In the site builder, you can click the three dots then select settings. Within the funnels, you select the funnel step then select the “Publishing” tab.

From here you can edit the step/site name as well as the path. The path for your a page/site goes at the end of a URL. For example: gohighlevel.com/about → the  “/about” is the path. You can set these, otherwise, we will provide a random one. If the path already exists or is being used on your domain, it will add numbers as you cannot have repeat paths.

We are now ready to publish and use our site! Great job!

Now that we have build our sites and updated all the settings, we are ready to use it to LevelUp our business!

FAQs

What are Global Sections?

Global sections are saved sections that you can use across multiple pages. They are unique in that you can use the same section across multiple pages. Further, making any changes to a global section, after saving, will automatically update it to all pages the Global Section is used on. A great example of a scenario to use a global section would be the Header/Footer of your website. Using a Global section as a footer or header enables you to have the same header across all of your pages.

All we need to do is have a section we like, such as a header for our page, then hover over the object, click the Save Icon, name it, select “Global Section,” then click Save. Now we can add this same global section to all of our pages.

Remember, any changes to this Global section, after saving, will update this section in all of the pages it was used. Further, global sections are not automatically placed, you must add them.

To add a Global section, click the “+Add Element” Icon in the top right of your builder. Then select > Global Section > Select your global section.

What are Template Sections?

Similar to a Global Section (see above), a Template Section can be saved and then added later within the same webpage or another webpage. Changes made to these sections saved to the Template Section in use will not update the templates or other places the template was added.

What Are Funnels?

The term funnel in marketing means a series of websites used to capture leads. Funnels have “steps” that allow you to visualize a series of websites that a potential customer will visit. For example, in a booking funnel, I might have 3 Funnel Steps.

  1. Step 1: Landing Page - where you can offer something for contacts to download in exchange for their contact information.

  2. Step 2: Booking Page - After a contact fills out a form, you will want to thank them but then schedule a call with them. So you have your booking calendar on this step.

  3. Step 3: Thank you Booking Page - After a client booked the call, they will land on this page, showing them the next steps and thanking them for booking.

Funnels usually serve a specific purpose, like offering a lead magnet or booking an appointment. There are many use cases for creating funnels. Whatever the reason, Funnels are a useful way to create a series of websites that contacts navigate through.

How to See the Mobile View of a Website on your Desktop?

When editing your site, you may find you want to see the mobile view of your website. Did you know you can see the mobile view of any website on your desktop? Simply right click on the loaded webpage, click inspect, then toggle the view from desktop to mobile. See the red arrow and the images below.

To load an image, you must either upload your image to HighLevel or provide another shareable link. You can do this in Google and other areas, but let’s review how to do this in HighLevel.

Within a Sub-Account go to Settings > then Media. Then select "Upload File" in the top right-hand corner of the media library.

After successfully uploading the image, you can right-click on the image to copy the link to it. Use this link when a media-shareable URL is required. For example, within Site Settings, the Favicon requires a shareable media URL. You paste this newly uploaded image URL you have there so your favicon will load.

If you are hosting duplicate content in multiple pages of landing page, setting a canonical URL will tell search engines which content contains the preferred version. 
 
A canonical URL is the version of a webpage chosen by search engines like Google as the main version when there are duplicates. This selected URL is prioritized to avoid showing repetitive content that does not provide unique value in search results.

 
Consider these two URLs:
 

In this example, Google will likely choose the canonical URL for indexing and ranking. The canonical page is also called the “principal,” “primary,” or “representative” version. A canonical tag, also known as rel="canonical" tag, is a snippet of HTML code that allows you to define the “primary” version in a set of duplicate or near-duplicate pages on your site.
 
How to Set Canonical Link for Blog?
  1. Go to Sites > Blogs
  2. Edit the Blog by clicking the name of blog with the button of Edit Blog Site
  3. When you publish the content of Blog, it shows in canonical links.
 

How to Set Canonical Link for Blog Post?
  1. Go to Sites > Blogs
  2. Go the blog name and click on it
  3. In the blog, there will be blog posts created for content distribution.
  4. Once the blog post is content is ready, if you click on Continue.
  5. The blog post allows you to set canonical link. 
Adding search and category navigation help in building better SEO hierarchy on the content, it allows users to scan and better understand the content on Blog. 
 

How to add Search and Category Navigation for Blog?
  1. Go to Sites > Blogs
  2. Once you go to Blogs from the list, click on the name of blog and in the list view of blog there is option to Edit the Site
  3. After going to specific blog site editor, there will be option of in Elements of Category Navigation. 
  4. Drag and drop the Category Navigation element
  5. While editing, it allows user to add more category in navigation. For Example, click on the Category 1 to edit the Category name and link to the category associated with the blog post. Please do the similar to other category options too. 
  • For Adding the Blog Search, there is option to enable or disable.


Having XML sitemaps allows search engines to crawl and index a website sufficiently, and allowing all search engines to be notified of the site map by inserting it into the robots.txt file. In a nutshell, sitemaps enhance the ranking of a website in search engine results, thus boosting the SEO efforts.
 

New Blog allows automatic sitemap, which means everytime a post is published the sitemap gets automatically updated.
 

How does it work?
 
  1. Go to Domain
  2. Add the domain -Follow this article for Domain setup https://help.gohighlevel.com/support/solutions/articles/155000000734-how-to-use-the-domain-connect-feature-
  3. After adding the domain, in three dots the option to visit the XML Sitemap
  4. In XML Sitemap, step one is to select the landing pages/funnel to add by selecting the blog home and blog post option.
  5. In step two, click on generate Sitemap 


Example - 
 
RSS stands for Really Simple Syndication. It's an easy way for you to keep up with news and information that's important to you, and helps you avoid the conventional methods of browsing or searching for information on websites. 
 

RSS Link for blogs can be used to send newsletters using Email Campaign or scheduling post automation using RSS function in Social Planner. 
 
Prerequisite - Domain needs to be associated 
 

How does it work?
  1. Go to Sites > Blogs
  2. In Blogs, there is option of "Settings" with gear icon beside the New Blog Option
  1. Go the RSS option
  1. Select the Blog option from the dropdown
  2. Enter the number of posts to be present in the RSS link
Note - maximum can be 100 posts
 
  1. Copy the URL and you can use it anywhere in Emails RSS Campaign or Social posting with RSS
Note - If you change the option in dropdown in RSS, it doesn't affect the other RSS url which you copied and used, it will keep working.

Privacy Policy

General consideration for privacy policies:

  1. What personal data do you collect?
  2. Where can you collect personal data?
    1. Funnels & Websites
    2. Forms
    3. Surveys
    4. Web Chat
    5. Order Forms
    6. Calendars
  3. How to create your privacy policy using funnels or websites
    1. Build a dedicated page within a funnel / website page (typically done on a homepage where the URL can be easily referenced
    2. Search google for references - https://www.google.com/search?q=privacy+policy+templates
    3. Please consult your legal counsel for help in drafting and finalizing your privacy policy specific to your business and use case.
  4. Where you can link to your privacy policy 
    1. In funnels & websites
      1. Text / Button
    2. In forms
      1. Text / link
      2. T&C form element
    3. In Surveys
      1. Text / Link
    4. Web Chat
      1. Text / Link in widget description
    5. Order Forms
      1. Text / Link on order page
      2. Enable Terms and Conditions in Advanced settings of Order Form and create a link there
    6. Calendars
      1. Text / Link on the page that the calendar is embedded on
      2. Use a custom form with a T&C element that includes the link (Note: you will need to link to a page on your website which contains your T&C as reference.)

General Setup

What is a Domain?
A domain serves as the digital address for online services like websites, email hosting, and more, by mapping them to IP addresses through DNS. Domain names are essential for your online presence, enhancing website accessibility and enabling email communication.

In HighLevel, domains are crucial for website hosting, white-label branding, configuring branded/API domains, email setup, and the Client portal. They form the foundation upon which HighLevel users build their digital presence.


What are Root & Sub-Domains
When working with domains in HighLevel, it's important to distinguish between a root domain and a subdomain.

Root Domain (Example: “gohighlevel.com”)

The root domain is the primary address of your website, appearing after "www." in a URL (e.g., in "www.gohighlevel.com," the root domain is "gohighlevel.com"). It serves as the main entry point to your website.

Subdomain (Example: "help.domain.com")

Subdomains are extensions of your root domain, directing users to specific sections or areas within your online infrastructure (e.g., "help.domain.com" for support). This allows for separate content, landing pages, and marketing campaigns without affecting the primary site. This setup is useful for ads, promotions, and utilizing different SEO strategies.


IMPORTANT NOTE: Be careful when adding root domains to HighLevel. Many users accidentally break their existing mailbox or site by adding a root domain already in use. We recommend adding a sub-domain if your root domain is used somewhere else.


Seamlessly Connect Domains with Domain Connect
If your domain provider is Google, Cloudflare, or GoDaddy, HighLevel offers automatic DNS configuration for connecting your domain to the platform. This feature eliminates the need to manually manage DNS records for branded domains, websites, dedicated domains, and the client portal. Auto-configuration streamlines domain integration, saving time and reducing the risk of errors.

To see more information about seamlessly connecting domains, please visit How to Use the Domain Connect Feature


Manual Option
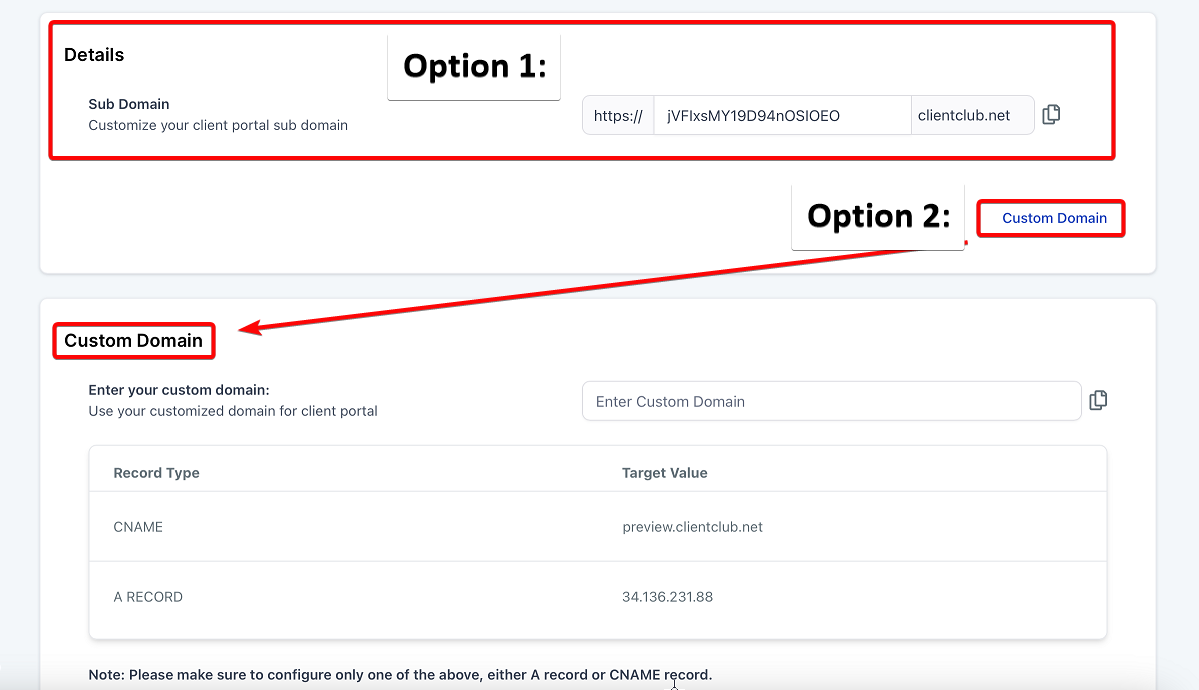
If your domain provider is not Google, Cloudflare, or GoDaddy, manual DNS configuration is required. HighLevel simplifies this process by generating the necessary record values for you to input into your domain provider's system. This ensures seamless integration of your domain with HighLevel, supporting branded domains, websites/funnels, dedicated domains, and the client portal.


1) Now you open your DNS provider of choice and add the records in. Adding records are much the same, with some variation based on the provider. Go to your DNS manager and click add record.


2) Select the record type provided by HighLevel


3) Input the Hostname into the “Name” field and Value/Target into the “target field”


4) Save the record. If utilizing Cloudflare the Proxy Status will need to be toggled off.


To learn more about this manual process, go here.

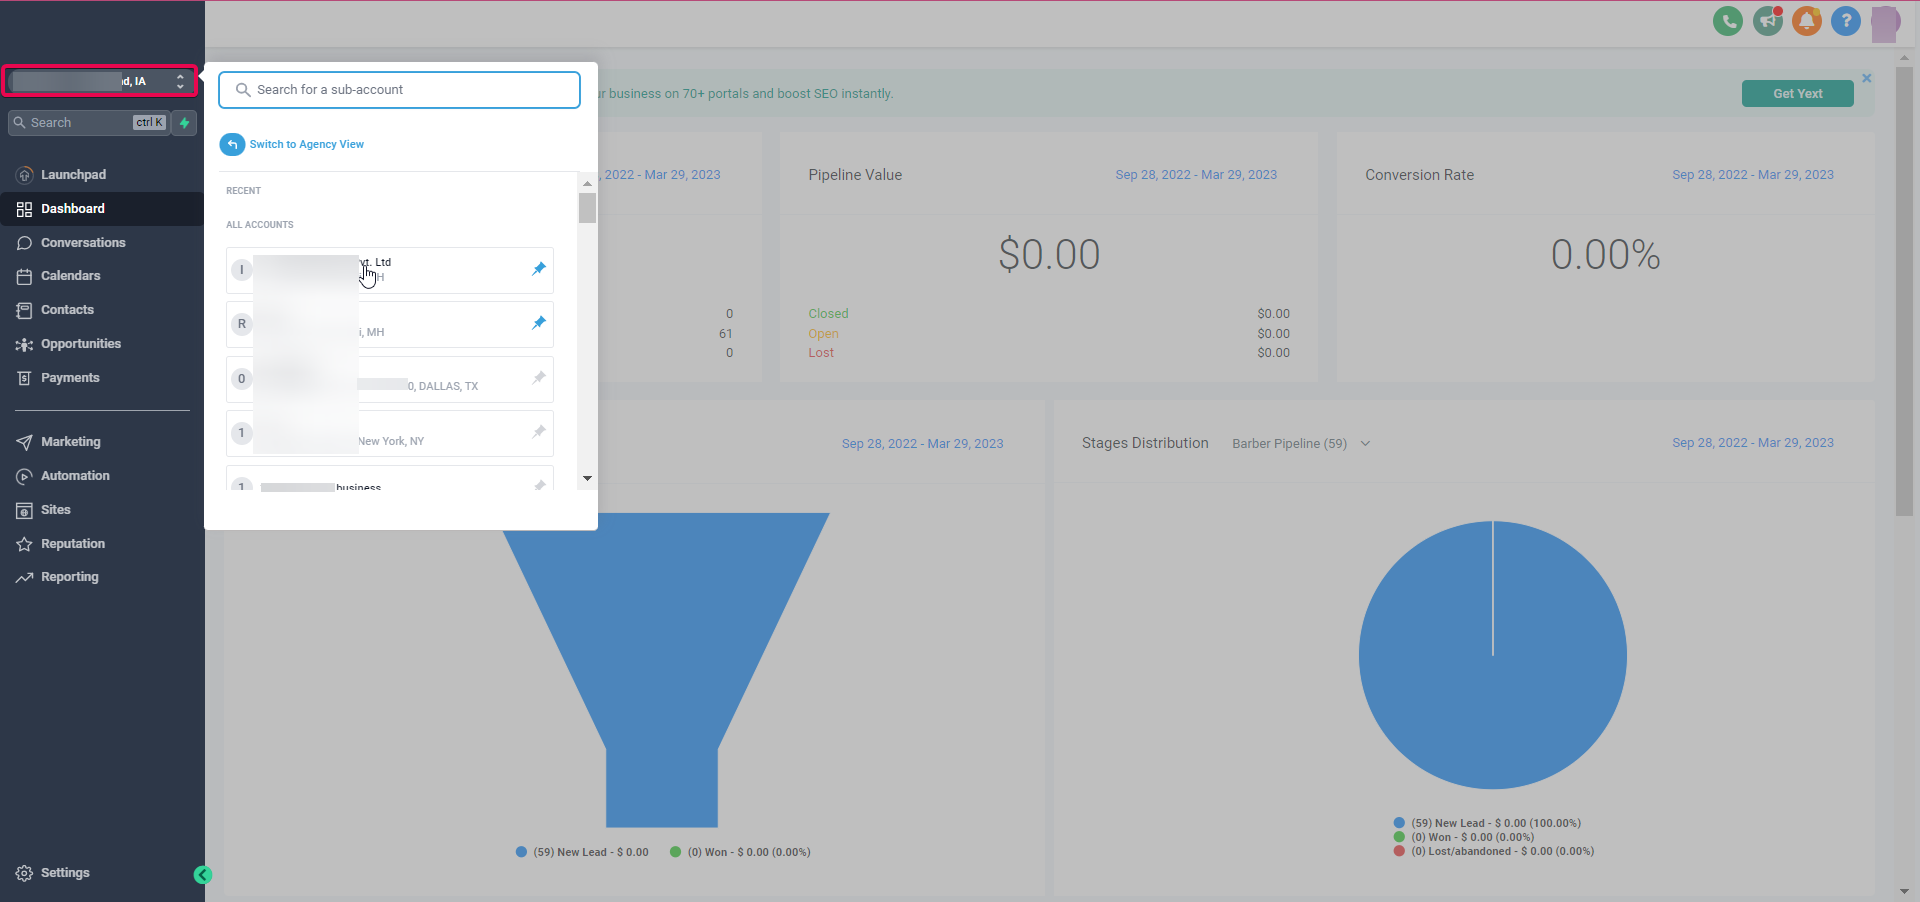
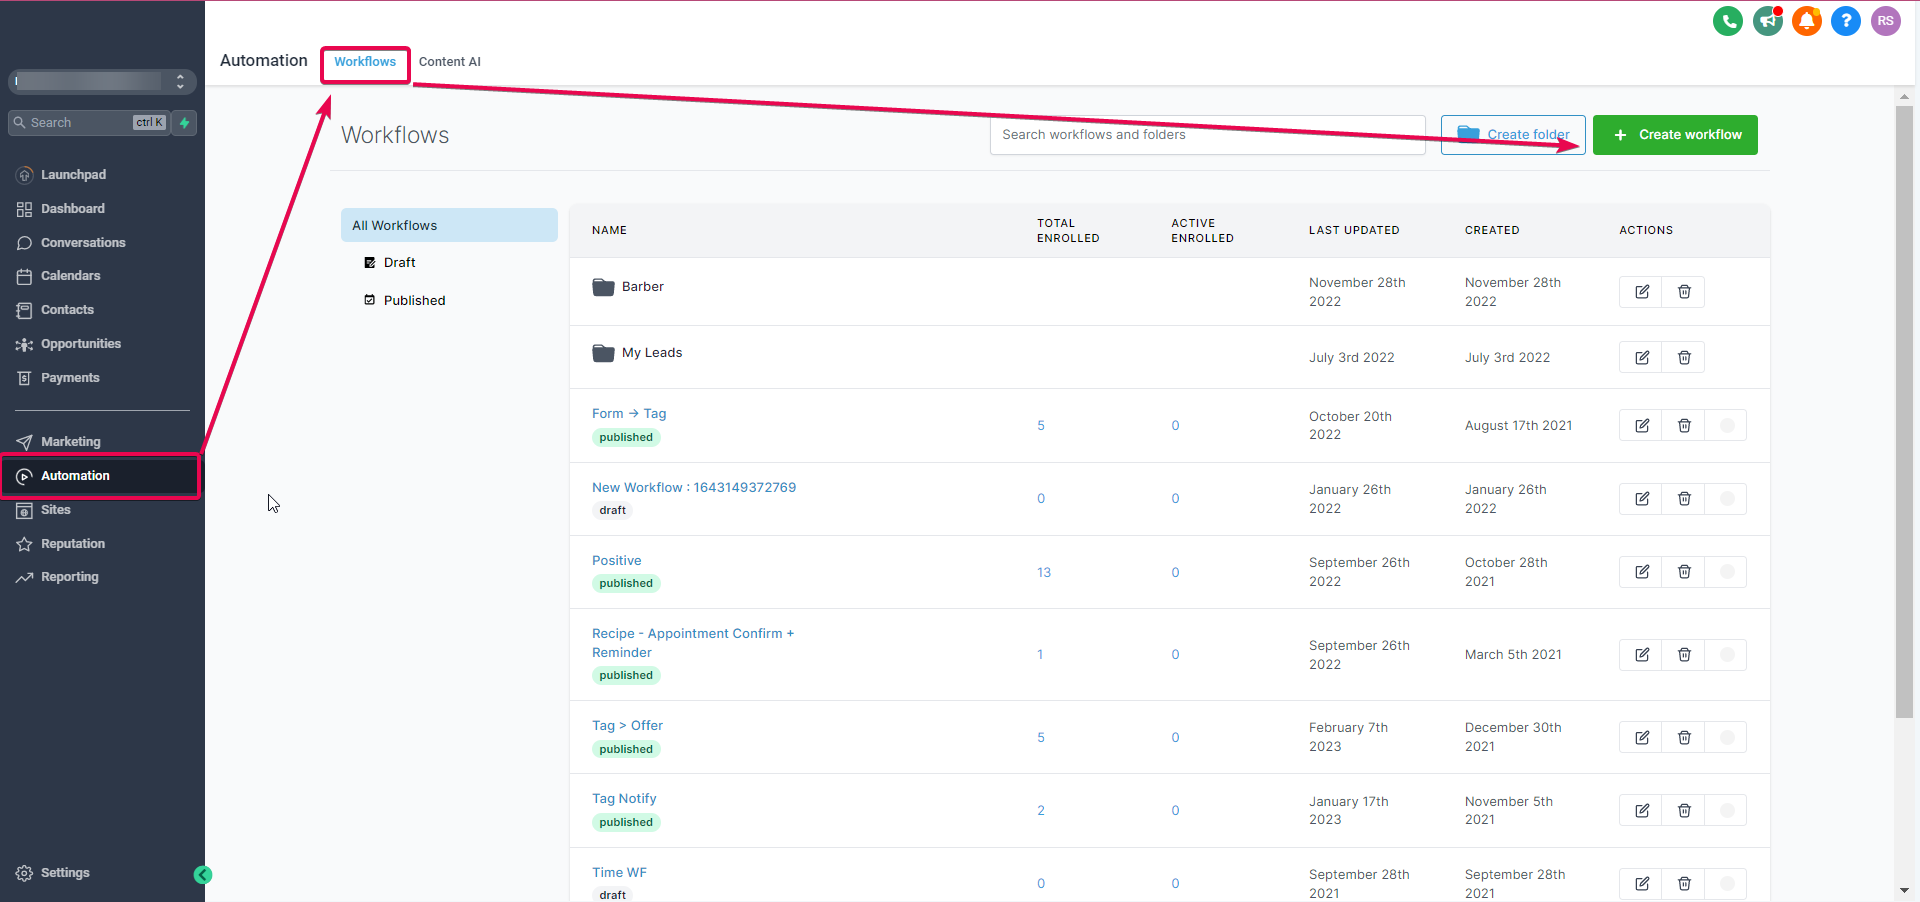
Places to Add Domains to in HighLevel
Within HighLevel, there are many places to add a domain, let’s briefly explore each one. We will provide resources to learn more.


Whitelabel Domain
Whitelabeling your desktop web app ensures that your customers interact with your domain instead of the default one. Simply follow four steps: create a CNAME in your DNS records, configure it in your HighLevel Agency account, upload your agency logo, and update your agency Terms & Conditions. Once your DNS record propagates, your customers

can access the app using your domain, seeing your branding elements like logo and terms & conditions.


A sub-domain is Recommended for whitelabeling. Most Commonly agencies will use "app" as the sub-domain for their whitelabel desktop app.


Navigate to the Agency View > Settings > Company Settings > Whitelabel Domain


For more information on setting up your Whitelabel Domain please visit How to Set Up a Whitelabel Domain

API or Branded Domain
Enhance your brand visibility and link deliverability by customizing system-generated links with our API/Branded Domains. By doing so, you can personalize links for forms, surveys, calendars, and more.

Custom API domains allow for branding of system-generated links, improving brand recognition and link deliverability. Configure API domains at the agency level company settings to establish a default branded domain for all sub-accounts.


Navigate to the Agency View > Settings > Company Settings > API Domain


At the sub-account level to customize domains for individual clients a branded domain can be set up. This will be done under the sub-account settings, within the business profile.


Navigate to the Sub-Account > Settings > Business Profile > API Domain


For more information on the API/Branded Domain setup please view How to Configure Brand System Generated Links

For both the API and Branded Domains, utilize a sub-domain as utilizing a root domain here will cause your domain to point away from your website.


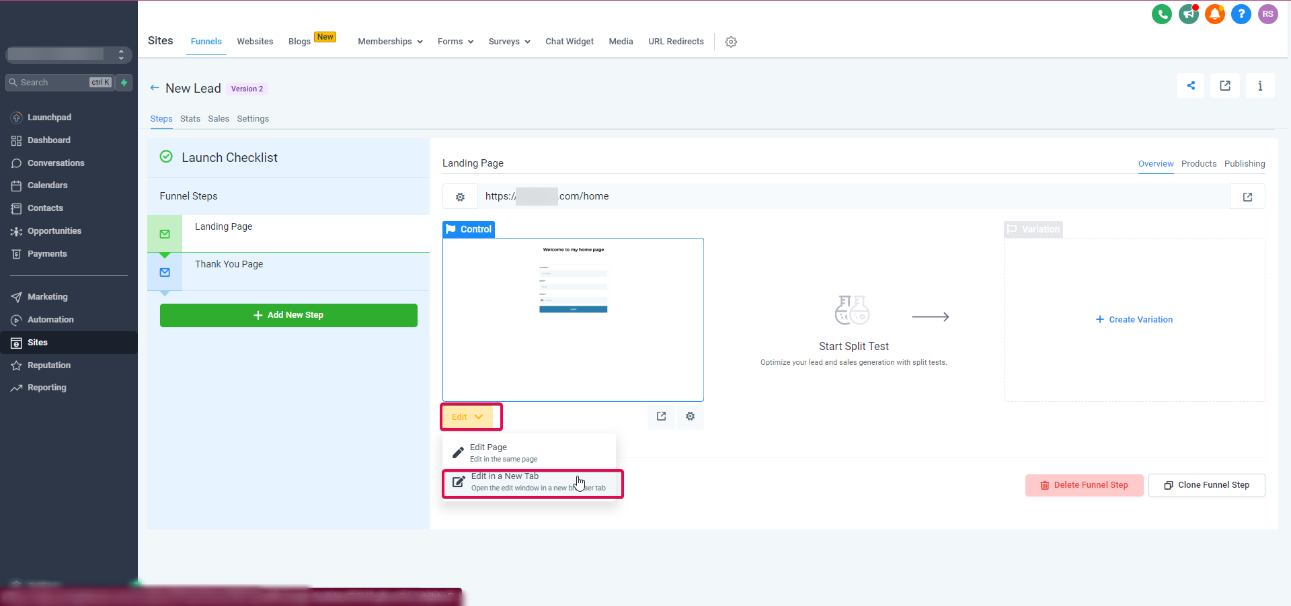
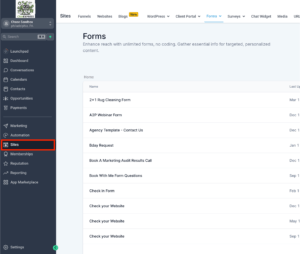
Sites (Settings > Domains)
Integrating a domain into your account unlocks the potential for website and funnel functionalities. This guide will offer a thorough walkthrough for manually configuring domains, covering essential steps like DNS setup, domain association with sub-accounts, and troubleshooting common issues like SSL errors and 404 errors.


Navigate to the Sub-Account > Settings > Domains


For more information on how to add a domain to a website please visit How to Set Up a Root/Subdomain for Your Funnels/Websites

Email Sending Domain
To maximize email marketing impact, prioritize sender reputation and deliverability. A dedicated sending domain in the LC Email system gives you control over email communications, enhancing brand credibility and reducing spam filter risks. This setup is ideal for customized notification emails and targeting specific categories, ensuring efficient delivery. To avoid conflicts with existing email services, configure your dedicated domain using a subdomain. Dedicated sending domains are key to maintaining a positive sender reputation and achieving effective email marketing with LC Email.

Add additional MX Record

Some Domain Host Such as Google Domains require can only have one MX record pointing towards a domain. In cases such as this there may be an option within the domain registry to add an additional record where you will need to include the second value.


For agency level email services navigate to the Agency View > Settings > Email Services > Dedicated domain


For sub-account level email services navigate to the Sub-Account > Settings > Email Services > Dedicated Domain


For more information the Dedicated Email Sending Domain setup process please visit How to Set Up a Dedicated Sending Domain


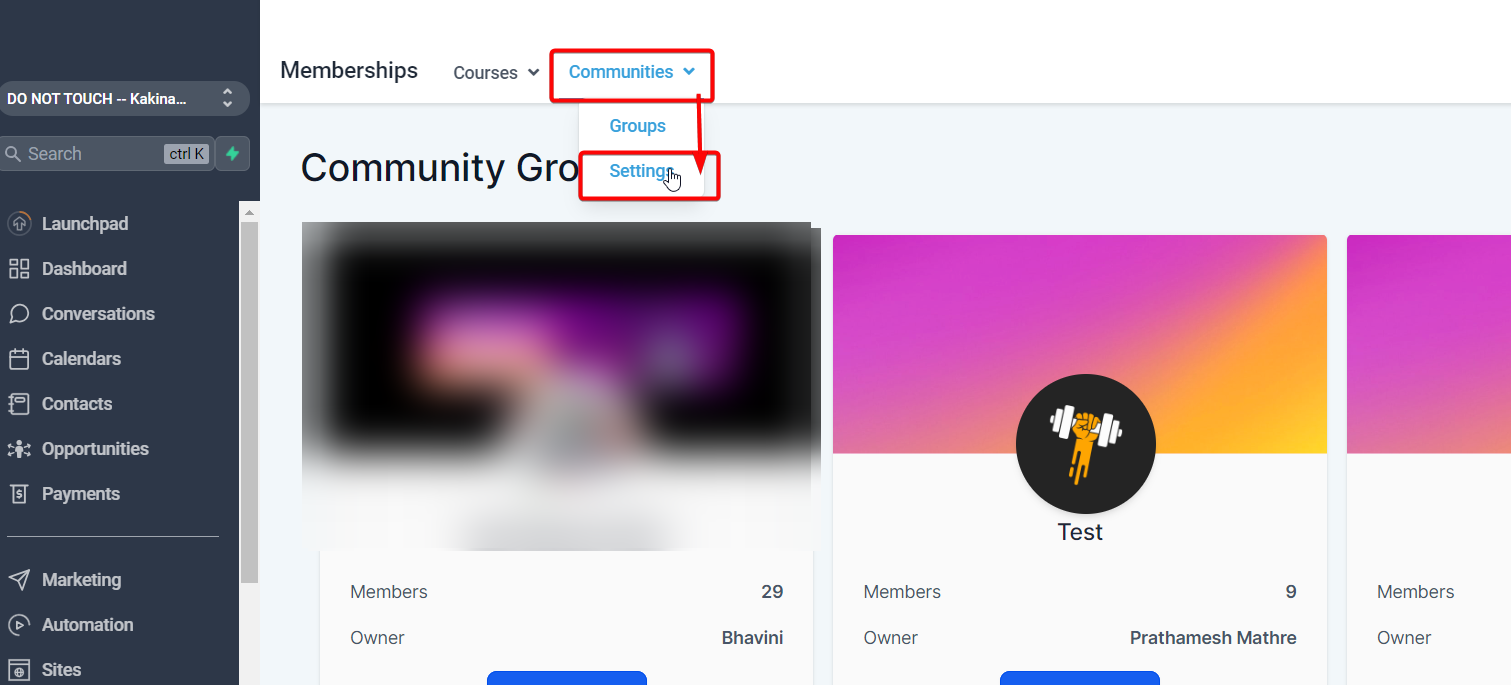
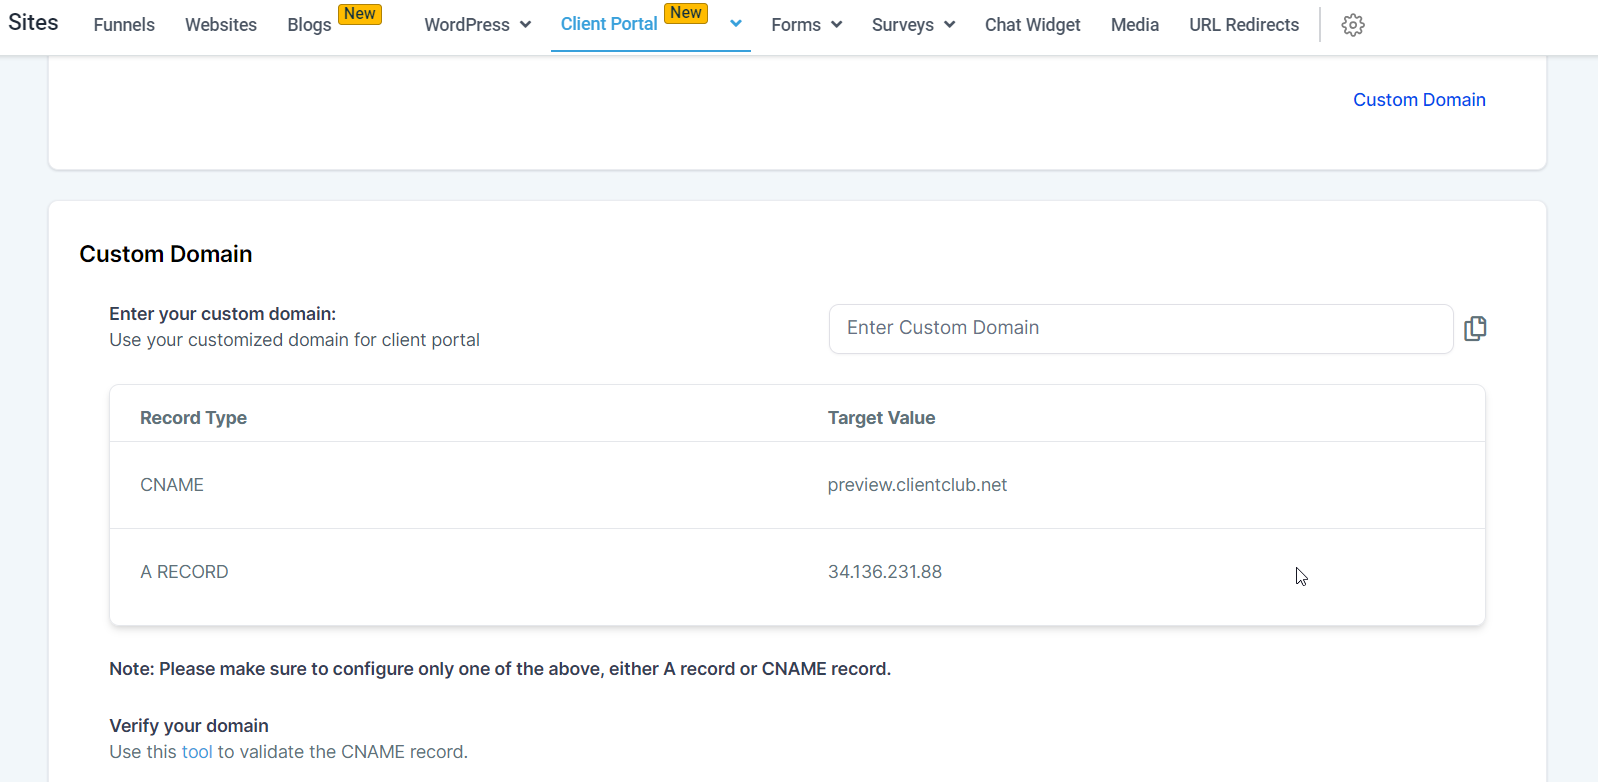
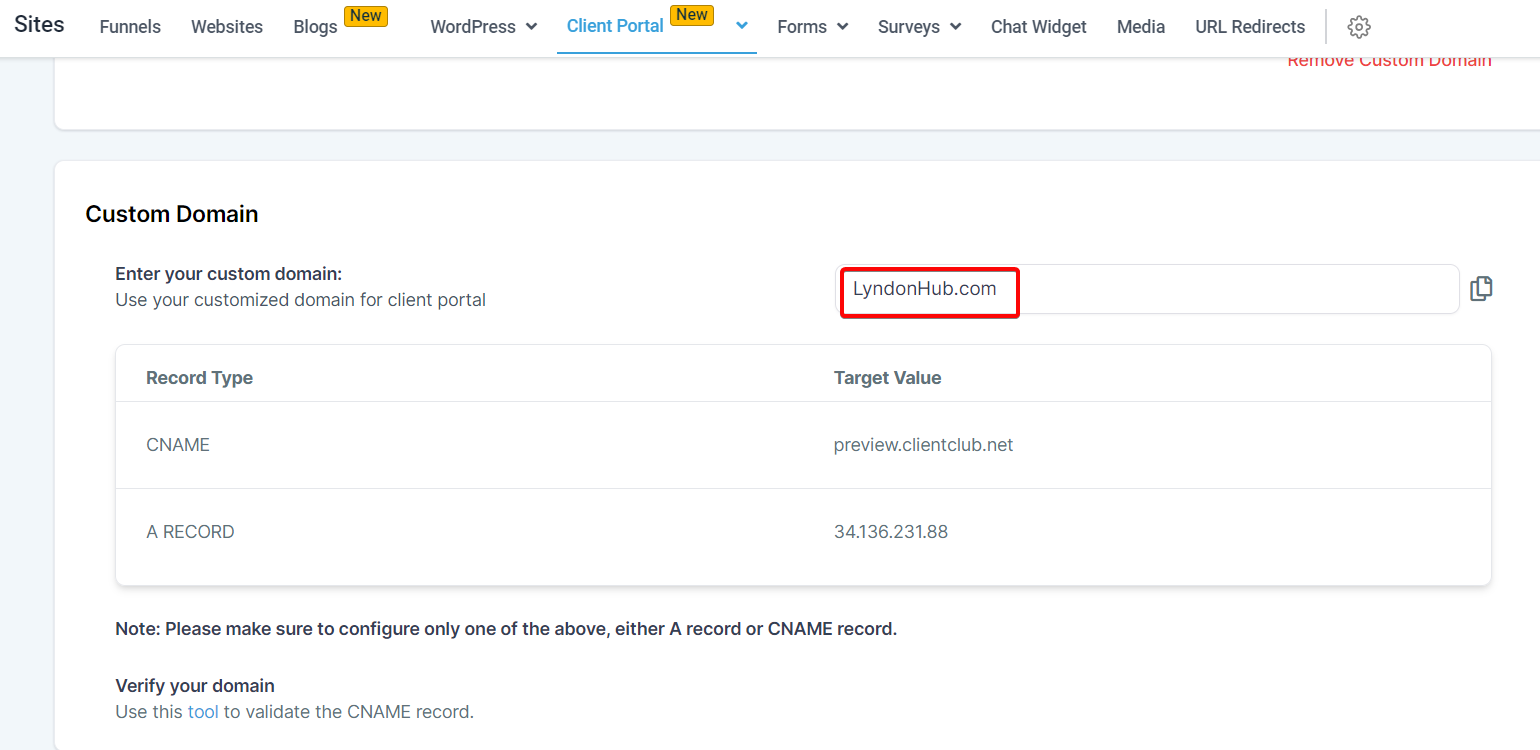
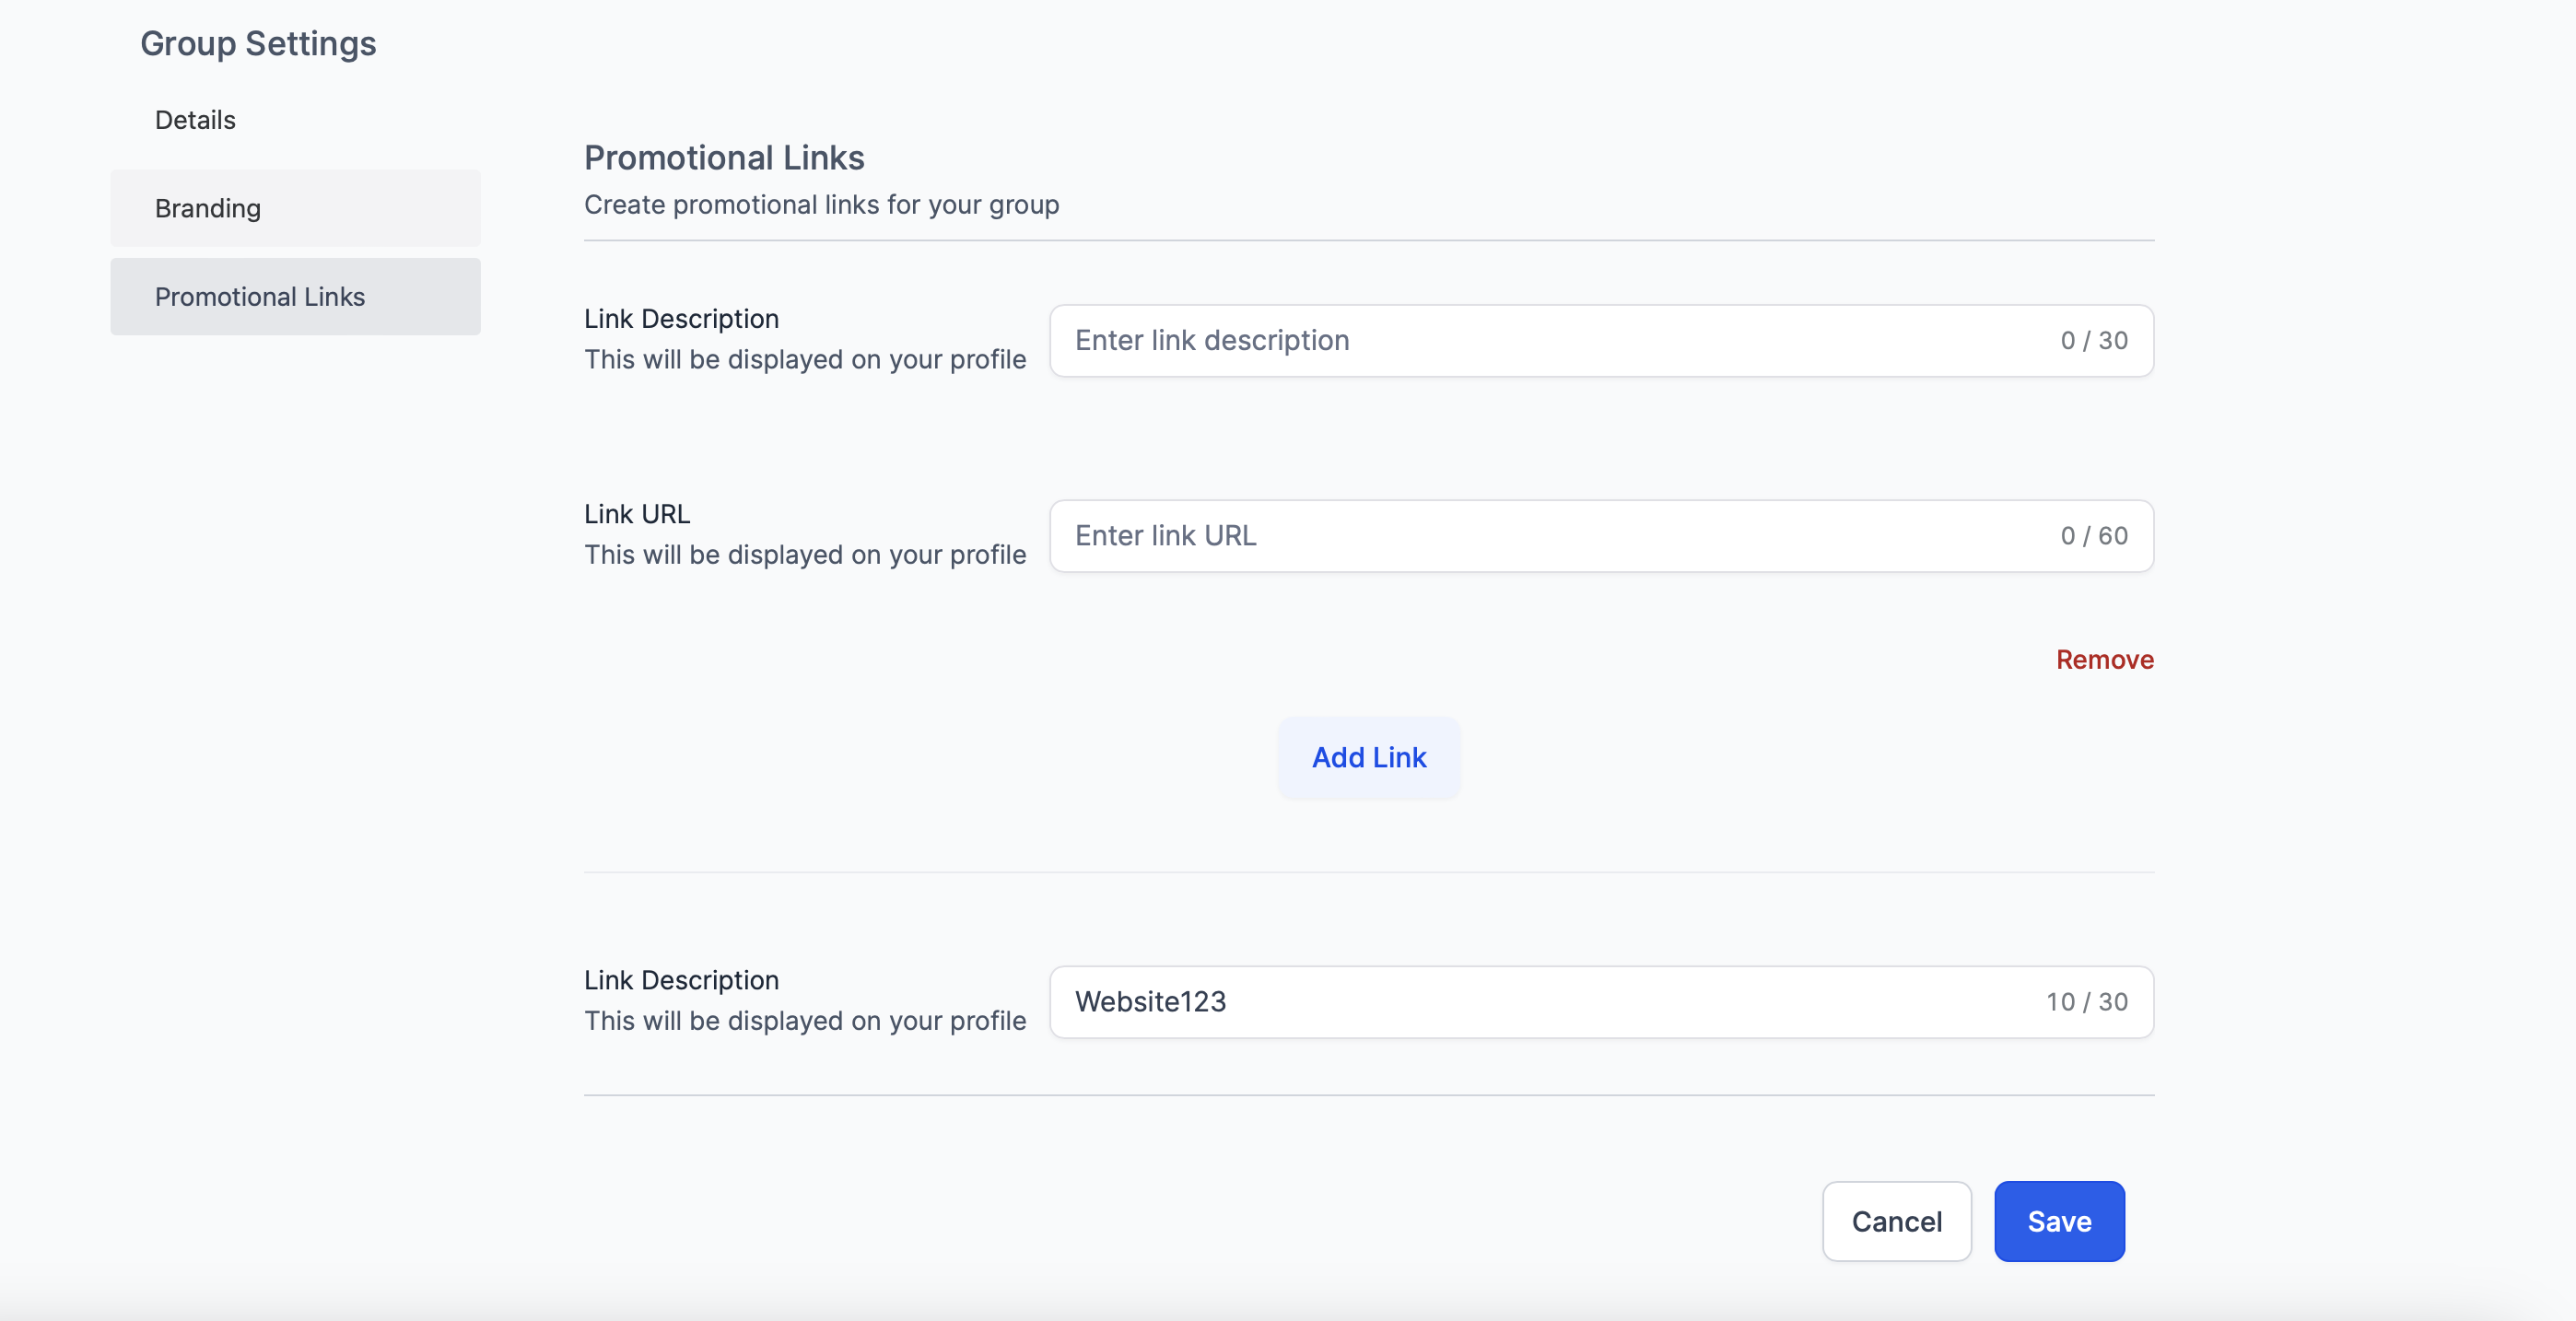
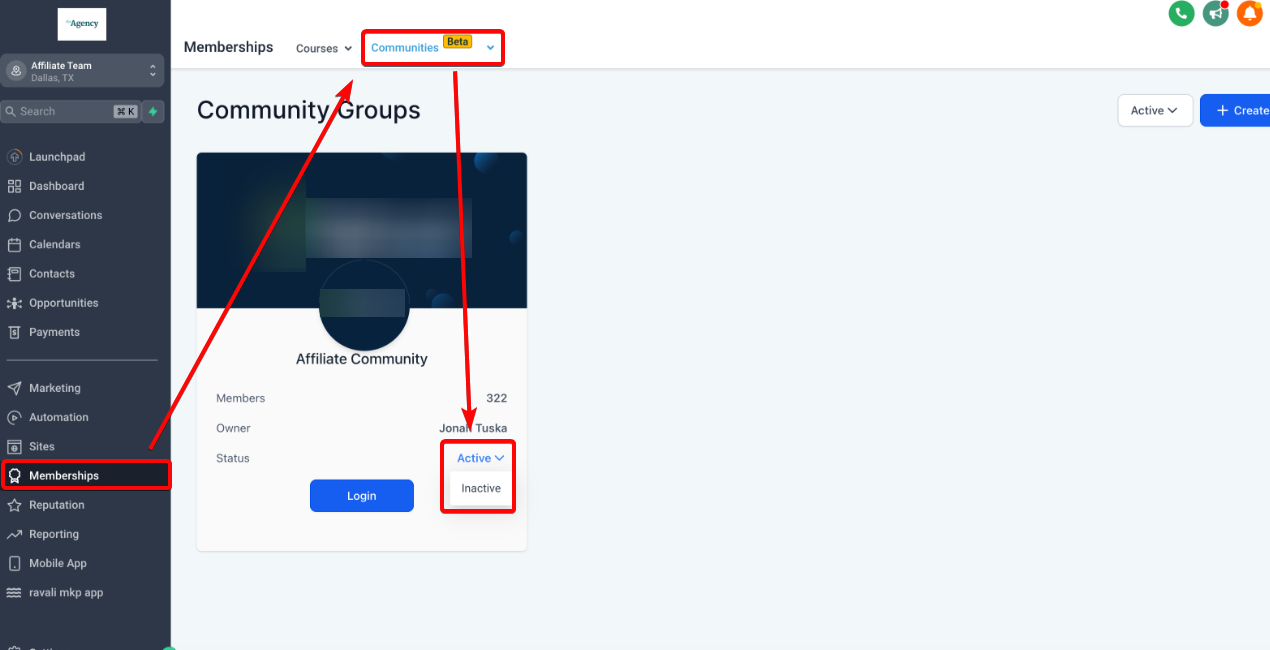
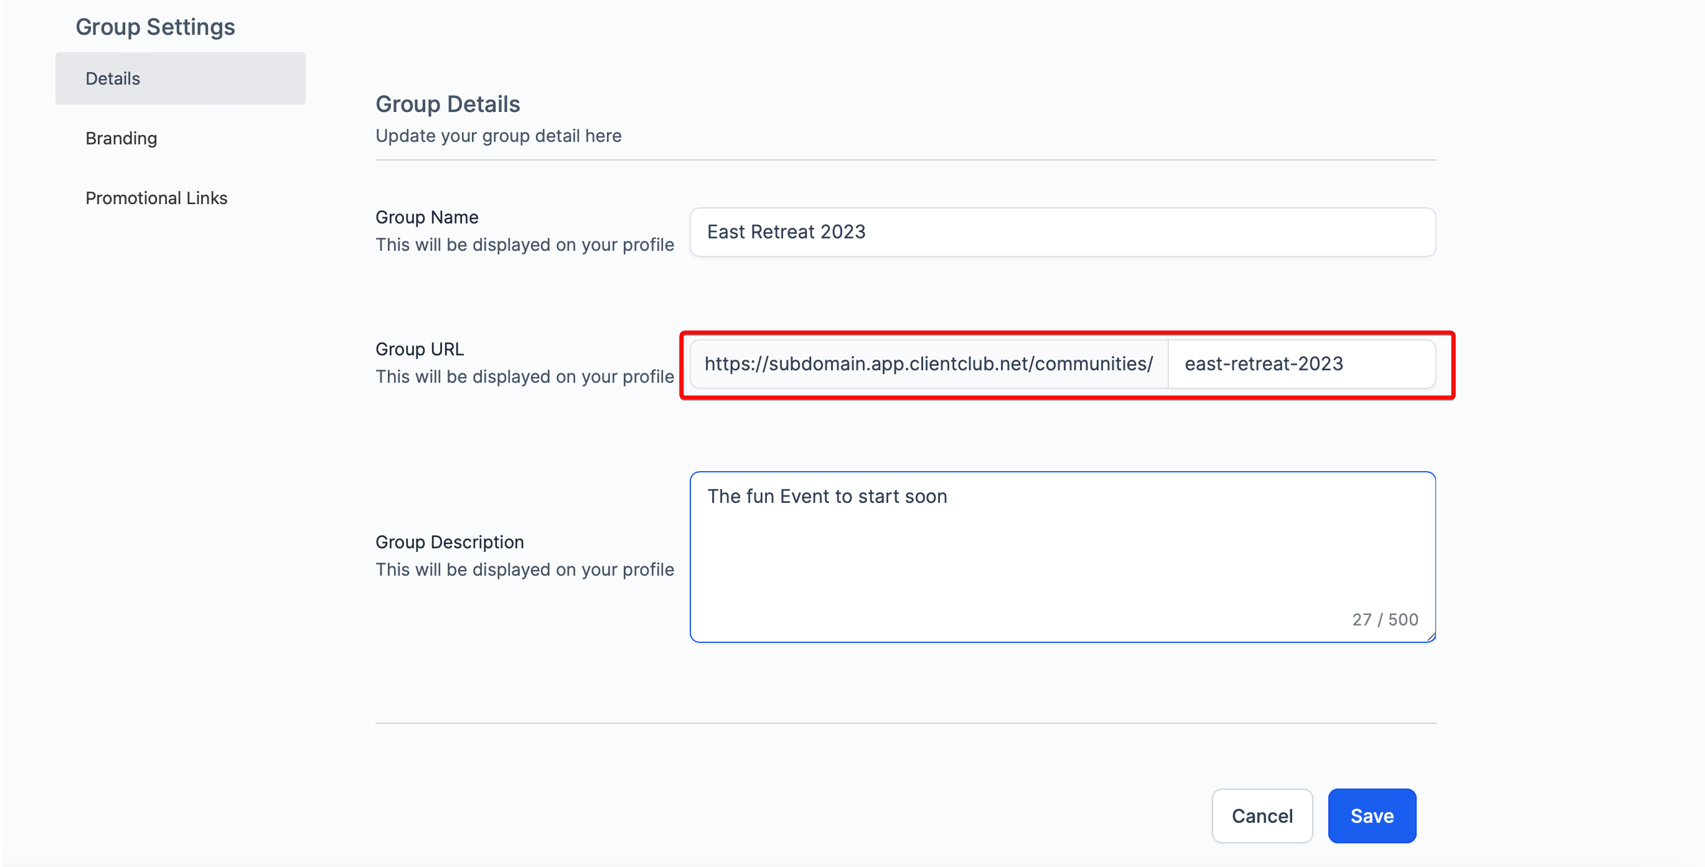
Client Portal Domain (Communities, Courses)


The client portal transforms client-business interactions by providing a secure, centralized platform in HighLevel for your Affiliates, Membership and Community management. The portal functions as a dynamic interface, centralizing affiliate manager commissions, community interactions, and membership course activity. It simplifies client engagement with custom domains and branding options, reinforcing brand-client relationships. Enhanced communication and client autonomy lead to greater satisfaction and loyalty.


This document guides you through setting up and customizing the portal to meet specific business needs, enabling clients to take autonomous actions.


Navigate to the Sub-Account > Sites > ClientPortal > API Domain


For more information on the Client Portal Setup please visit How to Set Up the Client Portal

WordPress
WordPress Hosting allows for the migration of an existing WordPress site, or for a new site to be created. After connecting the domain, users gain access to essential features like the WordPress Dashboard, User Management, Backup & Restore, and Advanced Settings.


Whether users are starting a new website or managing existing ones, this guide provides valuable instructions and insights to streamline the WordPress setup process effectively for your clients.


Navigate to Sub-Account > Sites > WordPress > Add Domain


For more information on WordPress Domain setup please visit Getting Started With WordPress Client Side Setup Guide

Domain Glossary - Key Words to Know


Example

Description

Domain

www.gohighlevel.com

The digital address for online services like websites, email hosting, and more

Root Domain

gohighlevel.com

The primary address of your website, appearing after "www." in a URL (e.g., in "www.gohighlevel.com," the root domain is "gohighlevel.com"). It serves as the main entry point to your website.

Subdomain

help.gohighlevel.com

Subdomains are extensions of your root domain, directing users to specific sections or areas within your online infrastructure (e.g., "help.domain.com" for support).

Hostname


The name/value utilized in the record, typically the subdomain utilized. This is what allows subdomains such as “help.gohighlevel.com” to act independently from “www.highlevel.com”

Data/Target/Value


The value which tells the URL to display intended website data.

Nameservers

GoDaddy, Cloudflare, Google, etc.

The directory which organizes and controls the DNS records. This is what tells the internet which Domain Provider, e.g. Godaddy, Cloudflare, etc, is controlling the Domain

DNS (Dedicated Name Servers)


The records that tell the internet when a certain URL is visited to populate a website, and allows email providers to send emails from the domain name.

TXT


TXT records are used for sending emails to prevent spam, and for protecting the domain by creating a domain verification.

MX


The Mail Exchange (MX) records tell emails where to be routed to. This is utilized to send and receive emails within HighLevel.

CNAME


A Cname record points to another domain. These records are commonly utilized when creating sub-domains

A Record


An A record points to an IP address that is hosting your website. These records are commonly utilized for your root domain to point to your primary website.

DMARC


A DMARC record is a TXT record that prevents email spoofing protecting your email sending from scammers and unauthorized use of the domain.

Troubleshooting
If you've added DNS records to your domain provider but are encountering issues like web pages returning 404 errors, there are a few key troubleshooting steps to consider.


1. Check for Duplicate A Records:

2. Confirm DNS Propagation

3. Review DNS Settings for Accuracy:

4. Verify Domain DNS Integration:

5. Consider Other Potential Causes:

6. Seek Additional Assistance:


1. Check for Duplicate A Records:
Ensure there are no duplicate A records pointing to the root domain in your domain provider's configuration.

Look for records with "@" as the hostname, indicating a root domain A record.

If duplicate A records are found, correct them to avoid conflicts that might cause 404 errors.

Ensure each A record points to the correct data specified by HighLevel. “162.159.140.166”


2. Confirm DNS Propagation
Verify whether the DNS changes have fully propagated across the internet.

DNS changes typically take between 24 to 48 hours to propagate, depending on factors like TTL, ISP, and domain provider systems.

Utilize a DNS checker tool (https://dnschecker.org/) to monitor propagation status and identify any incomplete updates.


3. Review DNS Settings for Accuracy:
Double-check all DNS settings to ensure accuracy.

Confirm that each DNS record points to the appropriate HighLevel value.


Domain Being Added

Type

Hostname

Value

Funnels/Website Root Domain

A

@

162.159.140.166

Funnels/Website Subdomain

Cname

Varies - “www.” & subdomain - “example”

sites.ludicrous.cloud

WordPress

A - Root Domain

Cname - Subdomain

Varies

Varies

Client Portal

Cname

Subdomain - “memberships”

clientportal.ludicrous.cloud

WhiteLabel

Cname

Subdomain - “App.”

whitelabel.ludicrous.cloud

API Domain/Branded Domain

Cname

Sub-domain - “link”

brand.ludicrous.cloud

Dedicated Email

1st TXT


2nd TXT


Cname


1st MX


2nd MX


TXT - DMARC

Varies


Subdomain used

“example”


Uses Subdomain - “email.example”


Subdomain used

“example”


Subdomain used

“example”


Varies

1st TXT - Varies


2nd TXT - v=spf1 include:mailgun.org ~all


Cname - mailgun.org


1st MX - mxa.mailgun.org


2nd MX - mxa.mailgun.org


Dmarc TXT - v=DMARC1;p=none;


4. Verify Domain DNS Integration:
Ensure that the domain DNS records were correctly added to the provider where the domain Nameservers are pointing.

If the Nameservers are managed by a different provider, integrate the HighLevel records into the DNS of that provider.

Utilize a MX checker (https://mxtoolbox.com/) to verify the Hosting provider and that the records are propagating the correct data.


5. Consider Other Potential Causes:
If the issue persists, explore other potential causes such as server downtime or incorrect domain configurations.

Investigate any recent changes or updates that might have impacted the DNS settings.


6. Seek Additional Assistance:
If troubleshooting steps do not resolve the issue, consider reaching out to your domain provider's support team for further assistance.

Alternatively, contact HighLevel support for specialized help in resolving DNS-related issues.

FAQ
What If I do not have a domain?
You can purchase a domain from a domain registrar such as Godaddy, Cloudflare, Namecheap, Google Domains if you do not currently own a domain. Once purchased this will allow you to proceed to set up the domain within HighLevel


Can I use an existing domain for my email?
You can set up a dedicated domain for an existing domain. It is advised to utilize a sub-domain when setting up your domain for email sending within HighLevel to prevent it from affecting your current email services.


Can I use WIX for my Dedicated Domain?
Wix does not allow for multiple MX records to be added of the same priority. In order to use a domain that is connected to Wix the nameservers will need to be changed to point to another domain host. For more information please see: LC Email / Mailgun replies not working when using WIX as the domain provider


My Cname record is not being recognized in Cloudflare.
Make sure the Cname record that is added into Cloudflare has the proxy toggled off in order to allow the record to propagate.


What if I have an existing domain?
If you have an existing domain, Great! If you currently have an existing website connected to that domain and are not wanting to replace it with a HighLevel website/funnel we can utilize a sub-domain to connect your domain to our funnels so that we could get this to act independently


What is an XML Sitemap?


A sitemap is a file where you provide information about the pages on your site and the relationships between them.


Search engines like Google read sitemaps to more intelligently crawl your site. A sitemap tells Google which pages you think are important in your site and also provides valuable information about these files: for example, when the page was last updated, how often the page is changed, and any alternate language versions of a page.


Do I Need an XML Sitemap?


According to Google:

"If your site's pages are properly linked, Google can usually discover most of your site. Even so, a sitemap can improve the crawling of larger or more complex sites, or more specialized files.
Using a sitemap doesn't guarantee that all the items in your sitemap will be crawled and indexed, as Google processes rely on complex algorithms to schedule crawling. However, in most cases, your site will benefit from having a sitemap, and you'll never be penalized for having one."
You might need a sitemap if:
Your site is really large. As a result, it's more likely Google web crawlers might overlook crawling some of your new or recently updated pages.
Your site has a large archive of content pages that are isolated or not well linked to each other. If your site pages do not naturally reference each other, you can list them in a sitemap to ensure that Google does not overlook some of your pages.
Your site is new and has few external links to it. Googlebot and other web crawlers crawl the web by following links from one page to another. As a result, Google might not discover your pages if no other sites link to them.
Your site has a lot of rich media content (video, images) or is shown in Google News. If provided, Google can take additional information from sitemaps into account for search, where appropriate.
You might not need a sitemap if:

Your site is "small". By small, we mean about 500 pages or less on your site. (Only pages that you think need to be in search results count toward this total.)
You're on a simple site hosting service like Blogger or Wix. If your site is on a service that helps you set up a site quickly with pre-formatted pages and navigation elements, your service might create a sitemap for your site automatically, and you don't need to do anything. Search your service's documentation for the word "sitemap" to see if a sitemap is generated automatically, or if they recommend creating your own (and if so, how to submit a sitemap on your hosting service).
Your site is comprehensively linked internally. This means that Google can find all the important pages on your site by following links starting from the homepage.
You don't have many media files (video, image) or news pages that you need to appear in the index. Sitemaps can help Google find and understand video and image files, or news articles, on your site, if you want them to appear in Google Search results. If you don't need these results to appear in Image, Video, or News results, you might not need a sitemap.
Where to Find XML Sitemap Settings in HighLevel
In order to find your XML sitemaps, you will need to navigate to the SITES section in your HighLevel sub-account and click the small gear icon in the secondary navigation menu in the top right corner of your screen.


You will be directed to the DOMAINS section in your sub-account settings. You can also get to this section by navigating to SETTINGS in the main navigation and scrolling down to DOMAINS on the left-hand side of your screen.


Once you're in the DOMAINS section, you will see an icon, with 3 dots aligned vertically, to the far right side of any domain that you have added to this sub-account. This 3 dot icon is the "actions" button for the domains you add here.


Important: If you have not added a domain to your sub-account, you will need to do so before you see the three-dot icon on your screen.


Once clicked, you will see the different actions you can perform to any domain that's added to your sub-account. One of these actions is labeled "XML Sitemap". This is the action you'll need to click in order to add, change, or delete XML sitemaps for your domains.


Once you click the XML sitemaps action button, you will see a list of all websites and funnels that are connected to that particular domain.


Because you can connect many different websites and funnels to the same domain in HighLevel, you will need to be careful when provisioning your XML sitemap. Only choose the website and funnel pages you want Google to crawl and associate with that domain.


When looking at websites and funnels in this view, you will see a few different elements on the screen that are important to understand:


Connected Websites and Funnels: Websites and Funnels connected to this domain are separated from each other inside a light blue rectangle accordion drop-down.

Website and Funnel Names: The name of the website or funnel will be visible in these rectangle accordion drop-downs.

Checkbox: The checkbox located on the left-hand side of the website or funnel name allows you to select the entire website or funnel and add all pages to the XML sitemap.

Carrot (arrow): Located on the right-hand side of the website or funnel, there is a carrot, or arrow, icon. When clicked, this icon allows you to see all pages associated with that website or funnel so you can select individual pages to be added to your XML sitemap. This allows you to keep certain pages from being crawled by the Google bot in relation to your XML sitemap.


Not adding a web page or funnel page to your XML sitemap DOES NOT mean it will never get crawled by a search engine. If there are any hyperlinks that link to a page you wish not to be crawled, you will need to restrict access to that page in other ways.

Click here if you want to learn how to block search engines from crawling your website or funnel pages.
How to Create/Change XML Sitemaps In HighLevel
In order to create your first sitemap or edit an existing sitemap, the first thing you need to do is click on the carrot (arrow) on the right-hand side of the website or funnel in the XML sitemap configuration wizard.


If you don't know where to find the XML sitemap settings, scroll up in this article or click here to read "How to Find XML Sitemap Settings in HighLevel".


Select the website or funnel pages that you would like to add to your XML sitemap. You are allowed to connect many different websites and/or funnels to the same domain, so make sure you select all the pages you'd like added to your XML sitemap before proceeding.


Once you're ready to move to the next step, click the "Proceed" button at the bottom of the list of websites and funnels.


If you have not created an XML sitemap in the past for this domain, you will see a message like this. Make sure to click the "Add New" button to create your first sitemap.


After choosing the pages you want to be included in your XML sitemap, you will see a popup like the one shown below. This popup will contain:


List of XML Sitemaps: This list will show all XML sitemaps created for this domain. If you have more than one XML sitemap, you will see more than one displayed in this list.

Custom Path: This is the custom URL path assigned to your XML sitemap when it's created. It is configurable and can be changed at any time. If you make changes to this URL path, remember to resubmit your sitemap to be crawled by Google.

Last Modified Date: This date indicates the last time the sitemap was modified. You can modify an XML sitemap by adding or removing pages or changing the custom URL path.

3-Dot Action Button: This action button gives you the option to either EDIT or DELETE an XML sitemap.


Once you are satisfied with your XML sitemap, click the "Generate & Save" button to complete creating or editing it. You will see a message like the one below, which will confirm that the sitemap was created and give you the URL of your new XML sitemap.


How To Submit a Sitemap to Google?
Google doesn't check a sitemap every time a site is crawled. A sitemap is checked only the first time that Google notices it and thereafter only when you ping Google to let them know that your sitemap has changed. You should alert Google about a sitemap only when it's new or updated; do not submit or ping unchanged sitemaps multiple times.


Submit it to Google using the Search Console Sitemaps report
Google recommends submitting your sitemap using the "Sitemaps Report" and Google Search Console. This method will also give you tons of data and insight into your sitemap, such as:

Active status
Total crawled pages
Crawl errors
and more!


Let's walk through the steps to submit your sitemap using Google's sitemaps report!


Step 1: Open Sitemaps Report
Click this link (https://support.google.com/webmasters/answer/7451001) to navigate to Google's "Search Console Help" center, specifically the page that contains the Sitemaps Report link. Once you're on this page, click the button that reads "Open Sitemaps Report".


Step 2: Add Property to Google Search Console
If you don't already have a property (website domain) associated with your Google Search Console account, you will need to add one.


Click here if you already have a Google Search Console property configured to jump a few steps ahead in this process!


Step 3: Verify Your New Property (Domain)
Once you add your property, you will need to verify it so that Google can collect and showcase all of the search console data associated with that domain.


Step 4: Navigate to Sitemaps Tab
In order to submit your sitemap, make sure you navigate to the "Sitemaps" section in your Google Search Console.


Step 5: Submit Your XML Sitemap
To submit your XML sitemap to Google you will need the URL of the sitemap. HighLevel provides this to you after you create or edit a sitemap in your sub-account. Grab the URL path for your sitemap and add it here.


Normally, the URL path for your XML sitemap created in HighLevel will just be "sitemap.xml"

This may change so make sure you take note of the URL path so you can successfully submit it to Google.


After you successfully submitted your XML sitemap to Google, you will need to wait until the Google bot crawls your site to see any data associated with the sitemap. Once your site is crawled you'll see a ton of useful data that will help you better understand how Google and other search engines are interacting and crawling your site.


This information will be found in the "Pages" section of your Google Search Console, and can be accessed from the "Sitemaps" section by clicking the 3-dot action button to the right side of any XML sitemap in your list.


If you're having trouble submitting your sitemap to Google using the recommended method, you can use the following alternative methods!


Alternative Methods for Submitting Your XML Sitemap to Google
If you're having trouble submitting your sitemap to Google using the recommended method, you can use these alternative methods:


1. Insert your sitemap's URL path anywhere in your robots.txt file.


Example: https://www.yourdomain.com/sitemap.xml


2. Use the "ping" service to request Google to crawl the sitemap.


Send an HTTP GET request like this: https://www.google.com/ping?sitemap=<complete_url_of_sitemap>


Example: https://www.google.com/ping?sitemap=https://www.example.com.sitemap.xml


Troubleshooting Surveys & Forms

If the form you are trying to embed is getting cropped or it is has unusual display behavior, you can add a "height" parameter in the embed code while also removing the script at the end of the embed code which handles responsiveness but can interfere with other platforms like WordPress or Squarespace.

Surveys

Takeaways:

  • Options > Make sure 'One field at a time' under 'Survey fields settings' is turned Off
  • Use Custom Fields for conditional logic questions
  • These are the Custom Field Types that use conditional logic:
    • Checkbox
    • Single Option
    • Radio
  • Do not use the 'Allow Add Custom Options' feature with the Radio custom field type. You cannot redirect if the lead chooses to add a custom option
  • Custom fields with conditional logic must be the only field on a slide for the redirect to work. Do not combine conditional logic custom fields with ANY other fields (including basic Text field)
  • Use 'Disqualify immediately' if you are planning to disqualify a lead based on an answer. Disqualify after submit will still force the lead to go through the entire survey which you do not want in conditional logic surveys

Getting Started

To access these new features, you'll need to navigate to the Sites Tab > Surveys > Builder within your sub-account. Here's a step-by-step guide:

  1. Log in to your GoHighLevel account and select the relevant sub-account where you want to create the survey.

  2. Once in the sub-account, go to the Sites Tab and click on Surveys and choose "Builder."

  3. In the top right corner, click on "Add Survey." You'll have the option to start from scratch or choose from a variety of templates.

Customization Options

One of the standout features of our new survey capabilities is the extensive customization options. Here's what you can do:

  • Footer Customization - In the right-side menu, navigate to the footer section of the survey. You can enable a new footer, which offers various customization options.

  • Progress Tracking - The new footer allows you to display progress tracking, which can be immensely helpful for respondents. You can choose to show one of four progress indicators. Additionally, you can decide whether the footer sticks to the survey or not, and adjust its position (left, right, or both).

  • Color Customization - Customize the text color, button color, and more. You can match these colors to your survey's theme, ensuring a cohesive look.

  • Detachable Footer - You also have the option to detach the footer from the survey, placing it at the bottom. This provides flexibility in survey design.

  • Page Count or Progress Percentage - Choose to display either the page count or progress percentage. Adjust the colors to align with your brand.

  • Background Images - For added visual appeal, include background images in your survey. For example, you can use images that promote a specific theme or message.

  • Button Customization - Customize the appearance of the previous and next buttons. Adjust button height, font size, weight, and type. You can even choose between text, arrows, or both for button types.

Once you've made these customizations, take a moment to preview your survey. You'll notice significant changes in just a few seconds. As respondents input data and navigate through the survey, they'll see the progress percentage, indicating how much of the survey they've completed.

Creating aesthetically pleasing surveys is not only easy but also crucial for user engagement. Contrary to what some may believe, users won't find it tedious to fill out well-designed surveys. In fact, they'll appreciate the user-friendly design, making it worth the effort.

With these tools at your disposal, you can create surveys that not only capture valuable data but also leave a lasting impression on your respondents.

FAQS:

How do I create custom questions for the survey?

You can do this by adding Custom Fields in the (+) menu. This will allow you to create your own custom fields which will be shown in the contact details page along with the answers they provided to each questions. 

Quick Overview

  • Access the Survey Builder: Log in to your survey creation platform or tool.
  • Open or Create a Survey: You can either open an existing survey or create a new one.
  • Navigate to Footer Customization: Look for "Style" tab within the Survey Builder interface.
  • Enable the new footer.

Please note that if you're creating a new survey, the new footer customization options may be enabled by default. For existing surveys, the default old footer will be retained, but you may have the option to toggle on the new footer customization options for an upgraded look and feel, depending on the survey builder's settings.

Following are the customization option:

  • Themes: You can choose from different themes to change the overall look and feel of the footer. Themes may include various color schemes, fonts, and styles.
  • Background: Customize the background of the footer, which may include selecting a background color, image, or pattern.
  • Font: Adjust the font style and size used for the text in the footer.
  • Height: Modify the height of the footer to make it taller or shorter based on your preferences.
  • Progress Bar: Customize the appearance of the progress bar, including its color, style, and positioning.
  • Button Color: Choose the color for buttons within the footer, such as "Next" or "Submit."
  • Position: Define the placement of the footer within the survey, which could be at the bottom, top, or other designated positions.
  • Stick to Survey: Enable the footer to stick to the slide as respondents progress through the survey, ensuring a seamless and consistent experience.

Troubleshooting Funnels

Adding a domain to your account enables website and funnel functionalities to be created and utilized. A domain refers to the web address, for example, a root domain like mydomain.com or a subdomain like www.mydomain.com. To begin, establish a domain with a registrar like Cloudflare, GoDaddy, or others. Afterward, you can integrate the Domain into the system for use.


Please Note:


This article covers how to manually configure a domain. To learn how to use the automated Domain Connect feature, click here.


Covered in this Article:
How to configure Domains for Funnels and Websites?
Step 1: (DNS Setup) Add an A record OR a CNAME record:
Step 2: Add the domain/Subdomain in your sub-account:
Step 3: Associate the Domain to a Funnel/Website:

How to check your DNS records (DNS Lookup Tool)
Removing a Domain from the account

Troubleshooting
What causes an SSL Error?
What causes the error "CNAME / A record not found."
404 Error
Why do my Cloudflare domains not work with a Proxy?

FAQs
Can I use the same Domain with more than one platform?
Can I add the same Domain to more than one account?
How many domains can I add to one account?
Do I have to purchase SSL for the Domain separately?
Can I buy a domain from you directly?
How many funnels/websites can I connect with one Domain?


How to configure Domains for Funnels and Websites?


To set up your new Domain, adhere to the following instructions:


Step 1: (DNS Setup) Add an A record OR a CNAME record:


You must complete this step within your domain registrar, such as Cloudflare or GoDaddy. Based on your domain host, you can choose one of the following two methods:


CNAME:

You can add a CNAME record for your subdomains using the value sites.ludicrous.cloud


Instructions on Adding a CNAME record to various Domain Registrars:

Namecheap instructions
Godaddy instructions
Cloudflare instrucions
Wix instructions
Hostinger instructions
BlueHost instructions


Please Note:


If you are using Cloudflare, please make sure that the Proxy status is set to DNS only as we do not support Cloudflare Proxy.


A Record


Alternatively, you can add an A record for your root domain or subdomain, directing it to 162.159.140.166


Namecheap instructions
Godaddy instructions
Cloudflare instructions
Wix instructions
Hostinger instructions
Bluehost instructions


Please Note:


If you are using Cloudflare, please make sure that the Proxy status is set to DNS only as we do not support Cloudflare Proxy.


After adding your Domain to the Domain Registrar, it might take some time for the DNS settings to propagate, so if it doesn't work immediately, give it some time (up to 24 hours) and try again.


Step 2: Add a Domain/Subdomain to your sub-account:


Go to Settings in the left navigation menu


Next, go to Domains > click the + Add button (or the + Add Domain)


For Root Domains (e.g mydomain.com):
Enter your domain in the Domain URL field (use the root domain, not the subdomain) then click the Add record manually link.

By default, the system will enable adding the www subdomain in addition to the root domain.
This option will also enable a 301 redirect so that all traffic to the www subdomain will be sent to the root domain.


Note: Clicking the Continue button will initiate the "Domain Connect" feature which will lookup where the domain is registered and attempt to authorize a connection to automatically add the necessary DNS records. If your registrar is not supported yet, you will be prompted to manually add the DNS records with your domain registrar. click here for more information about that process.


For Subdomains (e.g offer.mydomain.com)
Enter your subdomain in the Domain URL field then click the Add record manually link.


Note: If you want a funnel step / website page to open without a path (domain.com instead of domain.com/home), you can select that page as the default page for that domain. A default page can be selected from Settings > Domains > Edit Domain.


Step 3: Associate the Domain to a Funnel/Website:


Once the DNS records have been verified, you will be presented with a screen where you can choose which funnel or website you'd like to link.

First, choose the funnel or website.
Then, you'll be presented with an choice of which funnel step or page of a website you'd like to be the default landing page.
Finally, click the Link Domain button. This will complete the process and add an SSL certificate automatically. Please note that it will take a few minutes to complete on the backend.


How to check your DNS records (DNS Lookup Tool)


MXtoolbox is a popular online tool that can help you check your Domain's DNS records. Follow these steps to use MXtoolbox for checking DNS records:


Go to the MXtoolbox website at https://mxtoolbox.com.


On the homepage, you will see a dropdown menu with options like MX Lookup, DNS Lookup, Blacklists, etc. Click on the dropdown menu and select the type of DNS record you want to check. Some common options include: standard.


MX Lookup: Check your Domain's mail exchange (MX) records.

DNS Lookup: Check various DNS records like A, AAAA, CNAME, NS, etc.

TXT Lookup: Check the text (TXT) records for your Domain, which often contain information like SPF, DKIM, and DMARC records.

CNAME Lookup: Check your Domain's canonical name (CNAME) records.


After selecting the appropriate option from the dropdown menu, enter your domain name (e.g., example.com) in the input field next to the dropdown menu.


Click the "DNS Lookup" button to initiate the search.


The tool will then display the DNS records for the Domain you entered. You may need to scroll down to see all the results.


Remember that the DNS records might not be updated instantly if you've recently changed your Domain's configuration. The changes can take some time to propagate across the internet, typically up to 24-48 hours.


Removing a Domain from the account
To remove a domain from your account, go to Settings > Domains > on the line of the domain you want to delete, click on the three dots > Delete > confirm your choice on the confirmation dialog box.


Troubleshooting
What causes an SSL Error?
An SSL (Secure Sockets Layer) error occurs when there is a problem with the SSL certificate or the SSL/TLS (Transport Layer Security) configuration on a website. SSL/TLS is a security protocol that provides encryption and secure communication between a user's browser and the web server. SSL errors can result from various issues, often indicating that the connection between the user's browser and the web server is insecure.


If your Domain is showing a privacy/SSL error, it can be due to one of the following reasons:

Multiple DNS (A or CNAME) records exist for the same domain/subdomain. One Domain or subdomain can only work with one platform/server at a time, and that's why you need to have only one DNS record set up for that domain/subdomain.so
There is no DNS record added for the Domain
The Domain has an AAAA added, other than the A/CNAME record


What causes the error "CNAME / A record not found."


This error occurs if your DNS record is not set up properly or they are added to the incorrect domain host. Use the DNS lookup tool to discover where your Domain is hosted (GoDaddy, CloudFlare, Namecheap, etc.). Make sure to add the DNS record properly and add it to the correct domain host.


404 Error
A 404 error, also known as "404 Not Found," is a standard HTTP status code that indicates the requested web page or resource could not be found on the server. This error typically occurs when a user tries to access a non-existent URL or when the requested page has been deleted or moved to a different location without proper redirection.


If your Domain without any path shows a 404 error, e.g., mydomain.com, you need to go to Settings > Domains > Edit Domain> Select a default page. In case it is already selected, try saving it again.


If your Domain shows a 404 error despite having a default path, e.g., mydomain.com/home, then you need to make sure that one of the funnels/websites that are connected has the same path added in page settings. If the path is already added and it still does not work, then go to the funnel/website settings > remove the Domain> Save> add the Domain again and save.


If your Domain shows a 404 error intermittently, then you might be using the www/root domain with your funnel/website. In that case, ensure you have added a redirect from www to the non-www (root) domain or from the non-www Domain to www.


Why do my Cloudflare domains not work with a Proxy?
Suppose your DNS setup is accurate, but you're still getting a privacy error, your funnel/website is not showing images, or you cannot add the Domain. In that case, you need to make sure you've set the proxy status inside CloudFlare to "DNS Only."


When the CNAME/A record has proxy status set to "proxied," it shows an error.

CloudFlare proxy status is only to be set to "proxied" when setting up a redirect (only use this by following the exact instruction mentioned in the steps to set up a redirect)


FAQs
Can I use the same Domain with more than one platform?
No, one domain/subdomain can only be used with one platform/server at a time (WordPress, Wix, etc.)

If you already use mydomain.com with WordPress, use site.mydomain.com with our system or a different domain.

Also, if you're using a domain/subdomain with funnels/websites, it can't be used with memberships or some other feature hosted on a different server.


Can I add the same Domain to more than one account?
Yes, you can add the same Domain to multiple sub-accounts within the same agency.


How many domains can I add to one account?
You can add as many as needed. There is no limit.


Do I have to purchase SSL for the Domain separately?
No, our system generates SSL automatically once you've added the Domain successfully. You don't need to purchase it separately.


Can I buy a domain from you directly?
No, we only allow you to connect a domain to our system. You cannot purchase a domain directly from our system yet. You can buy it from other domain hosts like GoDaddy, Google Domains, Namecheap, etc.


How many funnels/websites can I connect with one Domain?
You can connect as many as needed within the same agency. There is no limit.


Parallax images or also known as Fixed background images do not properly work on iPhones and iPad. This is a limitation by iOS which blocks the Javascript for this animation. This works perfectly on Android phones or tablet, chrome book and Windows tablets.

iOs mobile Safari has a problem rendering fixed background images, unfortunately. This is an iOS browser limitation.

This issue is faced by many other platforms and every platform has its own workaround for this issue.

Workaround in GoHighLevel

You can have a different section for mobile phone which contains your Parallex Background image and for the mobile phones, you can select any other option than Parallax.

Here is an article on making separate sections for mobile phones:

https://help.gohighlevel.com/support/solutions/articles/48001161151

There are many threads on different forums that address this issue and might be able to help you.
https://www.google.com/search?source=hp&ei=n6eWX_GlOMjMaIu9nagH&q=parallax+image+not+showing+on+iphone&oq=parallax+image+iphon&gs_lcp=CgZwc3ktYWIQAxgAMgYIABAWEB4yBggAEBYQHjoICAAQsQMQgwE6AggAOgUILhCxAzoFCAAQsQM6DgguELEDEIMBEMcBEK8BOggILhCxAxCDAToCCC46CAguELEDEJMCOgoILhCxAxAKEJMCOgQIABAKOgQILhAKOgcIABCxAxAKOgoIABCxAxCDARAKOgcILhCxAxAKUKMNWPF0YJ2BAWgAcAB4AIABgQWIAeo4kgEKMi0xOC43LjAuMZgBAKABAaoBB2d3cy13aXo&sclient=psy-ab

Forms

Forms will help you capture information about contacts that fill out and submit the form. In order to view this information, start by navigating to "Sites" > "Forms" (at the top of the screen) > "Submissions"  where, you will be able to filter or search through form submissions and view the information that was provided on a particular form submission. 

If you are using custom fields on your forms, those will also be shown in the Contact Details page which you can access by navigating to "Contacts" > (then search or click on any Contact).

How do Sticky Contacts work?


Sticky Contacts remembers the contact's submission in the browser cookies so it can be transferred to another form, survey, order form or calendar widget. Use this if your customer is filling out the form , not if you or someone on your team is internally filling it out. If someone internal or yourself are filling out the same form and sticky contacts is on, it will overwrite the contact record with the latest submission.


Technical Details:

  1. When someone submits a form / survey / calendar / order form on a page, a cookie is created on the browser with their information against that domain.
  2. Whenever a page which lives on that same domain is opened, the cookie has the information so it gets pre-populated.
  3. If you clear the cookies, then that information will be gone. Same for if you try to use the incognito mode of your browser for the second submission, as cookies do not cross over to the Incognito mode.
  4. If you use a different domain, then the cookie won't work, and a new submission will need to be made so that a cookie for that specific domain is saved.

Please Note:

1. If two or more people submit their information using the same browser on the same form / calendar / survey / order form, and sticky contacts is enabled, their information will be overwritten to the same contact in the system.
2. If a person is submitting their information on a different browser, sticky contact will not work for the first time because the cookie won't be created on that browser.
3. Sticky contacts don't work on Hidden fields or Custom fields

Where to find Sticky Contacts in forms?


Navigate to sites> Forms> Builder> Options> Scroll Down to find the Sticky Contacts toggle.